by cfh@provide.net, 01/08/08.
Copyright 1999-2008 all rights reserved.
For hardcore pinball restorers only. This document is part of the Pinball Restoration document. Update of this document are available free of charge at http://www.pinrepair.com/fix.htm.
-
Scope.
- Dry time of 1 to 5 hours. Fully cured in 48 to 72 hours, after which the game can be immediately reassembled and played.
- Incredible hardness and durability. After fully curing, can not be removed with any thinner.
- High solids (fewer coats needed).
- Low solvents. The two-part urethane system dries because of the chemical reaction of the two parts, and does not depend on the evaporation of solvents.
- Extremely volatile when being applied. Can not be applied in-doors!!! Safety precautions MUST be taken!
- Expensive. Really expensive compared to Varathane.
- A two or three part system (a required activator/hardener is added to the clear, and sometimes a reducer too).
- Can not be removed once applied (there's no going back).
- Not available in spray cans. Must be brushed on, or applied with expensive spray and ventilation equipment.
I will discuss the advantages and disadvantages of using automotive clear coats as a playfield protection system. Will also test six different automotive clear coat systems to determine the best product for clear coating a pinball playfield. Test was originally done in 1999, so prices are 1999 prices.
Evolution.
After doing several pinball restoration projects, the first
game "restored" is probably not as well accomplished as the last game.
This is a simple learning process, a learning curve. The more games
done, the more learned and understood about the restoration
process.
Clear coating playfields, for me, has been an evolution too. I originally started clear coating in 1998. It was a great way to touch up a playfield, and lock-in the touch-ups. It also kept the playfield looking great, made it play much better, and essentially added an infinite life to the playfield. There seemed to be no down side to the process at the time (other than the effort involved).
For the first year I used a product by Flecto called "Varathane Diamond Finish, transparent IPN coating". (Note: "Varathane Elite Diamond Finish IPN coating" does not exist anymore. Flecto was bought by Rustoleum, who renamed the product to "Varathane Interior Diamond Wood Finish (Water-Based)." It is still available in a black and blue spray can, but is fairly hard to find. It can be special ordered at Home Depot's Contractors Desk by the case, UPC number 0-26748-20008-3.) Available at any good hardware store in spray cans for about $5, it worked great. The Varathane product was water based, which meant it would not yellow like many of the other solvent based (linseed oil) urethanes. It gave a very nice, tough finish that was easy to apply and use (see my other restoration document at http://www.pinrepair.com/restore for more info on using Varathane).
But Varathane had some bad points. First was time. It took five to seven spray coats to do a playfield, with a dry time of one day between coats. And after the final coat, it need two to three weeks more of final curing time before the playfield could be reassembled. That added a month to a game's restoration time!
Another problem with Varathane was its final hardness. Although very good, it just wasn't as hard as solvent based urethanes. But all the solvent based urethanes available at the hardware store had linseed oil. This made their clear yellow slightly, which was completely unacceptable. Varathane could also be easily (or accidentally) removed with "Goof Off", even after it was fully cured (which could be a good or a bad thing I guess).
First, Should You Clearcoat?
The reason for clearcoating a pinball playfield is as the
last step in fixing a damaged playfield. If the playfield had
excessive wear, was touched up, or was otherwise repaired, these
things need to be "locked in" so they don't wear again easily.
Clearcoating also gives the playfield a uniform surface "look", so
repairs are not as easily noticed.
But if you have a NOS (New Old Stock) playfield, or an lightly worn or undamaged installed playfield, I would highly recommend you think twice before proceeding with a clearcoat. Home use games won't get the wear that games-on-location get, and just don't warrant a clearcoat to protect them. Frankly it's just not needed, especially if you keep your games cleaned and waxed with a good hard Carnuba paste wax. Also the "collectibility" of the game will be *reduced* with an added clearcoat (compared to an original game in nice condition). So unless there was some repaired damage/touchup to the playfield, clearcoating is really not the correct thing to do in most cases.
Automotive Clear Coats.
The more I thought about clear coats, the more it seemed logical to
try the automotive clear coats. These are far more complex clears than
bought at any hardware store. They are also a lot more expensive,
and were more complicated to apply. But the automotive clears were the
same type of products today's pinball manufacturers were using on their
new playfields. These products are far more durable than any other
type of clear coating.
Automotive Clear Advantages and Disadvantages.
The advantages to automotive clear coats includes:
The disadvantages to automotive clear coats includes:
|
The test Jubilee playfield, partitioned into six areas. |
|
|
-
Testing.
- Compatible with substrates: the clear must be compatible with the lacquer used on most pinball playfields (it must not lift the playfield paint and artwork).
- Compatible with touch-ups: the clear must be compatible with the type of paint I used to do playfield touch ups (it must not lift the playfield touch-up work).
- Viscosity: the product must be the proper thickness (viscosity) so it can be applied with a brush. Or, if sprayed, must be applied without using a reducer (thinner). This constraint is to save money, as the reducers required are designed specifically for each clear coat product (brand).
- Hardness: the product must dry hard, without chipping.
- Dry Time: the product must have a decently short final curing time.
Here's the criteria I used for testing clear coat products:
I used a 1972 Williams "Jubilee" for my test playfield. This playfield was originally coated from Williams with acrylic Lacquer (as are most playfields from the 1960s to about 1991). I removed all playfield parts, and removed any wax and dirt with Naptha. I then gently sanded the playfield with 600 grit sandpaper, dry. Then I wiped down the playfield again with Naptha to remove sanding dust.
Next I touched up the playfield using water-based acrylic paints. I also did some touch up using a Testors Paint pen, and a Sharpie ink pen. I figured these were the three most commonly used touch up tools. This would test each clear's compatibility with these touch up products.
Finally, I divided the playfield into six equal parts. Then I could apply each of my six test clears, and do a side-by-side comparison.
-
Whether spraying or brushing these products, ALL
of them require very strong safety precautions.
When the activator is mixed with the clear,
a chemical gas call "isocyanate" is produced as the urethane dries. This gas will be
immediately attracted to anything that is moist, especially the linings of your lungs.
This also means your (moist) eyes too will
attract the isocyantes out of the air, and be absorbed by the body! Isocyanates are really
bad stuff, and can cause central nervous system problems, and blindness! Remember the body does not
have replacable parts. Wear protection!
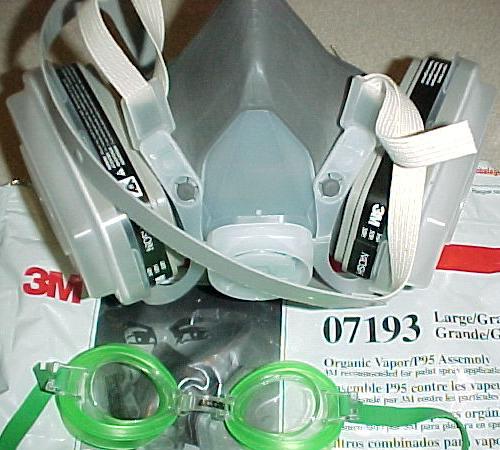
At minimum buy a new 3M organic vapor/P95 mask assembly, part number 07193. This disposable mask system is about $15, and comes in a resealable ziplock bag. It uses a carbon filter system. When not in use, keep it in the ziplock bag! (otherwise the carbon in the mask will "wear out" because of exposure to the air). The mask is good for about 20 hours of use (exposure to the air). After that, just throw it out and buy a new mask.
Also needed is some sort of eye protection that completely seals the eyes from paint fumes. A low cost solution is a set of swimming goggles! These work good because they completely seal your eyes from the outside air (and paint fumes!).
Additionally, disposable gloves are a very good idea, to keep the isocyanates off the hands. If spraying auto clears, think about getting a disposable body suit, which cost about $8. This will protect the neck, arms and other exposed body areas (and save your clothing).
|
A disposible 3M mask #07193 and "safety glasses" (swimming goggles). At minimum these will be needed. |
|
-
The Products.
- Dupont's ChromaClear 7600s* (and 7675s activator).
- PPG's Omni AU MC161 (and MH167 activator). Also available as ShopLine JC661. (Exact same product, different marketing name).
- Dupont's Imron 500s (and 192s activator).
- PPG's Concept DCU 2021 (and DCX61 activator).
- PPG's DelClear DAU75 (and DXR80 activator).
- Sherwin Williams' Ultra 7000 CC-639 (and UH-80 activator).
There are so many automotive clear coats currently available. It's almost staggering. Which one do you use? After considerable research, I decided to test six different products:
* Notes on Dupont's Auto Clear Products HC-7600s versus G2-4500s.
Dupont HC-7600s is their newest "hyper-cure" clear which cures from the top down.
This means as it dries it forms a skin, with the paint below the skin still being
soft. In an automotive production environment, this allows vehicles to be
moved quicker through the paint shop (dry in 10 minutes at 120 degrees
forced hot air, or 1.5 hours at 70 degrees).
But if too many coats are applied, it will trap the solvents underneath the
skin and cause "dye back". This can later (a few days to weeks)
cause a white haze, loss of sheen, and solvent popping
(vents or pinholes form to allow the
solvents to escape, much like magma in a volcano).
On the other hand, DuPont G2-4500s (an older product) "dries" rather then "cures" (note sometimes G2-4500s is mistakenly called "Dupont 4600"). Instead of forming a skin on the top surface, it dries more evenly (some may call this "drying from the bottom up"). The difference in drying time is minimal (15 minutes at 160 degrees forced hot air, or four hours at 70 degrees). But 4500s will level better, dry harder, and with a higher gloss. In a production paint environment where a dozen cars a day are painted, minutes adds up, and they are only spraying two coats so solvent pop is not an issue. But on playfields we are striving for high gloss and levelness, often more coats are sprayed on a playfield then a car. For this reason, DuPont G2-4500s is a better product to use than Dupont HC-7600s (or a comparable product from another manufacturer). But one problem with 4500 is it's a three-component system. That is, you need to mix three parts G2-4500s clear, one part activator (G2-4507s for faster dry time or G2-4509s for higher air temperatures and better appearance), and one part ChromaPremier 12375s medium reducer (this reducer is the third part, and is not needed for HC-7600s).
Unfortunately when doing this evaluation I used Dupont 7600 (which was a newer product). All the same benefits and caveats apply to Dupont 4500, so it should still be a good analysis if you decide to use 4500 instead of 7600.
|
After the final coat of Dupont 7600s has been applied with a foam brush. Notice the lack of any serious brush marks, and the intense gloss. |
|
|
-
The Bottom Line (who won, if you don't want to read any further).
- Smeared the Sharpie: every product did this. When using automotive clear coats, a Sharpie pen can not be used for touch ups (heck Sharpies smear pretty easily with Varathane too).
- Smeared the Testors paint: every product did this too. Testors enamels can not be used either to touch up a playfield.
- Incredible gloss: every product test just had great gloss.
- Incredible hardness: I could not find any one of the six products tested that was harder or softer than the others. I tested hardness by taking a pinball, and dropping it from a height of 8 inches onto the clear coated playfield. All six products dimpled very slightly from this test, but did not crack.
- Incredible smell: all the products smelled really bad when applying them.
- Quick drying: all the products dried quickly. All could be rubbed out within 8 hours, and were completely cured in 72 hours.
- High solids: all products were "high solids". This means they don't use much thinner, and each coat applied does not evaporate much. This is done to minimize the VOC (volatile organic compound) when sprayed to under 5 pounds per gallon. This was largely a pollution concern.
- 3 hours shelf life: all the products had about a 3 hours shelf life when mixed. So don't mix more clear coat than needed.
There were actually two big winners in this test.
Brush Applied Winner: The overall brush applied winner is Dupont's ChromaClear 7600s (and 7675s activator). For brush application, this product has the best consistency and dry time. It also had the best substrate and touch-up compatibility (it didn't lift the original playfield art, or the acrylic touch work). At $32.15 for a quart of 7600s clear, and $19.55 for a pint of 7675s activator ($51.70 total cost), it was somewhat expensive (note these quantities were the smallest available). But all of the automotive clears were basically this much money, except for one. Second place winner was PPG's Omni AU MC161 (and MH167 activator).
Spray Applied Winner: The winner was PPG's Omni AU MC161 (and MH167 activator, aka Shopline JC661) and Dupont's ChromaClear 7600s (and 7675s activator). For individuals with less than "professional" spray experience, I would recommend the PPG Omni AU product over the Dupont 7600. The PPG is more forgiving and just easier to get good results.
For spray applications with a standard compressor and gun (at 45 psi), the Omni AU and ChromaClear products had perfect viscosity and dry time. They also level better than any of the other products, and need no thinning. The leveling is the big factor here. With these products, the last coat usually will need no rub out! They level so nice, like a piece of glass, and without of the use of (expensive) thinners. Overall, the perfect spray products. Although the Omni AU was not quite as good with touch-up compatibility (it did lift my water-based acrylic touch up very slightly), it's consistency and final hardness was excellent, as was the price! At $15.07 for a quart of MC161 clear, and $12.04 for a half pint of MH167 activator ($27.11 total cost), Omni AU was extremely economical compared to the other brands of clear (note these quantities were the smallest available). This product's final quality was as good (if not better) than any of the other clears too. The Dupont 7600 ChromaClear is probably a slightly better product though, but it costs nearly double ($51.70 total cost versus $27.11) that of the Omni AU. It also was less forgiving. Hence second place spray winner was Dupont's ChromaClear 7600s (and 7675s activator).
Cost Winner: Again, PPG's Omni AU MC161 (and MH167 activator) were clearly the winner. About half the price of any other product, at $15.07 for a quart of MC161 clear, and $12.04 for a half pint of MH167 activator ($27.11 total cost)
What All the Products Did (or Didn't) Do.
To be honest, all the clear products tested basically worked well.
They were all very similar in most regards. Granted some were
better, but they all basically worked. Here's a list of what
they all did or didn't do.
-
Application Notes and Warnings.
- Remove all the playfield components.
- Wipe the playfield down well with Naptha and a clean cloth to remove dirt and wax.
- Sand the playfield dry with 600 grit sandpaper. Note this applies even if the playfield is used or a brand new, unused version.
- Wipe the playfield down again with Naptha and a clean cloth.
- Do the playfield touch-ups using acrylic water-based paints.
- Wipe the playfield down with a tack cloth, to remove dust.
- Buy a few two inch foam paint brushes. I found the foam brushes work well, and were cheap. I used a new foam brush for every coat applied.
- Get a few 12 ounce paper coffee cups (with the rolled up rim) at the local self-serve coffee store. Do not get the waxed soda cups. Do not use plastic beer cups (I found if the clear is left in these cups, the cups eventually melt)! And do not use Styrofoam cups either.
- Mix about 50cc of product (3 fluid ounces) in the paper coffee cup. This is all that is needed for a single coat. The mixing ratio is different for most of the products, so read the label before mixing. Use a metal (stainless steel) mixing cup to measure the product. If all the product is not used, throw the rest out. The clear can not be saved once the activator (hardener) is added.
- Optional, but recommended: add some "Smoothie" to the mixed paint. This is fish-eye eliminator, and will also help level the final finish. Without Smoothie, adhesion problem can occur, especially when clear coating used playfields.
- Apply the clear with a new foam brush.
- If the inserts in the playfield were noticibly shrunk, I used the brush to "dap" inside the inserts (to raise them up a bit). I then let them dry for 5 minutes.
- After the inserts dried (5 minutes), I brushed from the right (shooter lane) to left of the playfield horizontally (working from the top to bottom did not work well). I would take the initial stroke from the shooter lane across the playfield to the edge, then turn the brush over, and immediately come back across the same area again. Apply the product with a slight pressure on the brush. On every "stripe" of this over and back process, I would re-coat the brush is clear for the next "stripe".
- Do not go back and go over any freshly brushed areas again. All the clears dried too quickly, and this caused more problems then it solved.
- Let the clear coat dry 2 to 8 hours.
- Optional: wet or dry sand the clear with 600 grit to remove playfield imperfections between coats. Do not over-sand (after the first coat, do not to sand at all as the film thickness isn't enough yet). Sanding between coats is optional, as long as the previous coat does not dry more than 24 hours (remember the 24 hour window, discussed above).
- Go back to step number 6, and apply the next coat.
- When done with the last coat (four coats maximum), let the playfield fully dry (about 3 days). Wet or dry sand the playfield with 600 grit and remove the imperfections. Then use 1200 grit, and finally 2000 grit (if available).
- Rub out the playfield with Novus3, then Novus2.
- Remove all the playfield components.
- Wipe the playfield down well with Naptha and a clean cloth to remove dirt and wax.
- Sand the playfield dry with 600 grit sandpaper. Note this applies even if the playfield is used or a brand new, unused version.
- Wipe the playfield down again with Naptha and a clean cloth.
- Do the playfield touch-ups using acrylic water-based paints.
- Wipe the playfield down with a tack cloth, to remove dust.
- Prepare the compressor and spray gun. About 40 to 50 PSI will be needed at the gun for a standard spray gun set up. Only about 9 PSI is needed if a low pressure system is used.
- Get a few 12 ounce paper coffee cups (with the rolled up rim) at the local self-serve coffee store. Do not get the waxed soda cups. Do not use plastic beer cups (I found if the clear is left in these cups, the cups eventually melt)! And do not use Styrofoam cups either.
- Mix about 150cc of product (9 fluid ounces) in the paper coffee cup. This is all that is needed for about 2 coats. The mixing ratio is different for most of the products, so read the label before mixing. Use a metal (stainless steel) mixing cup to measure the product. If not using all the product, throw the rest out. Do not save the clear once the activator (hardener) is added.
- Optional, but recommended: add some "Smoothie" to the mixed paint. This is fish-eye eliminator, and will also help level the final finish. Without Smoothie, there can be adhesion problems, especially when clear coating used playfields.
- Spray the first and second coat "wet". Do not sand between these coats. Dry time between coats is usually 15 to 30 minutes.
- Let the second coat dry from 30 minutes to 8 hours.
- Gently wet or dry sand the clear with 600 grit to remove playfield imperfections. Do not over-sand.
- Spray a third coat, wet.
- DO NOT apply more than 2 or 3 coats of clear! These products are "high solids", and are designed for 2 or 3 coats only. Applying more than 3 coats can cause problems. Mostly the outer coats will dry, locking the lower coats in a semi-dry state. The solvents left in the lower coats can cause a haze to develop below the top finish, and cause possibly adhesion problems. Again, these products are designed for 3 coats maximum. Do not exceed that.
- Let the playfield fully dry (about 3 days). Depending on the quality of the prep work, and the condition of the playfield, it may not need rubbing out!
- If rub out is required, wet or dry sand the playfield with 1500 grit and then 2000 grit. Rub out the playfield with Novus3, then Novus2.
- Let the clearcoat dry 30 days before waxing.
All of these products are two part systems: a clear product and an activator (hardener). Actually, all also had a reducer (thinner) component too. But since I was applying these with a brush, and expense was a concern, I did not want to buy or use (or need) the reducer.
All products should be applied with a respirator mask and eye protection. When the activator is mixed with the clear, a chemical gas call "isocyanate" is produced as the product dries. This gas will be attracted to anything that is moist. This means the eyes and lung linings will essentially suck the isocyantes out of the air, to be absorbed by the body! Isocyanates cause serious central nervous systems damage.
To avoid isocyanate absorption by the eyes, I recommend wearing swim goggles. These are those small eye goggles that cup the eyes while swimming in a pool. Buy an inexpensive pair at any sports shop.
If you spray these materials, at minimum a a charcoal respirator will be needed. 3M's disposible mask #07193 (about $15) is a very good choice. If using Dupont's Imron, a fresh air ventilation system is absolutely needed! Imron is EXTREMELY dangerous to spray. (Note Imron didn't even test all that well, so I would completely avoid this product anyway).
Apply Automotive Clear Outside!
This is really important. Do NOT try and apply these clears
(even with a brush!) inside. Wife/family/friends will
hate you forever. This stuff smells BAD, and is really bad
for the body. Apply the clear in the garage or outside. See the safety
warning above. A mask and eye protection MUST be worn when
using these products, even if the are only being applied with a brush!
Brushing versus Spraying.
Simply put, the final outcome is MUCH better if the clear
is sprayed. Brushing clear works well, but it doesn't
leave the playfield as level as spraying. So if using
Varathane, buy the spray cans. But unfortunately, the automotive
clears are only available in quart cans. If spray is desired,
expensive, professional spray equipment will be needed. There is also
a big health concern with spraying automotive clears. I can
spray Varathane in my basement with no ill-effects. But auto clears
can NOT be sprayed indoors!
Auto clears, when sprayed, can create a serious health problem.
The 24 hour Window.
These multi-part paints have a "24 hour window". That is,
the manufacturers all recommend that an additional
coat be applied over the previous coat before 24 hours has passed. The reason
is these paints get so hard after just 24 hours of drying, the new coat will not
stick to the previous coat if it is older than 24 hours.
Of course this rule does not apply if you sand between coats
(which we are doing). But this rule needs to be mentioned.
How Far will a Quart Go?
Or how many playfields can be clear coated with a quart? This is
obviously dependant on how many coats put on, the mixing
ratio of clear to the activator, and how much extra clear is
mixed up per coat (that gets thrown out). But as a general rule,
if using a brush, expect
5 to 10 playfields out of a quart of activated clear. Figure
about 2 ounces of activated clear per coat and three coats means
6 ounces per playfield. There are 32 ounces in a quart, plus another
8 ounces of activator (at 4:1), netting 40 ounces. In this situation
a quart of activated clear would net about 7 playfields.
Brush Application Procedure.
Applying the automotive clear coats wasn't much different than
applying Varathane. The outcome is largely dependant on the
prep work. Here are the steps required for a good outcome.
Spray Application Procedure.
Number of Coats needed. A minimum of two coats, and an absolute maximum of four coats is needed. Remember with these clears, more is not really better. These products dry so hard and have such high solids, a minimum number of coats are needed. Also there are some risks to applying too many coats.
For example on Dupont's HC-7600s, it "cures" from the top down. This means as it dries it forms a skin, with the paint below the skin still being soft. If too many coats are applied, it will trap the solvents underneath the skin and cause "dye back". This can later (a few days to weeks) cause a white haze, loss of sheen, and solvent popping (vents or pinholes form to allow the solvents to escape, much like magma in a volcano). For this reason, a minimal number of coats (two or three) of 7600s should be applied.
On the other hand, some Urethane clears like DuPont's G2-4500s "dry" rather then "cure". Instead of forming a skin on the top surface, it dries more evenly (some may call this "drying from the bottom up"). This allows the users to spray more coats without the chance of it later hazing or "popping". For example, you could spray five coats then block sand down to two coats to get a perfectly level surface. But if only three coats were sprayed, there may not be enough film thickness to block sand the playfield perfectly level.
If you are not using either of the above Dupont products, and you're not sure if your clear "cures" or "dries", then the best approach is the minimalist's approach. That is, only spray two or three coats and no more. In most cases this is plenty of film thickness anyway, even after doing the final level block sanding.
Final Sanding and Rubout.
Make sure to let the playfield dry after the last coat for
three full days before you rubbing it out. The
playfield can be rubbed after just 8 hours, but some times the finish "sinks"
and leaves very small dimples. Letting the finish
fully dry for 72 hours will prevent this.
If you have sprayed Urethane, the final coat may not need
to be rubbed out at all (depending on how well you did the playfield
prep work, and how well the Urethane was sprayed).
It is also advised to do the final 1500 or 2000 grit sanding after 24 hours, they wait another day, sand lightly again and do the final buffing. This allows the vapors that are collected under the finish "skin" to be released, and then the buffing partially seals the finish. But if you wait too long (72 hours or longer), the finish becomes so hard it is difficult to do the final 2000 grit sanding (it wears out the sand paper very quickly).
When Can the Finish be Waxed?
It would be best to wait 30 days before waxing, but it is Ok to
wax after just 72 hours if you just can't wait.
What to Do with the Leftover Activated Clear.
After mixing the activator into the clear, the remainder must be
thrown out (it can not be saved longer than about 3 hours).
This is why using paper coffee cups is desirable. Just leave the brush in the cup,
and let it dry. After it is dry and solidified (overnight), just throw the
whole cup in the trash.
-
PPG's Omni AU MC161 (and MH167 activator).
- Clear Overview by Dupont. A nice overview of Dupont's line of urethane clears.
- G-2 4500s. The second generation of 4500s, "hyper-clear" technology (fast dry time). This clear is designed for forced hot air drying. Do no use this one.
- G-2 4700s. The second generation of 4700s, it uses "hyper-cure" technology (which means it dries very fast, good for rub-out in 1.5 hours). This clear is designed for air drying. A very good clear, and is probably what most car shops use today (if they are using Dupont).
- HC-7600s. Uses "hyper-cure" technology (which means it dries very fast, good for rub-out in 1.5 hours). This clear is designed for air drying. 7600s is also a low-over spray formula, which means it is more environmentally friendly than G-2 4700s. A very good clear, and is probably what most car shops use today in California and other polution affected areas (if they are using Dupont).
- 7500s LE. Slower dry time than 7600. A decent clear but I would not recommend it if 7600s or G-2 4700s is available.
- v7500s. A forced air dry version of 7500s LE. Don't use it.
- 7800s. I can't find any datasheets for this clear!
- 7900s. This clear is designed for cross-flow and down draft forced air drying. Don't use this one.
- 72200s. A three part clear, don't use it.
- 72400s. A three part clear for downdraft forced air drying. Don't use it.
- 72500s. A three part clear for downdraft forced air drying. Don't use it.
The lowest cost clear did the best in spray application! This stuff is great, and the easiest of all the products to use. It did lift the acrylic touch up paint slightly though, but I found this rubbed out easily without leaving any marks. Not available at all PPG stores (because it's considered a "budget" line). Dry time and viscosity was great. This clear is mixed at a ratio of 2:1 to the activator. This means more activator is needed than any of the other clears (added expense). But at $15.07 for a quart of MC161 clear, and $12.04 for a half pint of MH167 activator ($27.11 total cost), it was still extremely economical to get started with this product.
Dupont's ChromaClear 7600s (and 7675s activator).
I like Dupont paint products. They always seem to the be the
best available. This clear was no different; I rate it as
tied for the best of the six clears I tested. Dupont 7600's
viscosity was perfect for application with a brush; not too
thin, but not too thick. Most of the brush marks leveled
out before the clear dried. This made final rub out an
easy job. ChromaClear was great sprayed too.
Dupont 7600 also did not lift the acrylic
touch up paint. Dry time was also very quick,
and gloss and rub-out ability was great. This clear is
mixed at a ratio of 4:1 to the activator. Cost was some what
high at $32.15 for a quart of 7600s clear, and $19.55 for
a pint of 7675s activator ($51.70 total cost).
Other Dupont Clears.
Dupont actually makes a number of clears, if 7600s can't be found
or someone is doing the clear for you and using another Dupont product.
I say not to use the forced air dry clears because you and I don't
have access to that kind of system. Also I don't think it's a good idea
to force hot air dry a playfield.
Below is a quick summary of the clears, and their datasheets in PDF format.
PPG's Concept DCU 2021 (and DCX61 activator).
PPG's "glamour" clear worked decent, but lifted the acrylic
touch-up the most of the six products tested (but not
a "show stopper", as the lifting could be sanded and
became unnoticible). Dry time
and viscosity was good though. Spray application was
decent too (but a bit thick). This clear is mixed at
a ratio of 4:1 to the activator. Price was $32.20 for a
quart of DCU 2021 clear, and 20.50 for a half pint of
DCX61 activator ($52.70 total cost). If not using acyrlic
water based touch up paints, this is a great product.
Sherwin Williams' Ultra 7000 CC-639 (and UH-80 activator). Sherwin Williams "glamour" clear worked decent. It did not lift the acrylic touch up paint. Dry time of this clear was the slowest of the six test (over 8 hours before it was really dry enough to rub out). Also, the viscosity of the mixed product (with no reducer) was a bit too thick. This means there were a lot of brush marks left in the finish that had to be sanded out. This product sprayed better though. Because of this, I felt this product was more trouble than it was worth. This clear is mixed at a ratio of 4:1 to the activator. It was also expensive at $34.75 for a quart of the CC-639 clear, and $32.76 for a pint of UH-80 activator ($67.51 total cost).
|
If the clear was too thin, it sunk into the "planking" pores of the playfield. This was a problem with Imron and DelClear. The other (thicker) clears filled these pores much better. |
|
|
-
Dupont's Imron 500s (and 192s activator).
I had heard that this is the paint Sega uses to clear coat their new playfields (I don't know if this is true or not). But I found Imron to be a decent product, but far from my first choice. The biggest problem with Imron (other than it's extremely toxic, more so than the other clears) is its viscosity. The final mix is just too thin, and didn't cover as well as the other products. Imron did not lift the acrylic touch up. This clear is mixed at a ratio of 4:1 to the activator. Price was $34.67 for a quart of 500s clear, and $31.30 for a pint of 192s activator ($65.97 total cost).
|
The acrylic touch-up paint lifted the most with PPG's Concept DCU 2021. Acrylic touch up paint lifted the most in large areas of touch up with certain clears. Amazingly, this rubs out well with no major ill-effects. |
|
|
-
PPG's DelClear DAU75 (and DXR80 activator).
- PPG's Omni AU MC161. Great spray application! Easy to get great results, even for someone with limited experience. Price was cheapest of all the products too.
- Dupont's ChromaClear 7600s. Great brush application! Probably the best overall product (though less forgiving), but nearly twice the price of the Omni AU.
- PPG's Concept DCU 2021 (lifted acrylic touch-up the most, but otherwise good).
- Sherwin Williams' Ultra 7000 CC-639 (too thick, too hard to use).
- PPG's DelClear DAU75 (cheap, but too thin).
- Dupont's Imron 500s (expensive, volatile, and too thin).
- $27.11: PPG's Omni AU MC161 (and MH167 activator).
- $42.85: PPG's DelClear DAU75 (and DXR80 activator).
- $51.70: Dupont's ChromaClear 7600s (and 7675s activator).
- $52.70: PPG's Concept DCU 2021 (and DCX61 activator).
- $65.97: Dupont's Imron 500s (and 192s activator).
- $67.51: Sherwin Williams' Ultra 7000 CC-639 (and UH-80 activator).
When I originally started this project, I was told by almost every paint shop that all the new urethane clears were "too hot" to be applied over a lacquer playfield, and this would cause the original playfield paint to bubble. Of course they were all wrong (typical in the paint business, as no one wants to be liable for a bad paint job). For this reason, one shop suggested PPG's DelClear DAU75. Only DAU75 and Sherwin Williams' CC-639 spec sheets stated they could be used over lacquer. But unfortunately, the viscosity of DAU75 was too thin, and did not cover well. It also lifted my acrylic touch-up very slightly. This clear is mixed at a ratio of 8:1 to the activator (though the can suggests 16:1, the paint shop suggested 8:1). Price was $23.00 for a quart of DAU75, and $19.85 for a pint of DXR80 activator ($42.85 total cost).
Break down by Overall Usage and Quality.
Here's a breakdown of the products by how easy and usable it was,
and the final quality (highest to lowest).
Break down by Cost.
Here's a breakdown of the products by cost (lowest to highest).
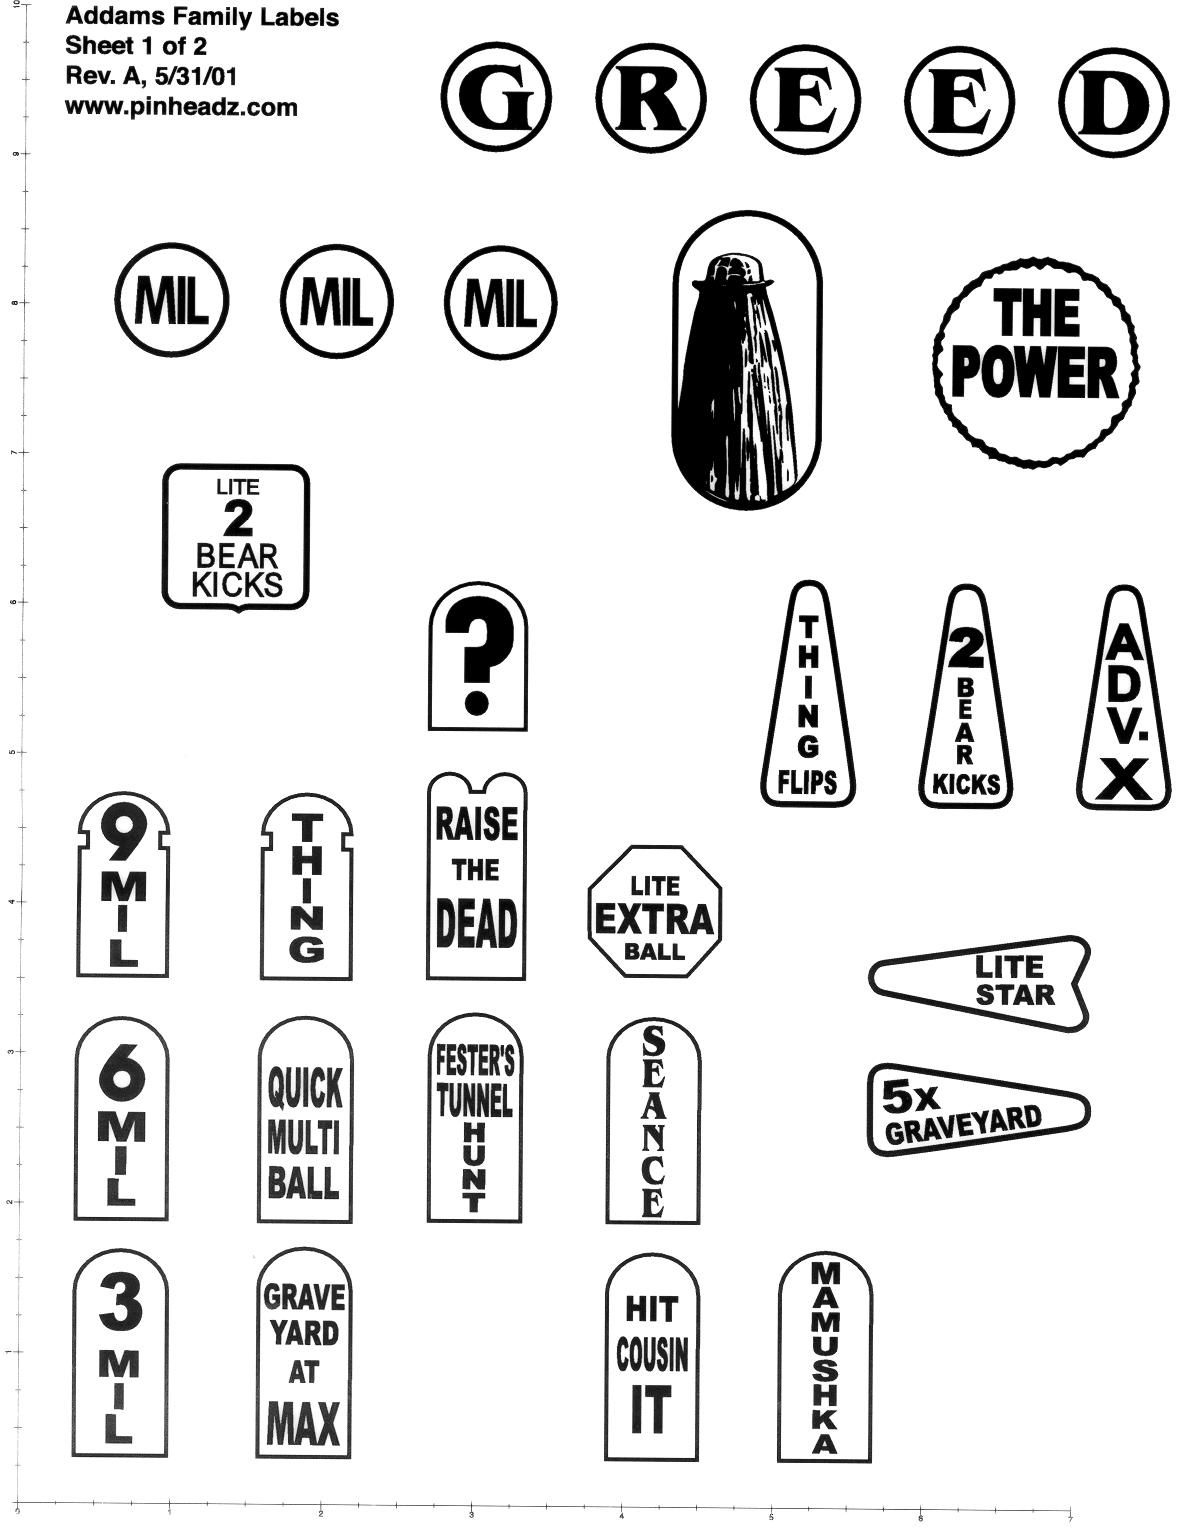
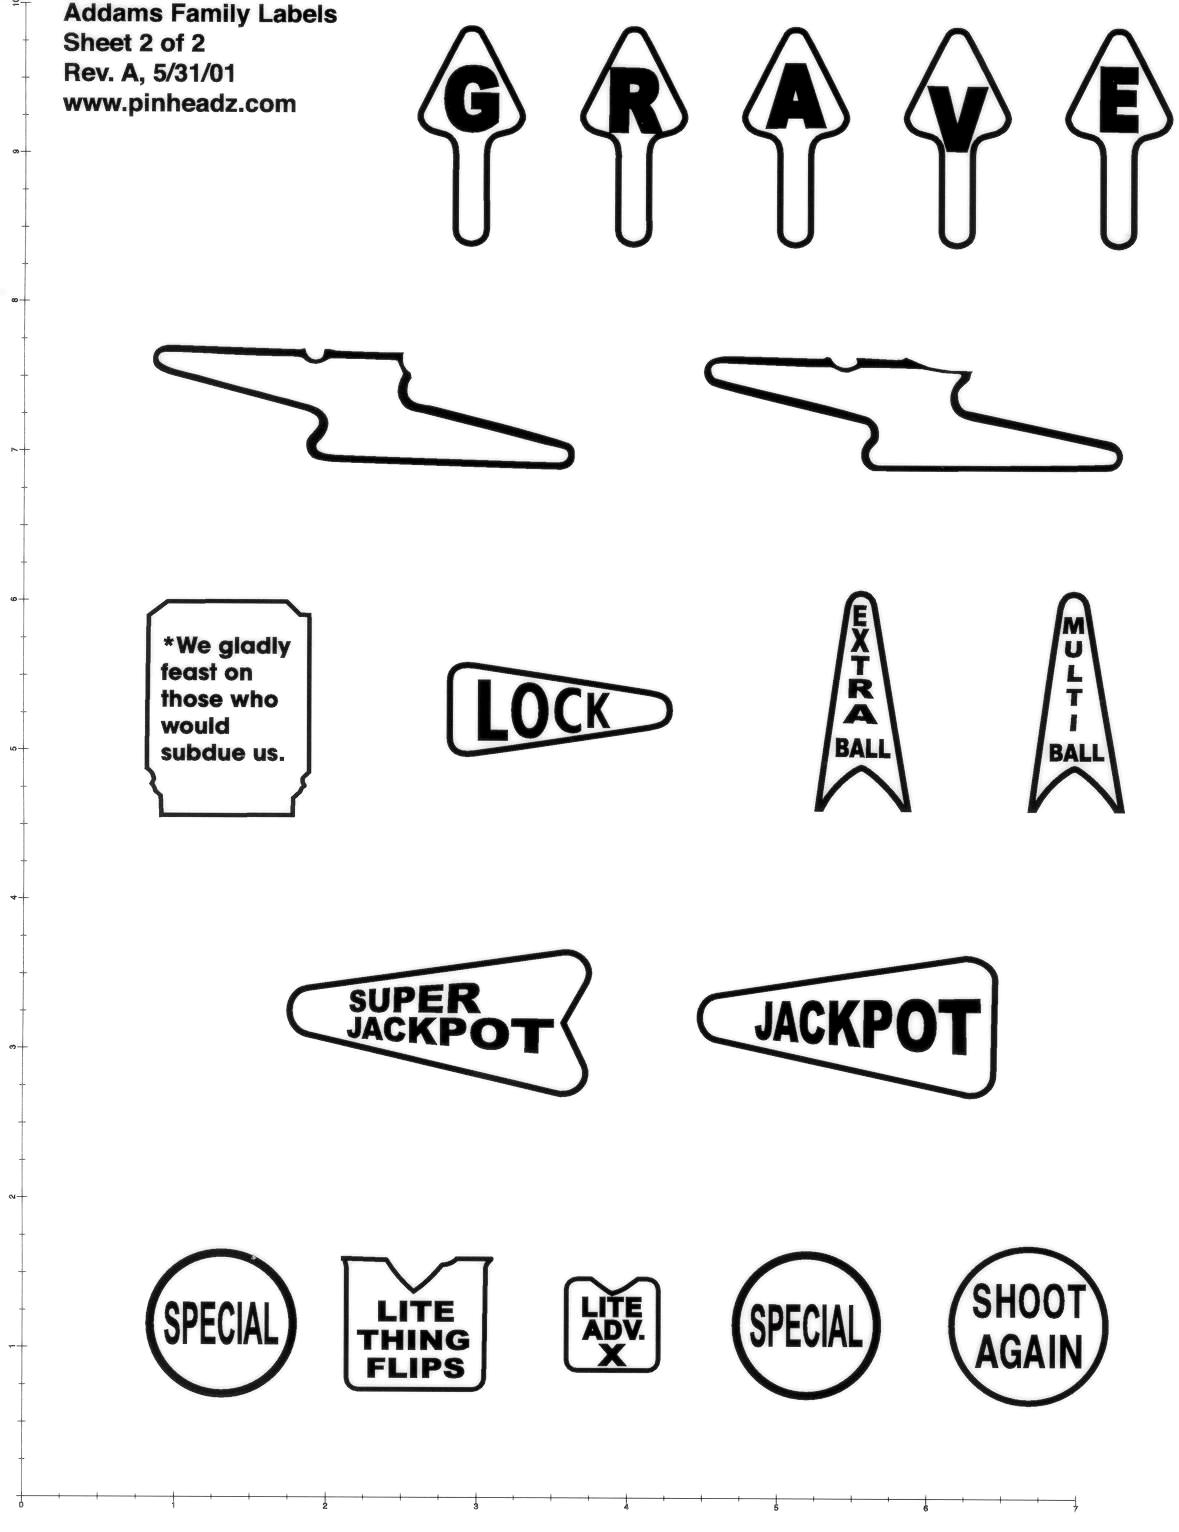
Can Auto Clear be Used over Mylar Decals?
Pinheadz made some playfield mylar lamp insert decals for various games
such as Addams Family
(now available from www.pinballpal.com). These can be applied to
a playfield, and then clearcoated with Dupont 7600s or PPG's
Omni AU. The big trick is to keep the size of the decal as small
as possible. That is, trim them to be the size of letters, and
leave no clear spaces around the lettering.
The reason for this is simple: the decals adhere with self adhesive glue. So the more decal there is, the great the chance of future decal delamination. So trimming the decals as small as possible is ideal.
-
All of these products worked well. Don't be scared to try any of them.
PPG's Omni AU and Dupont's HC-7600s/G2-4500s systems worked the best though.
More information on clearcoating can be seen in the "This Old Pinball" video TOP#4. This shows the whole procedure of touching up and clearcoating a 1990s playfield. Also shown is the application of the Pinheadz mylar lamp insert decals, and clearing over them. See www.pinrepair.com/top for details.
* Return to the Pin Fix-It Index