
W*S Industries

The Corvette Prototypes
In Ask Uncle Willy #15, Uncle Willy told the story of how the
original design for the Corvette pinball machine had included drop targets
and a gear shifter. Uncle Willy finally had the chance to take pictures of
the only machine believed to exist with these parts, and will now share
those pictures with you, along with the details of how the drop targets
were wired into the game. (Uncle Willy's hovering legal counsel wishes him
to remind you that Uncle Willy is only providing these details for their
historical interest. If you foolishly pursue making similar modifications
to your own machine, you do so at your own risk! Uncle Willy doesn't want
to see the Williams warranty claims department flooded with badly drilled
Corvette playfields.)
Because the drop targets were removed from the design of the game, the production versions of software were never intended to support them. Therefore, when the game programmer decided to add support back in for them, so he could build himself a version of the game with the drop targets, he was forced to make a compromise: to have the released version of the software easily support both kinds of targets, it would be necessary for the drop targets to use switches, not optos. So there is the trickiest part of this conversion: he hacked some microswitches on to the circuit board in place of the optos and their supporting circuitry. He also drilled a hole in the area behind the targets, so that he could mount a rebound switch for scoring points when targets were down.
Those were the physical modifications, and here is how he wired it up:
-- The drop target microswitches were wired exactly like the standup targets had been wired before he removed them. Lower standup became lower drop target, and so on.
-- The rebound switch was wired using a white green wire (attached with the one on the trough switch) and a green/grey wire (attached with the one on the standup target to the left of the center ramp.)
-- The coil was wired using a red/black wire for power (attached with the one on the left slingshot coil) and a brown/blue wire run from connector J127-7 for the drive.
Additional installation notes, not provided by Willy (by "cfh").
I recently added the drop targets to my production Corvette game. Here's
some tips in this installation.
- Opto style 3-bank drop targets work fine! You do NOT have to use
microswitch drop targets. The only stipulation to this is the opto
drop targets MUST have a LM339 chip mounted on the drop target opto board
(newer drop target banks, 1992 and later, have the LM339 remotely mounted, and can not be used).
For example, the drop target I used was from a 1990 Bally "Radical" game.
This 3-bank drop target used the "U" shaped optos, and had a LM339 chip mounted
right on the board. The wiring to the opto board was simple. The following
labels were silkscreen on the board by each connector pin:
- COL = common switch column wire from the original targets.
- R1,R2,R3 = individual switch row wires from each individual original target.
- +12 = 12 volts is needed for the optos, and this is taken from the opto board which is about 6 inches from the drop target.
- GND = ground is needed for the optos too, and this is taken from the same opto board where the 12 volts comes.
- The lamp board for the three lamp inserts in front of the targets will need to be moved towards the center of the playfield slightly. In order to do this, an adjacent lamp board which mounts at an angle and very close to the target lamp board, will also need to be shifted slightly. It is tight, but they will all fit!
- Do NOT install the rebound switch! Frankly, there just isn't enough room for it, and the switch is only worth 10 points! It is just not worth it. Also, the drop targets do not stay down for any period of time, making this switch close to useless.
- Older drop targets (like the one used from the 1990 Bally Radical) have different style drop targets; they are much thicker at the top of the target. This thickness was a problem, as it hit the rebound rubber behind the drop targets, preventing the target from falling. To fix this, replace the drop targets with the "new style" Williams drop targets. These new targets are much thinner at the top, and do not interfere with the rebound rubber.
- Use THREE rebound rubbers behind the drop targets, on the original posts. Remove the black rubber sleeves from the posts, and install three 2.5" rubbers. If you don't use three rubbers, the light bulbs behind the drop targets will get broken (as seen in the photos below).
- Click here for the graphics used on the drop targets. Print these with a color printer, then cover with mylar on the printed side. Finally used double sided sticky tape on the back, and you have corvette drop target stickers! The size of each sticker should be 1.5" x 15/16".
Click on an image to get a larger view...
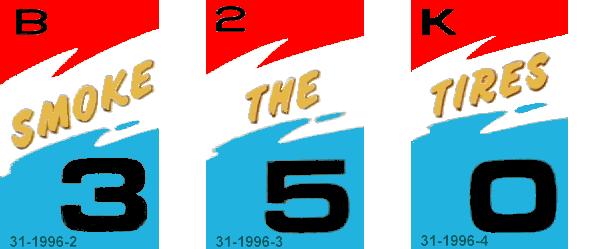
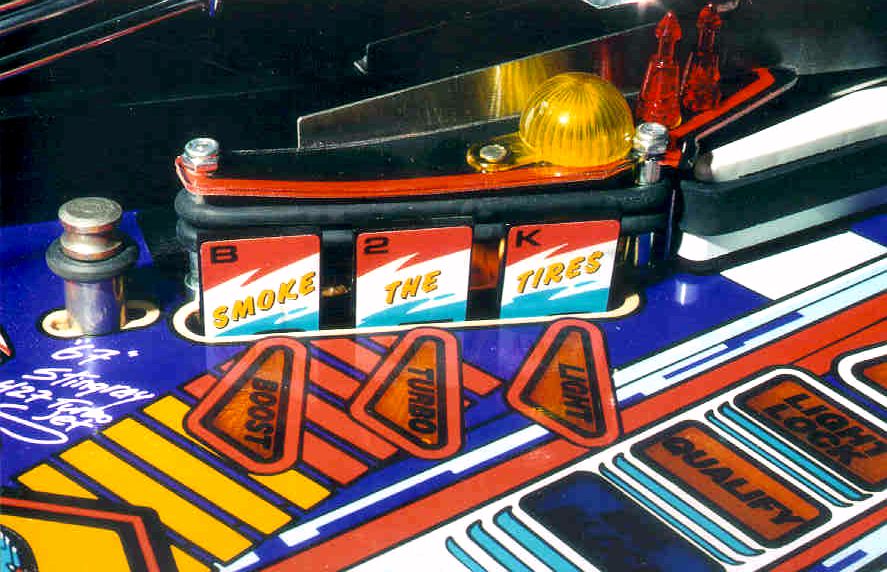 Fig 1: The drop targets with their original stickers.
|
 Fig 2: The drop targets down, showing the rebound switch installed behind them. |
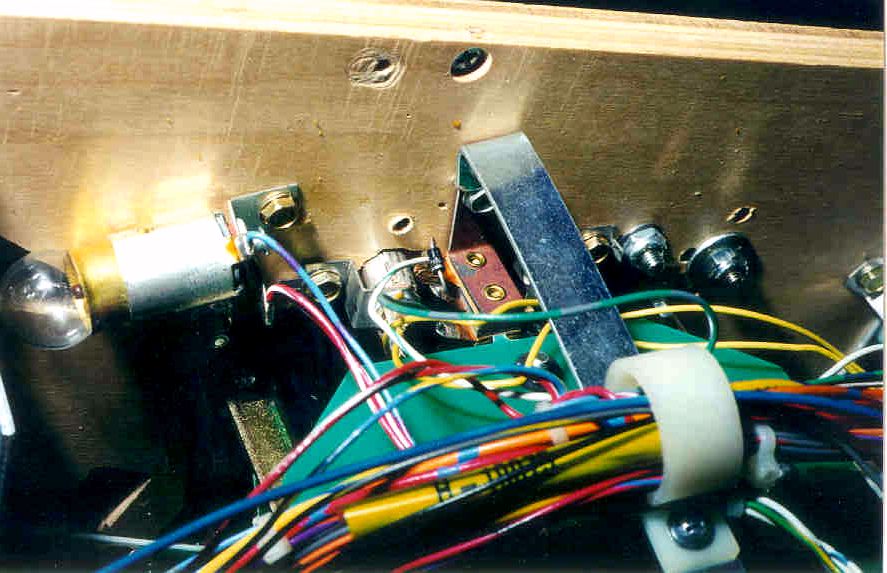 Fig 3: The rebound switch as seen from underneath the playfield. This is a tight fit! |
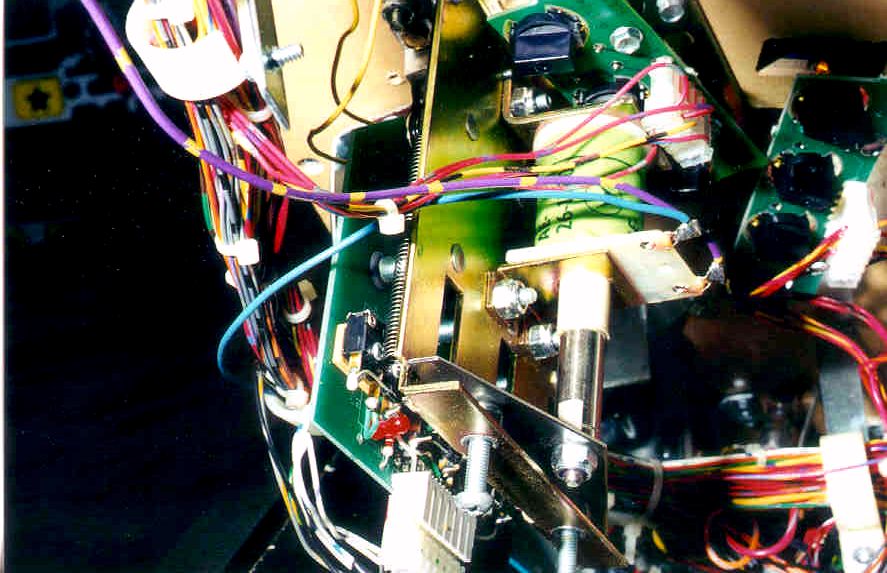 Fig 4: The drop target assembly from underneath the playfield. |
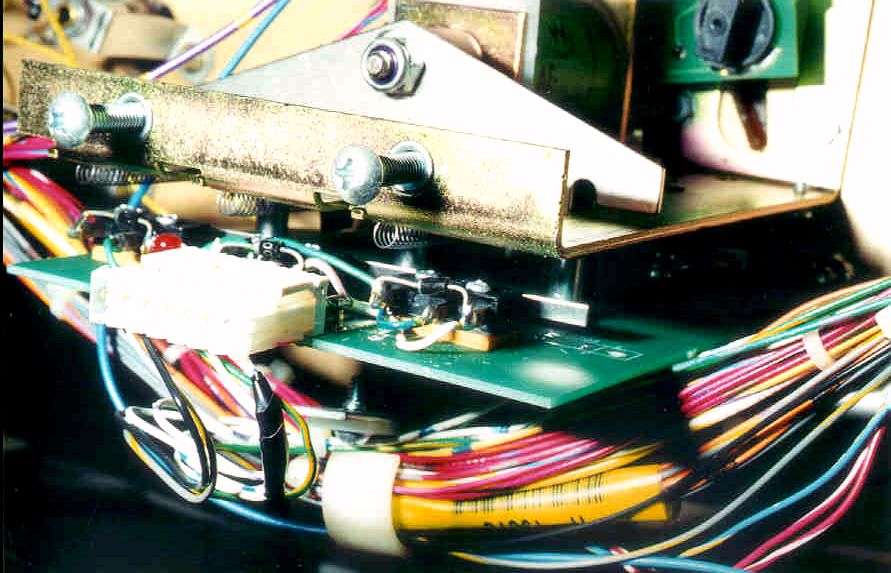 Fig 5: A closer view of the microswitches hacked onto the circuit board. |
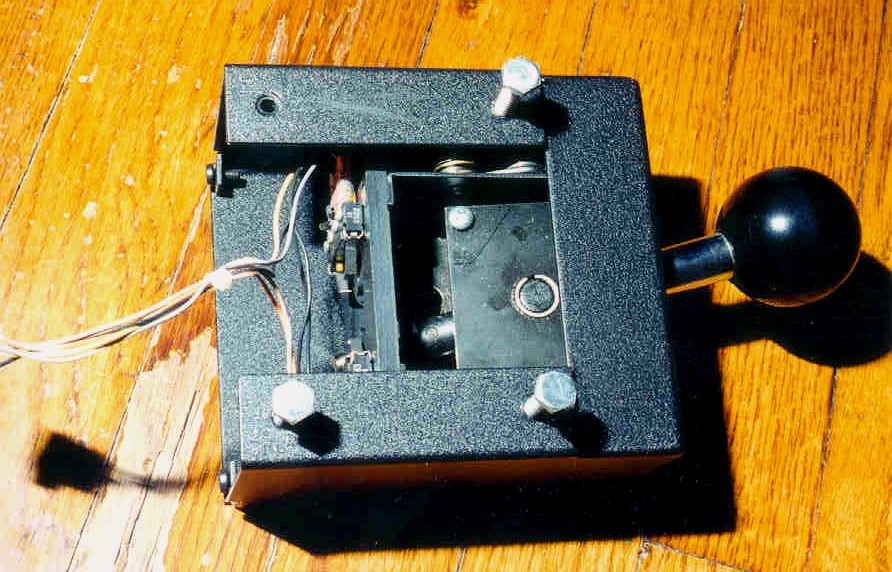 Fig 6: A picture of the original shifter assembly (which was not installed on the game Uncle Willy was taking pictures of.)
|