|
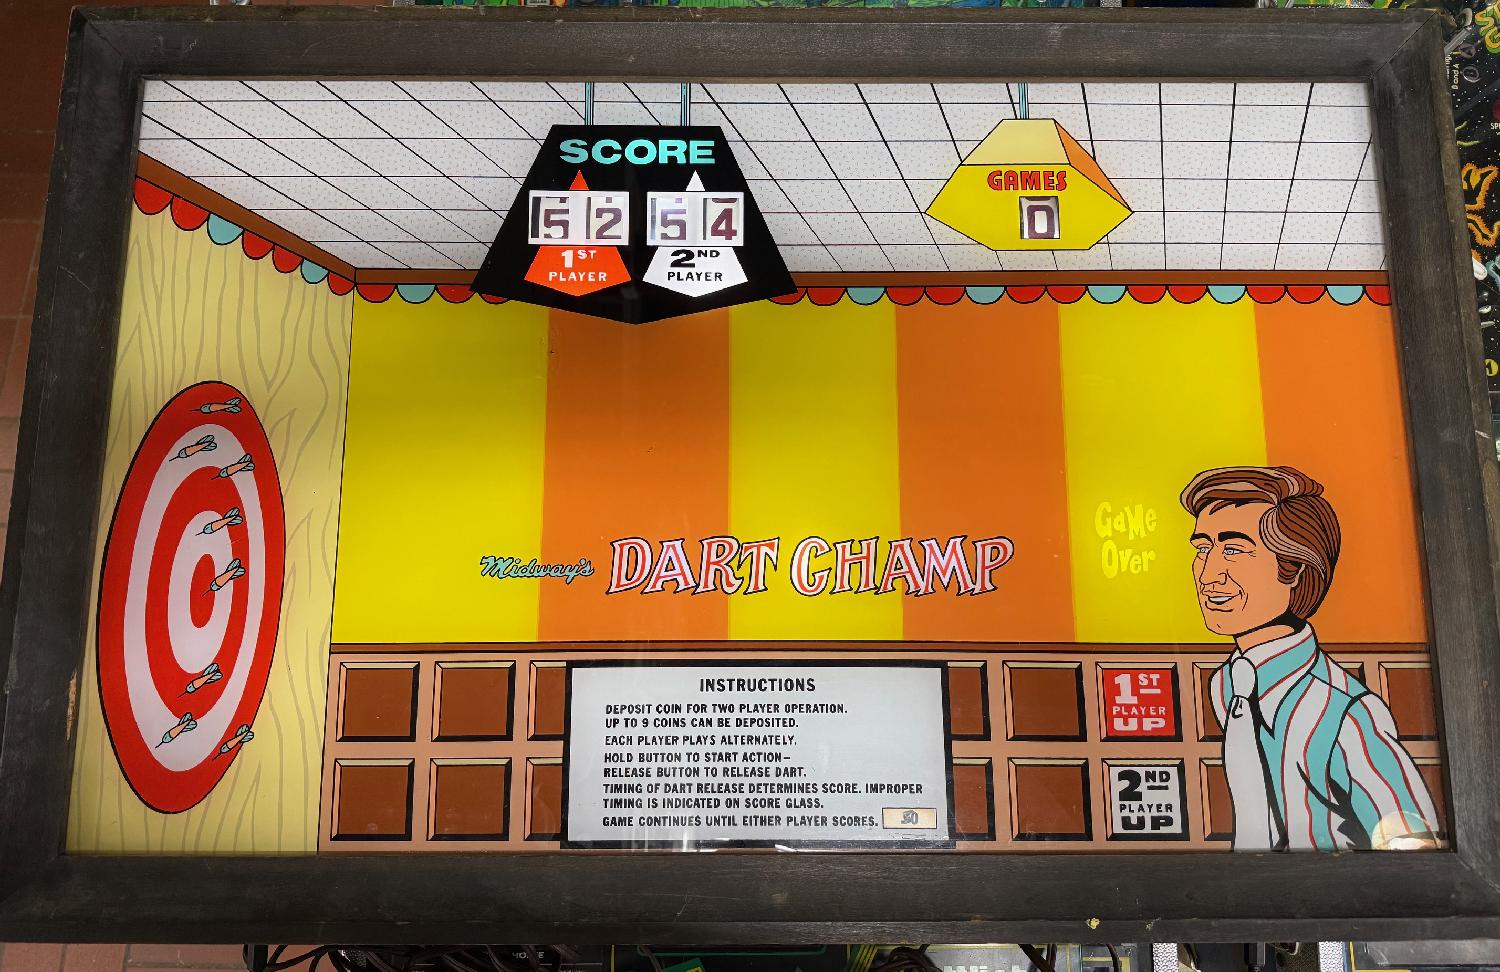
Return to the general specifics for all Midway wall games here. The following information pertains to the 1972 Midway Dart Champ in particular. Though this info can be applied to the other Midway wall games too. But I have personally added the following modifications to the Dart Champ model, so I know it works on that game.
Adding an MP3 Player. On the electronics123.com MP3 board I permanently wired button P1 to ground, and the Read.cfg file contains "1". This way when the board powers on, it will play my custom 001.mp3 file - I contructed this sound file from youtube songs that have a dart theme. For the DY16922 mp3 board, the DIP switches should be set to "on off on", and the filename 00001.mp3 - This will start the song playing at power on. Note the added mp3 sound is a good thing, as it makes the game a bit harder. Good players can time their shots using the sound of the Midway score motor. So the background sound makes that a bit difficult, and players must time their shots based on the moving lights of the game (as was intended.) Also the added MP3 song indicates that the game has indeed started, so players can react (opposed to walking away in confusion.)
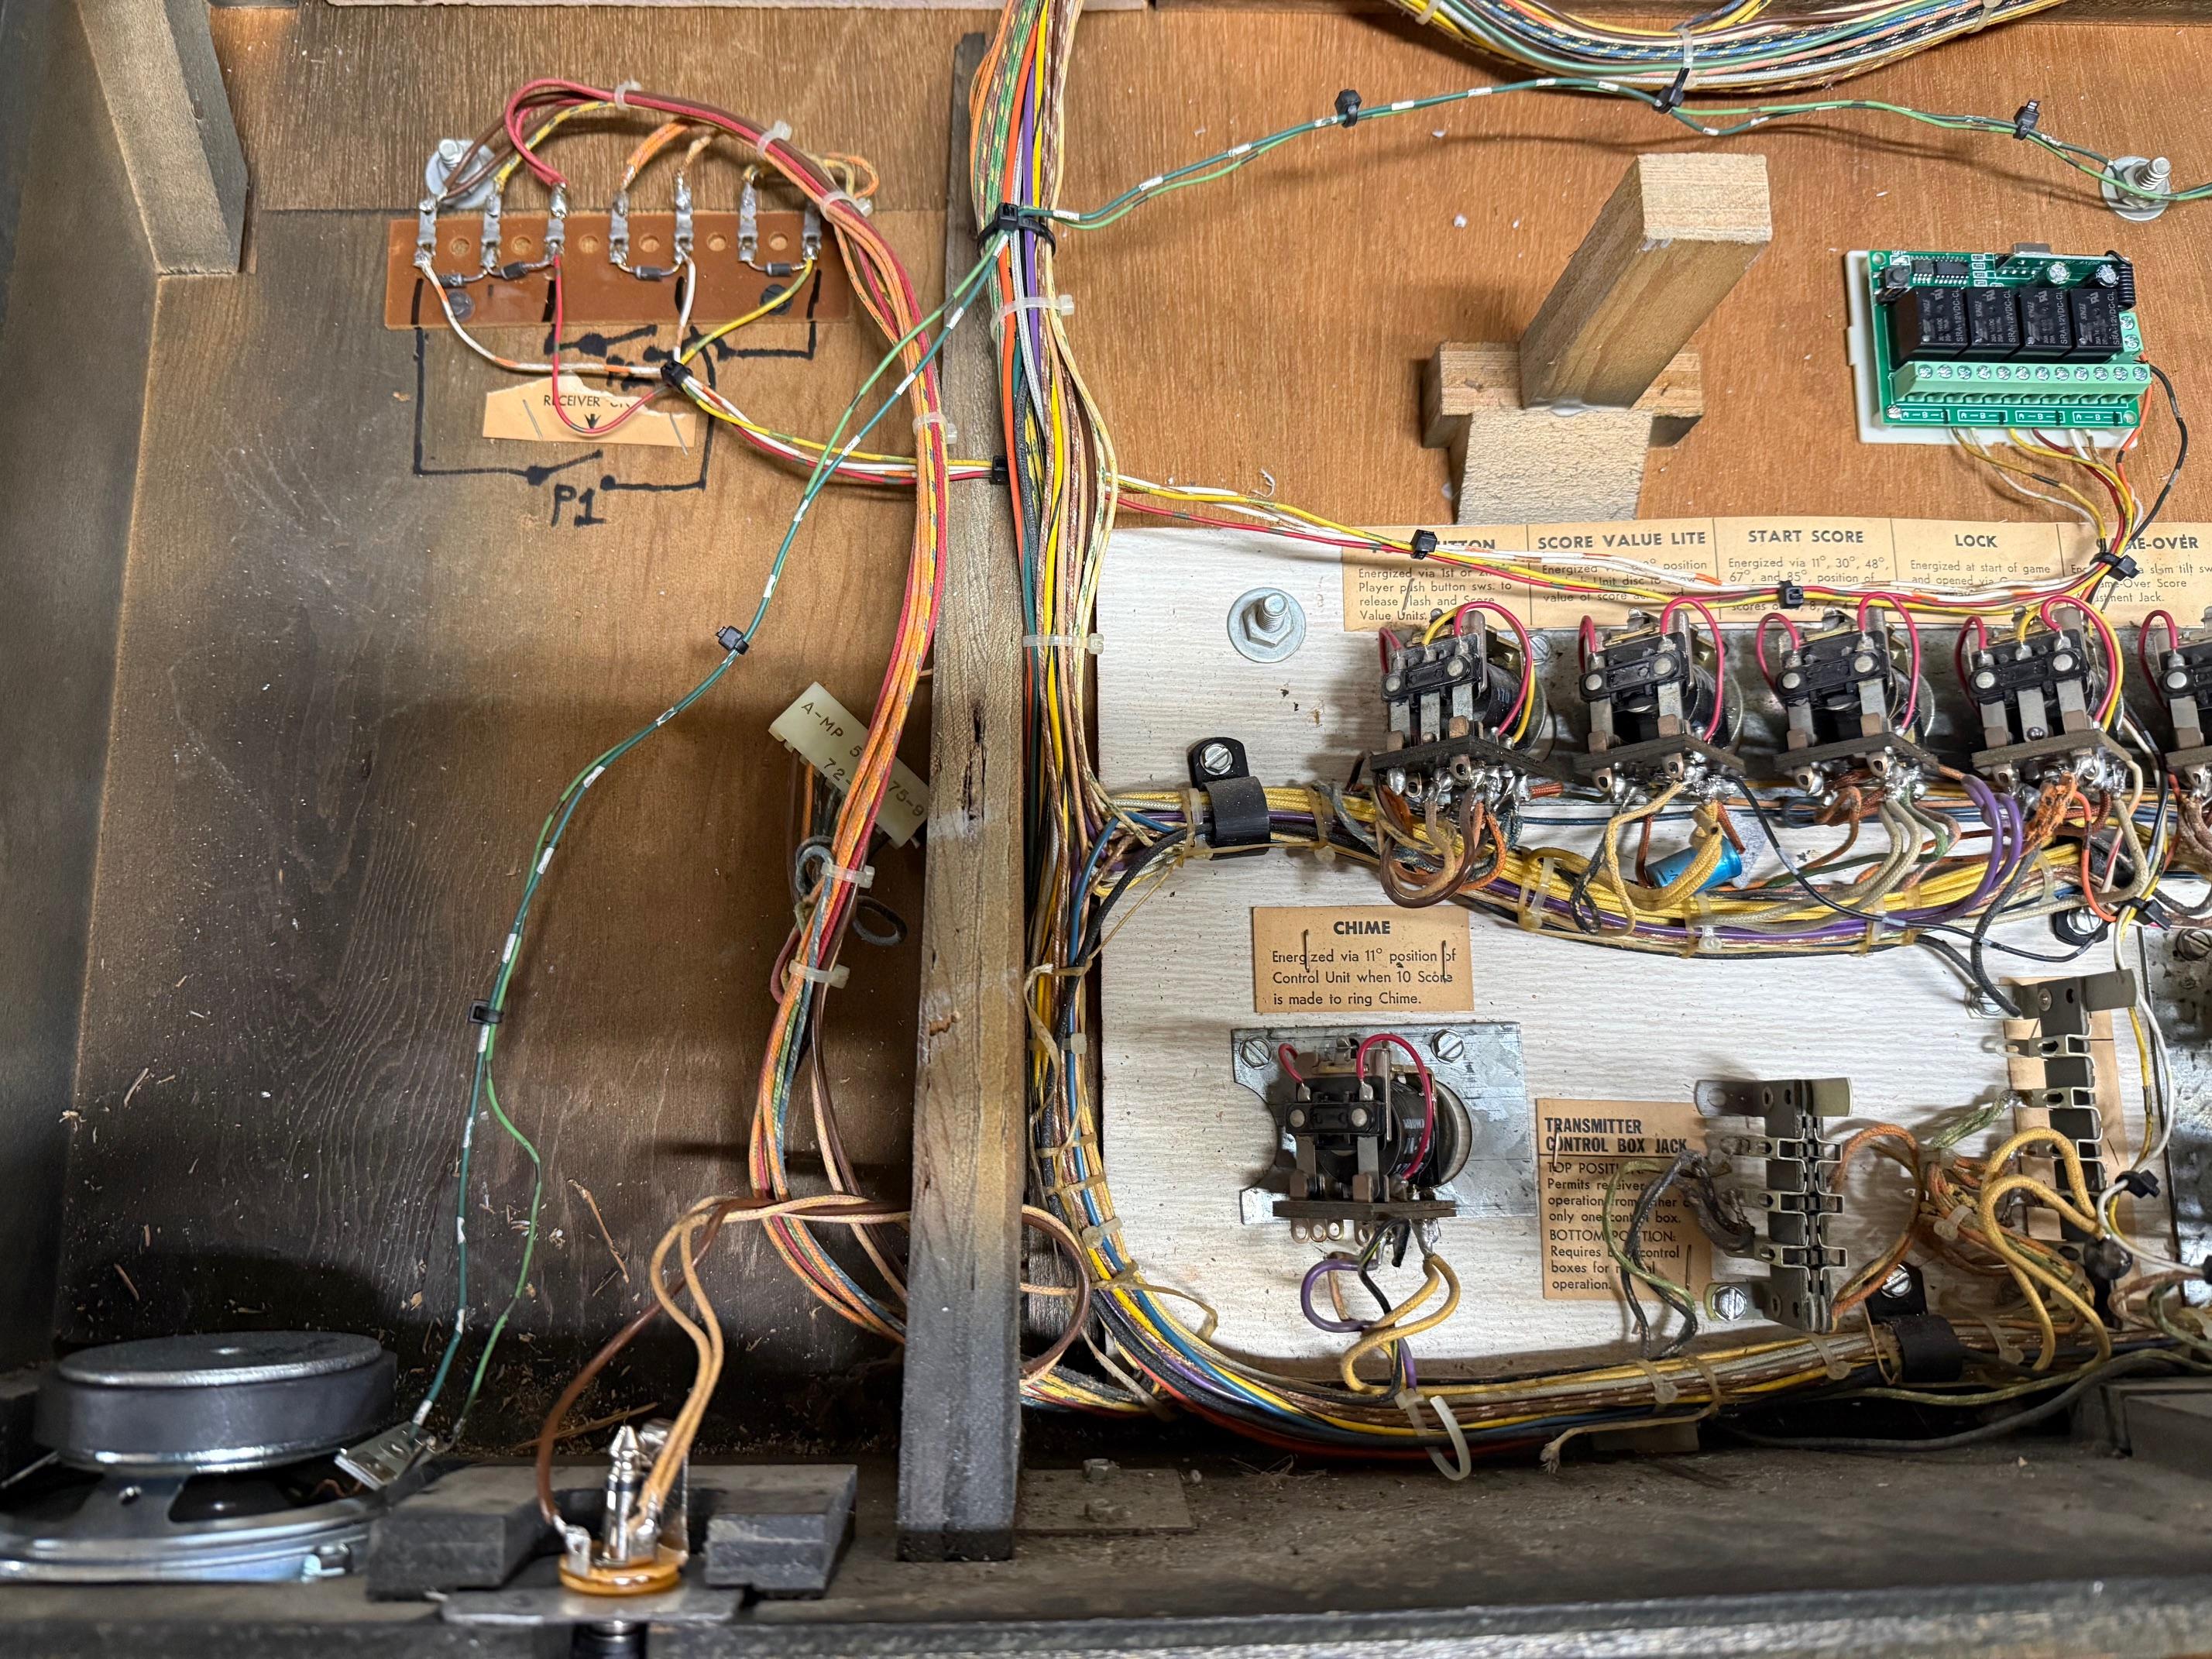
Replacing the Remote Controls. Amazon sells 12 volt Relay Wireless RF Remote Control Module with two 433Mhz Transmitter key fobs here. With some wiring this can be used, and it works well. There's a small 3 pin jumper on the remote receiver board - remove that and discard. Then wire the "A" N.O. (A and B) contacts for player1, and the "B" N.O. (A and B) contacts for player2. The game has a diode terminal strip with the player button contacts, so it's easy to tap into the player controls there. The remote boxes can also be purchased on Amazon here. Drill a hole for a momentary switch in the face of the box. Take the remotes apart, remove the metal button film from the remote circuit board, Then solder two wires to the "A" contacts (for player1), and the "B" contacts (for player2.) Mount the remote boards in their respective boxes and you now have two new player remote controls for the game. I have also created some Photoshop graphics for the Dart Champ box here. There is one other option which can be deployed with this remote: have the game start function on one of the remotes. There are four relays on the remote receiver board, and we are already using two of them for the player 1&2 functions. Hence using the "C" relay and its N.O. (A and B) contacts, you could start a game wireless on the remote. Of course you'll have to add another momentary switch to one of the remotes... The problem with this is the remote receiver board's power has to be on all the time. So using the Lock relay power setup (as used with the MP3 board) will not work. Instead you'll need to power the remote board with the Black wire (+12v) and the Yellow wire (-12v.) On Dart Champ the yellow wire is on many relays, and the black wire is pretty much the power wire to a lot of relays. This will power the remote receiver board as soon as the game is turned on. Additionally two wires can be connected from the remote receiver board's N.O. "C" relay terminal switch A and B, to the start button. This of course assumes you have a press button on one of the remotes connected to the "C" button terminals. With this the game will start up using the remote. If you do this, I would recommend having the game on Free Play Free play is achieved by bending the "game" score reel switch closed when at zero credits (aka "games.) The big issue with having a remote start button comes during game play... a user could accidentally (or purposely) press the game start button in the middle of a game, and restart the game. For that reason it may be prefered to have the start game function separate from the handheld remotes.
Adding a Timer. I bought a timer board off Amazon for less than $10 and found it works quite well. It powers at 12 volts (like the MP3 and Remote boards.) For the timer board use the power stream that the MP3 board is using (the Lock relay power.) This way, the timer board turns on right when a game is started, and counts down. After the set time, it Slam tilts the games, turning off power to the timer board (and the MP3 player, if you are using that), and of course ends the current game. Programming this timer board is a bit tricky. Power on the board with 12vdc while holding down the K1 switch for a couple seconds. It will show "P-1". Press the K1 switch twice to move this to "P-3". Then press the K3 button, and "000" will show. This is the time. Press K2 to advance the programming digit (0 to 9), and K3 to move the programming digit from 100s to 10s to 1s. After it's set to "180", power off the board. Then turn on power to the board, and the timer should start count down from 180 to 0. When the timer hits zero, it energizes the board's relay, which closes the relay contacts labeled COM and CK. Two wires can be attached from these two COM/CK contacts to the slam switch contacts. Then after 180 seconds, the board will "slam tilt" the game, ending any current game play. This is a great way to end a current game after 3 minutes, if someone starts a game and walks away without finish.
|

Inside of a Midway Dart Champ game:
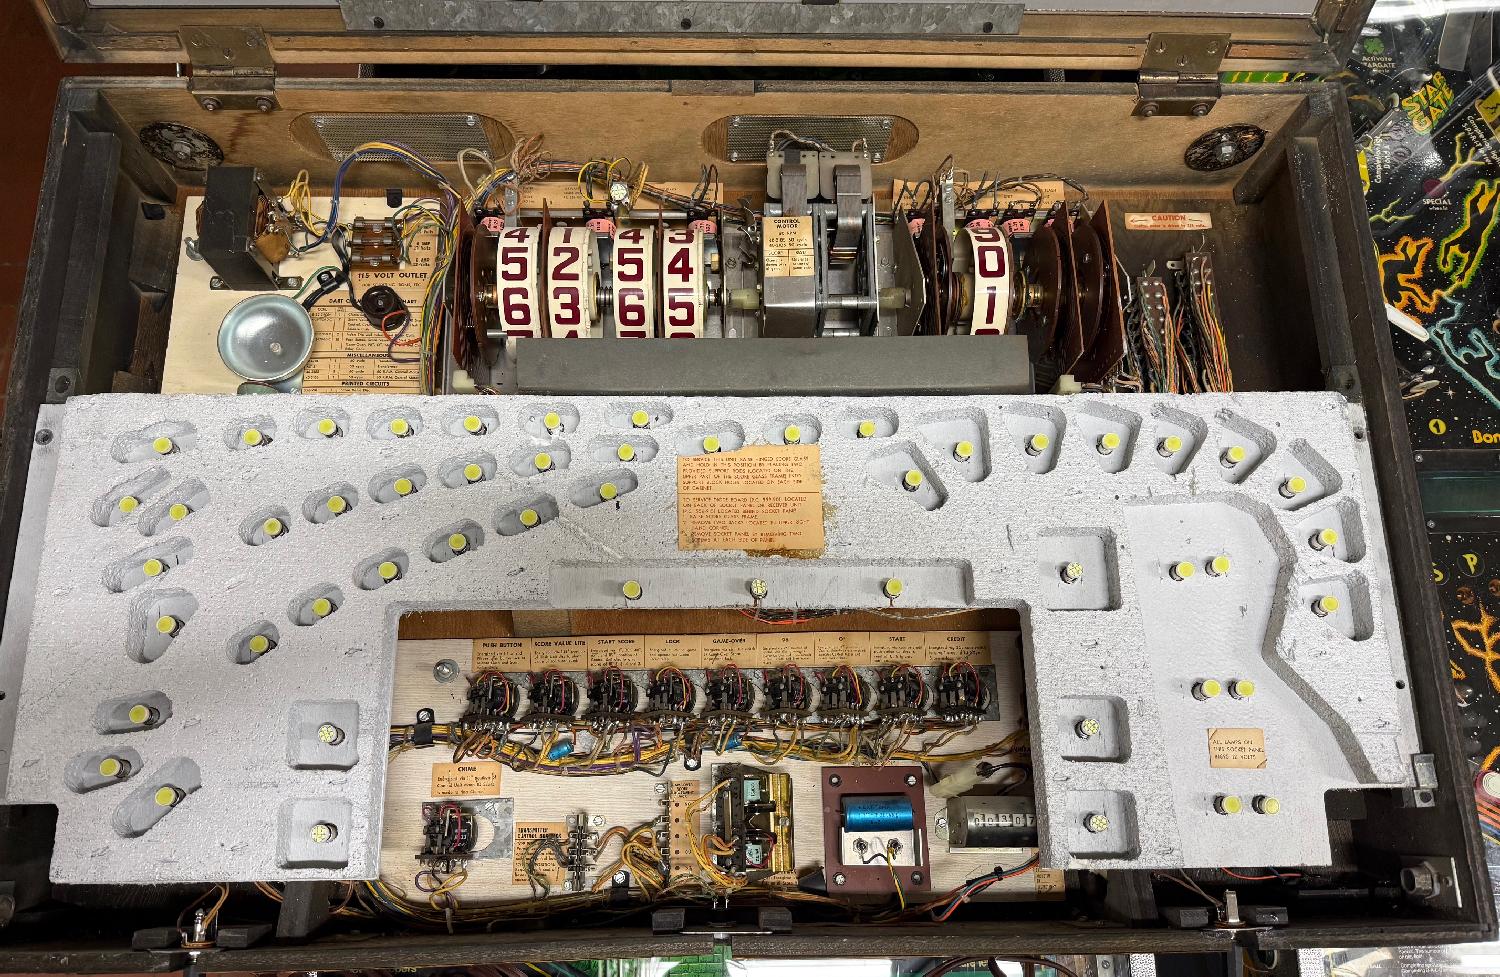
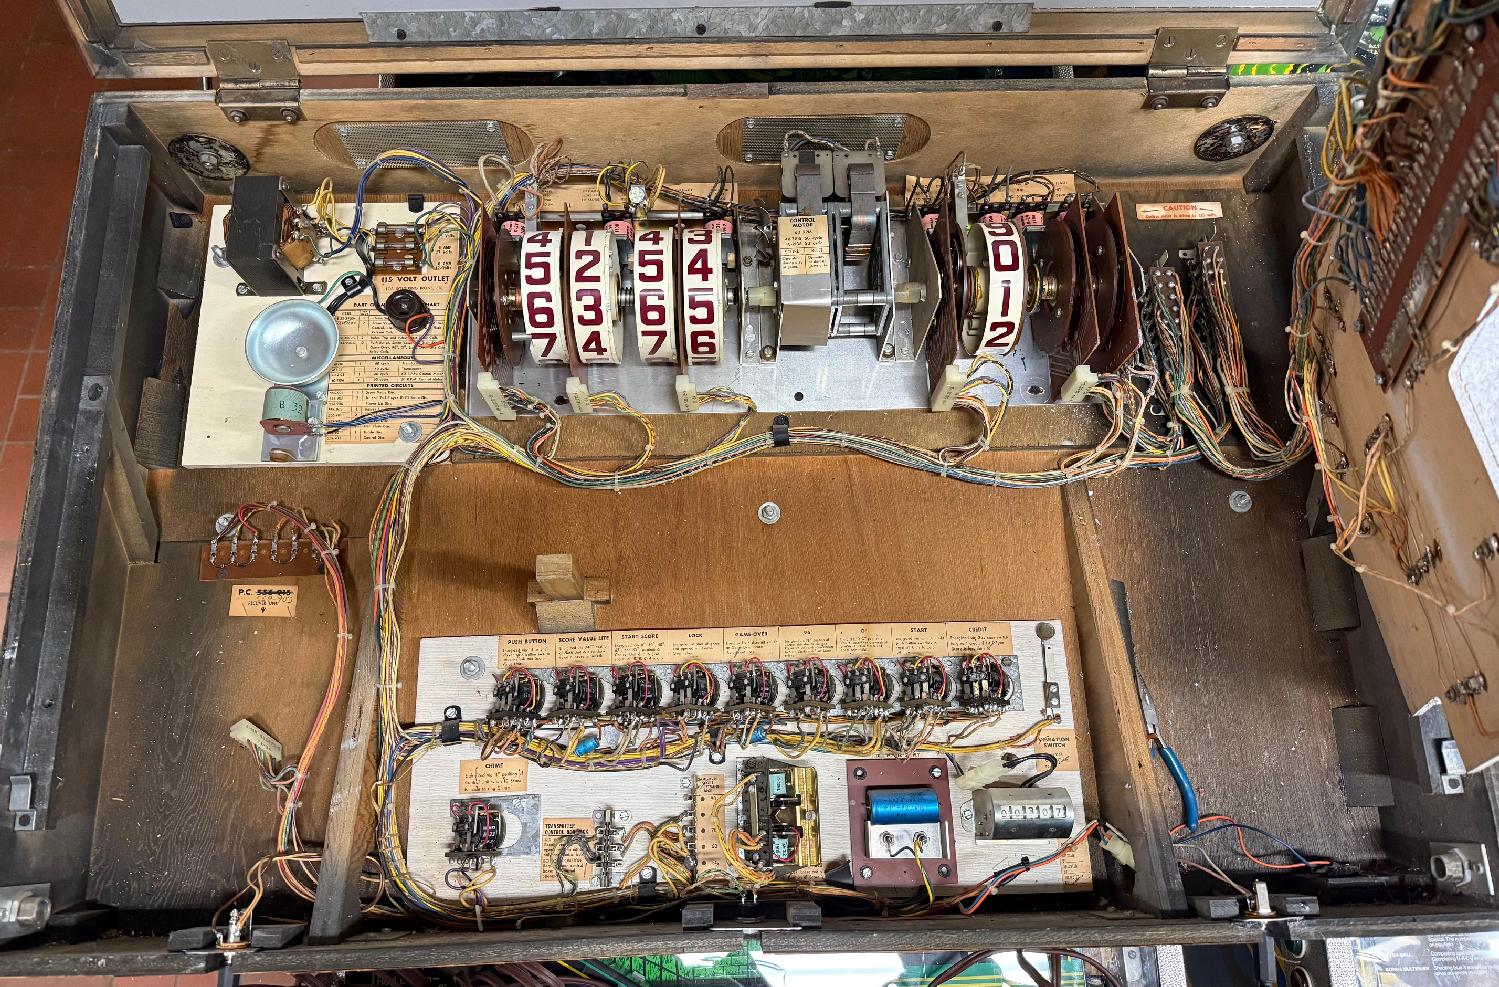
The MP3 player and Timer board wired into Dart Champ.
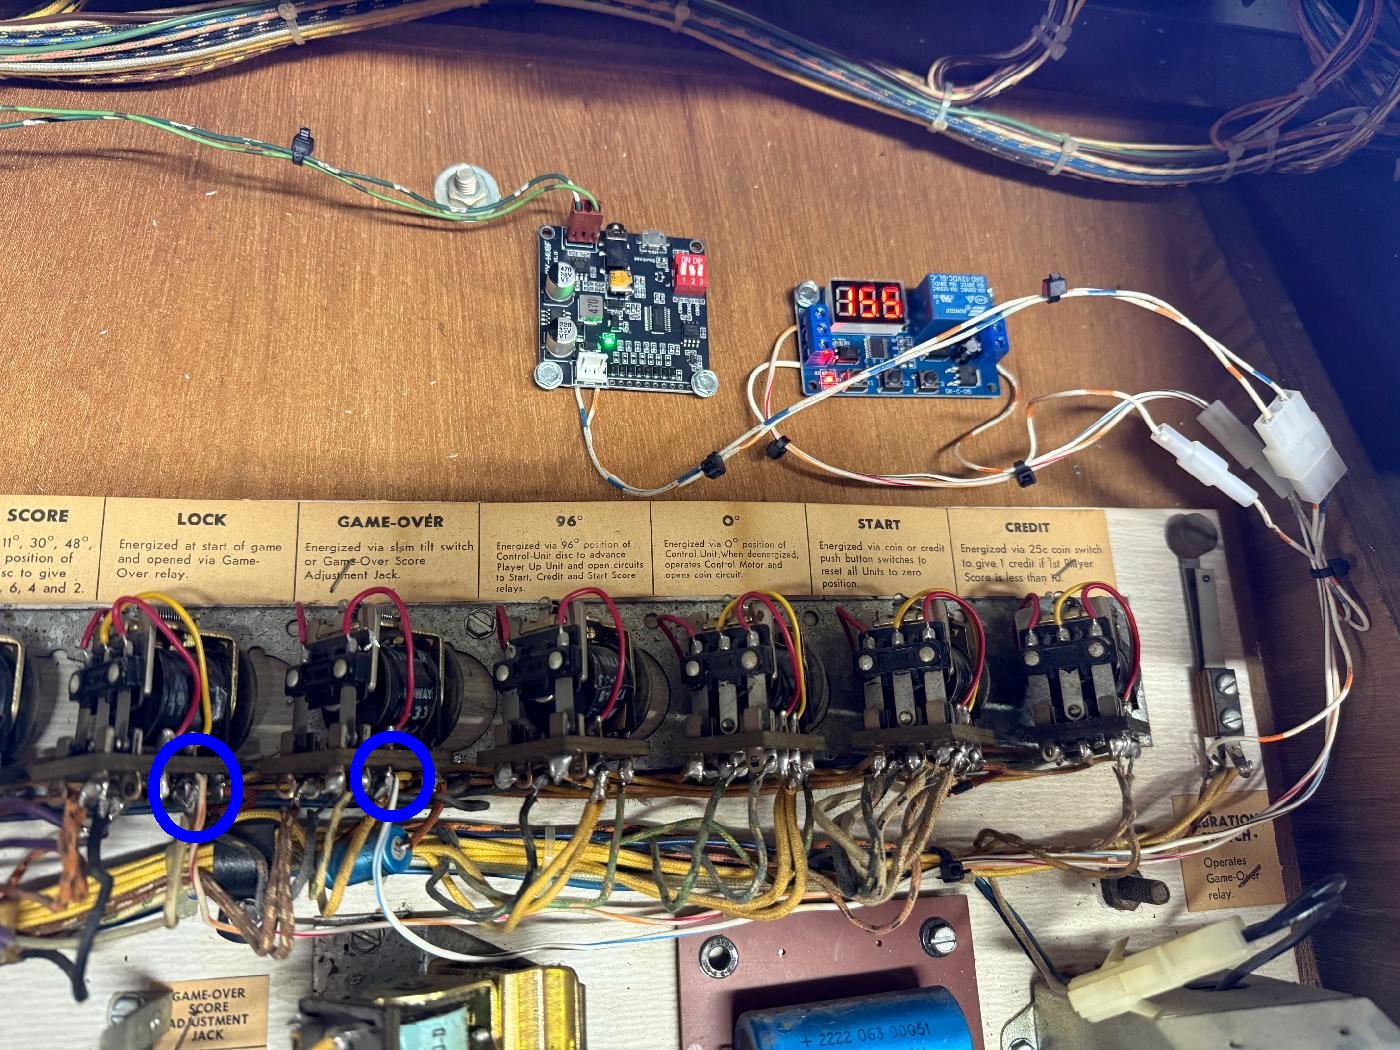
The remote board connected inside the Dart Champ. Power is black wire (+12v) on the Lock relay,
and yellow wire (-12v) on the Score Value Lite relay.
|
* Email the collector cfh@provide.net * Go to the EM Arcade History index * Go to the Pinball Repair/History index |