
|
Schematic for the Midway Golf Champ is available
here. The following information pertains to the 1972 Midway Golf Champ in particular. Though this info can be applied to the other Midway wall games too. But I have personally added the following modifications to the Golf Champ model, so I know it works on that game.
Adding an MP3 Player.
Replacing the Remote Controls. Amazon sells 12 volt Relay Wireless RF Remote Control Module with two 433Mhz Transmitter key fobs here. With some wiring this can be used, and it works well. There's a small 3 pin jumper on the remote receiver board - remove that and discard. Then wire the "A" N.O. relay switch for player1, and the "B" N.O. relay switch for player2 in the game (I used the diode terminal strip in the game, it's easy to tap into the player controls there.) The 12 volt power can be gotten from the Lock relay power (same power source used for the MP3 player mod.) The remote boxes can also be purchased on Amazon here. Drill a hole for a momentary switch in the face of the box. Take the remotes apart, remove the metal button film from the remote circuit board, Then solder two wires to the "A" contacts (for player1), and the "B" contacts (for player2.) Mount the remote boards in their respective boxes and you now have two new player remote controls for the game. I have also created some Photoshop graphics for the Golf Champ box here. There is one other option which can be deployed with this remote: have the game start function on one of the remotes. There are four relays on the remote receiver board, and we are already using two of them for the player 1&2 functions. Hence using the "C" relay and its N.O. contacts, you could start a game wireless on the remote. Of course you'll have to add another momentary switch to one of the remotes... The problem with this is the remote receiver board's power has to be on all the time. So using the Lock relay power setup (as used with the MP3 board) will not work. Instead you'll need to power the remote board with the Black wire (+12v) and the Yellow wire (-12v.) On Golf Champ the slam switch has the yellow wire, and the black wire is pretty much the power wire to nearly all relays (I used the Credit relay's black wire, as it's closest to the slam switch.) This will power the remote receiver board as soon as the game is turned on. Additionally two wires can be connected from the remote receiver board's N.O. "C" relay terminal switch A&B, to the start button. This of course assumes you have a press button on one of the remotes connected to the "C" button terminals. With this the game will start up using the remote. If you do this, I would recommend having the game on Free Play (see above.) The big issue with having a remote start button comes during game play... a user could accidentally (or purposely) press the game start button in the middle of a game, and restart the game. For that reason it may be prefered to have the start game function separate from the handheld remotes.
Adding a Timer. I bought a timer board off Ebay for less than $10 and found it works quite well. It powers at 12 volts (like the MP3 and Remote boards.) For the timer board use the power stream that the MP3 board is using (the Lock relay power.) This way, the timer board turns on right when a game is started, and counts down. After the set time, it Slam tilts the games, turning off power to the timer board (and the MP3 player, if you are using that), and of course ends the current game. I tried a couple different timer boards, and they both worked well. One was set to two minutes maximum, which is probably a bit short. The other was more programmable and had a nifty countdown LED, so went with 180 seconds on that board. Then after the set time (be it two or three minutes), or players get to 50 points (which would end the game anyway), the game automatically ends. The timer relay's Normally Open switch is connected to the Vibration Slam switch. After 120 or 180 seconds, the timer board's Normally Open relay switch closes and slam tilts the Vibration switch, which ends the game. It works really well! I have found that two minutes is a bit short, but that's plenty of time for two half drunk players to get through a game. Now admittedly, if they only get 2 points each for *every* shot, their game is more like four mintues. Hence I used the other timer board with the LED countdown, and set it to a three minute game. This timer addition is a great way to avoid risk for 50+ year old motors. Because someone starts a game and walks away, these Midway games can self destruct.
|

Inside of a Midway Golf Champ game:

Free play on Midway Golf Champ: using a green alligator clip wire to short the plasitc brown/white and cloth red/black wires.

Added MP3 player to a Midway Golf Champ. Power for the MP3 board comes from the Lock relay power.

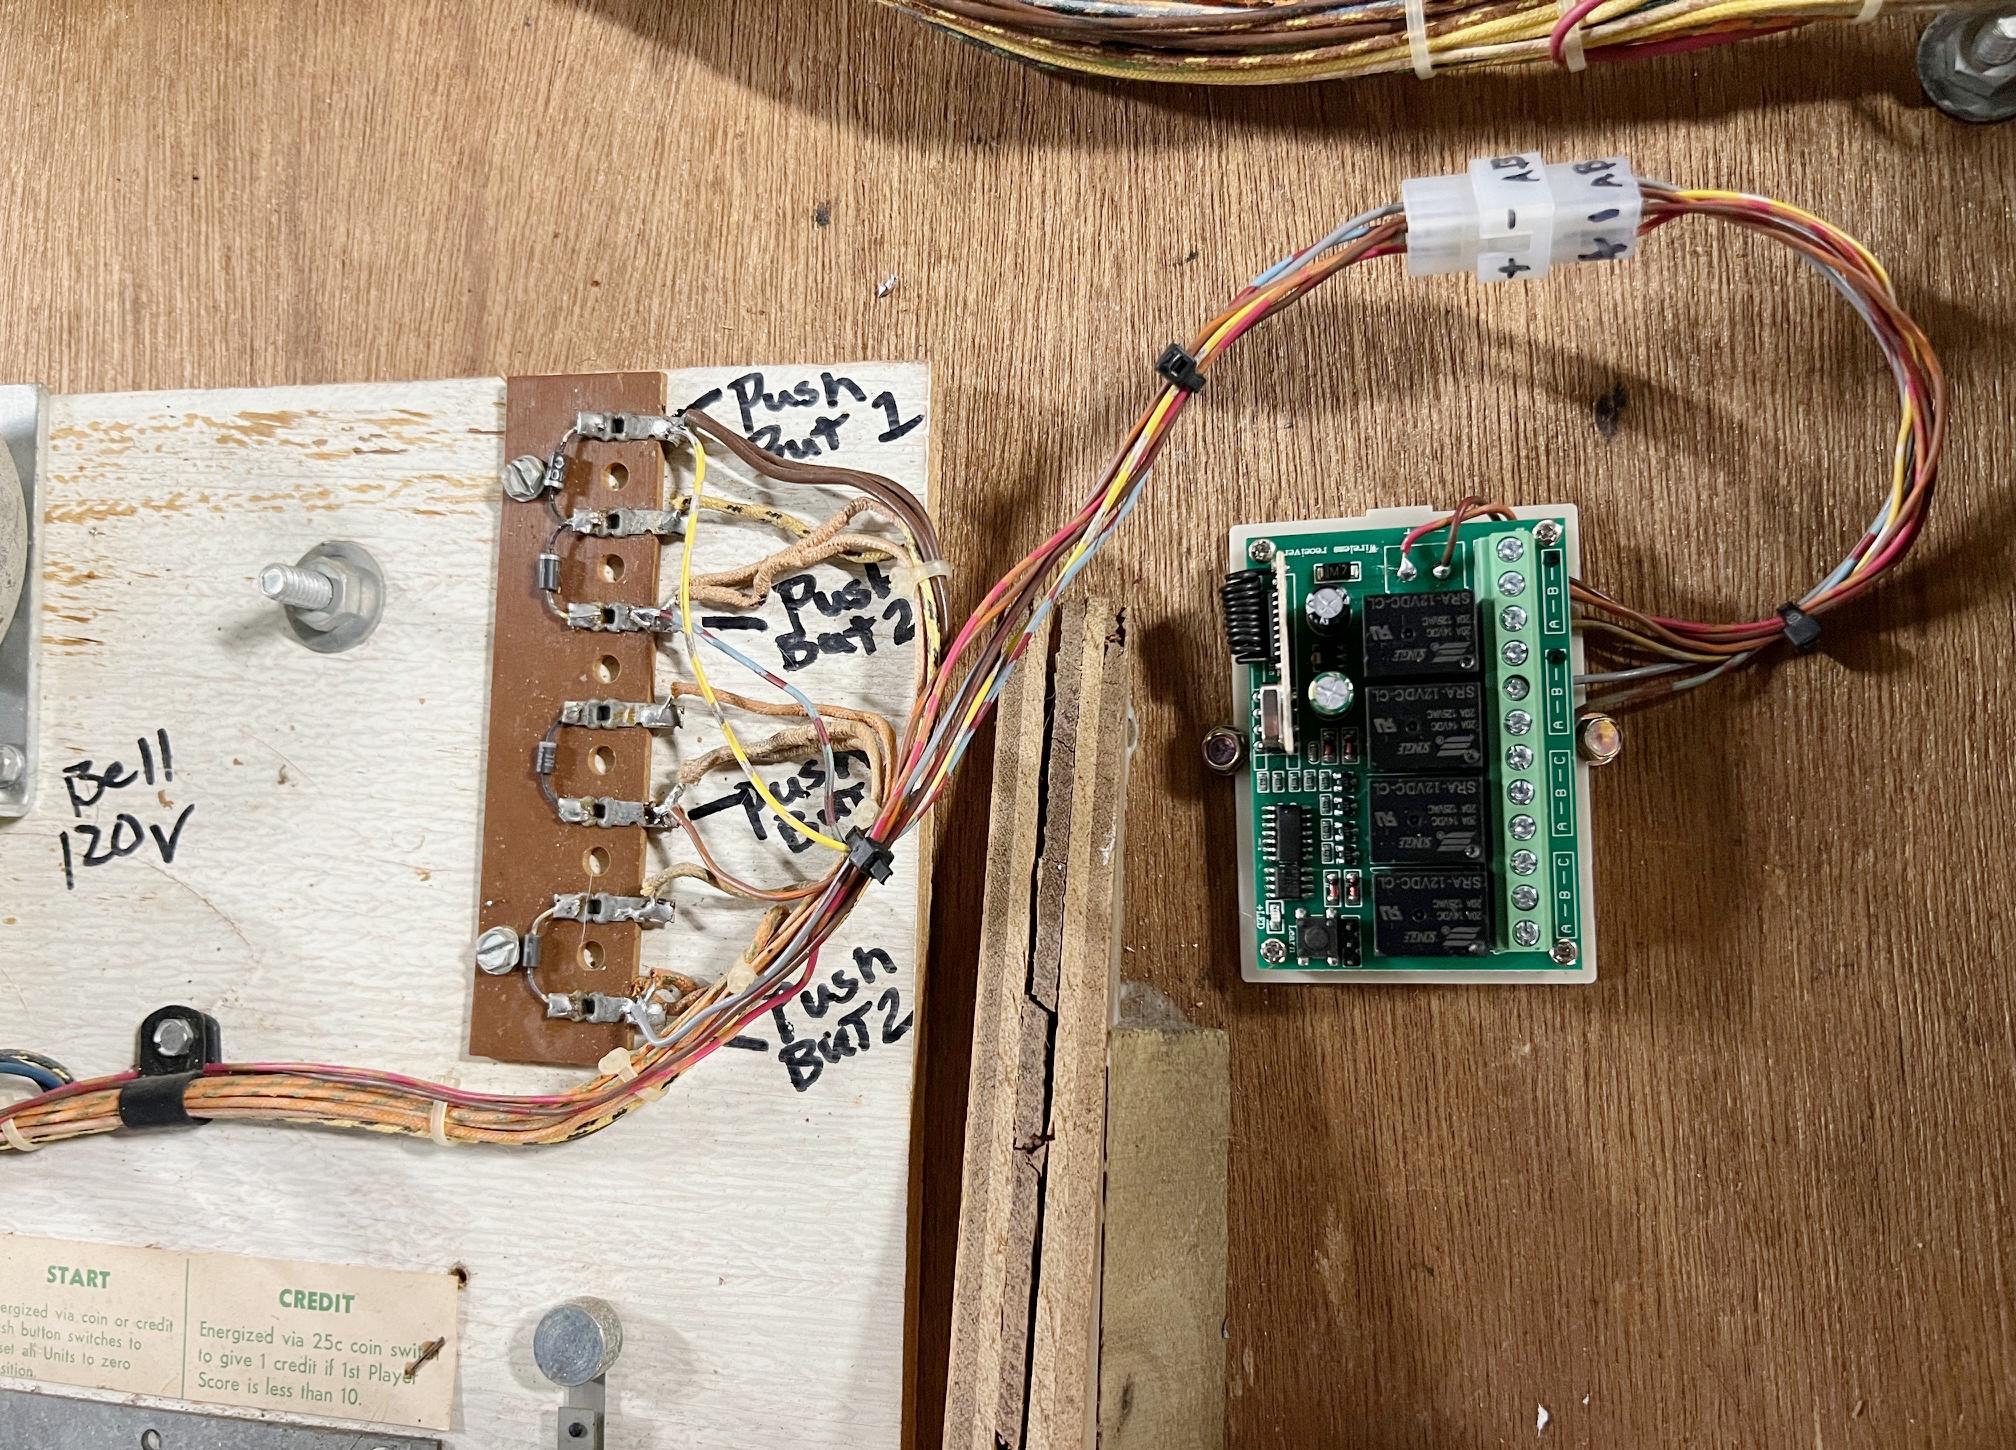
The new Remote control board powered from the Black and Yellow (center tap) wires giving 12volts.
The connections for the player controls are on the diode terminal strips to the left of the new remote board (Midway Golf Champ.)
Amazon remote key fobs taken apart. The clear tape with the metal slugs needs to be remoted,
and wire soldered to the circular pad. These go to the momentary switch for the remote.
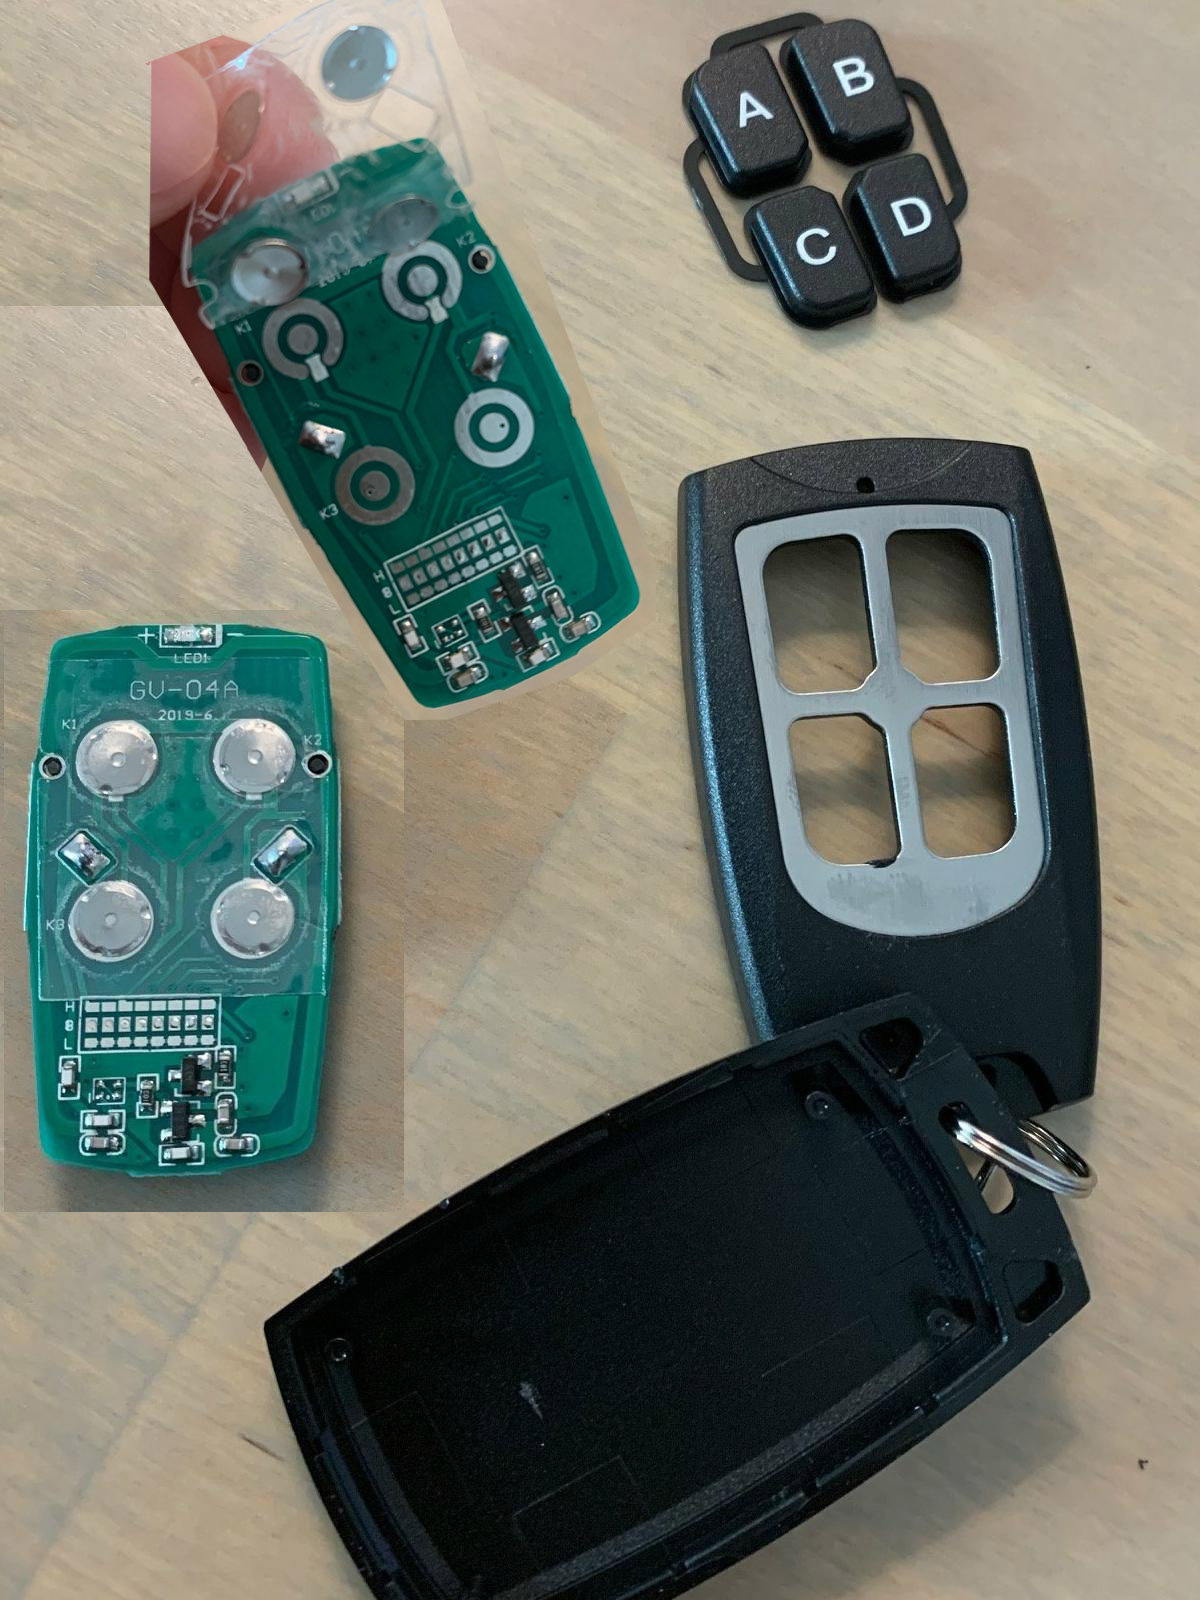
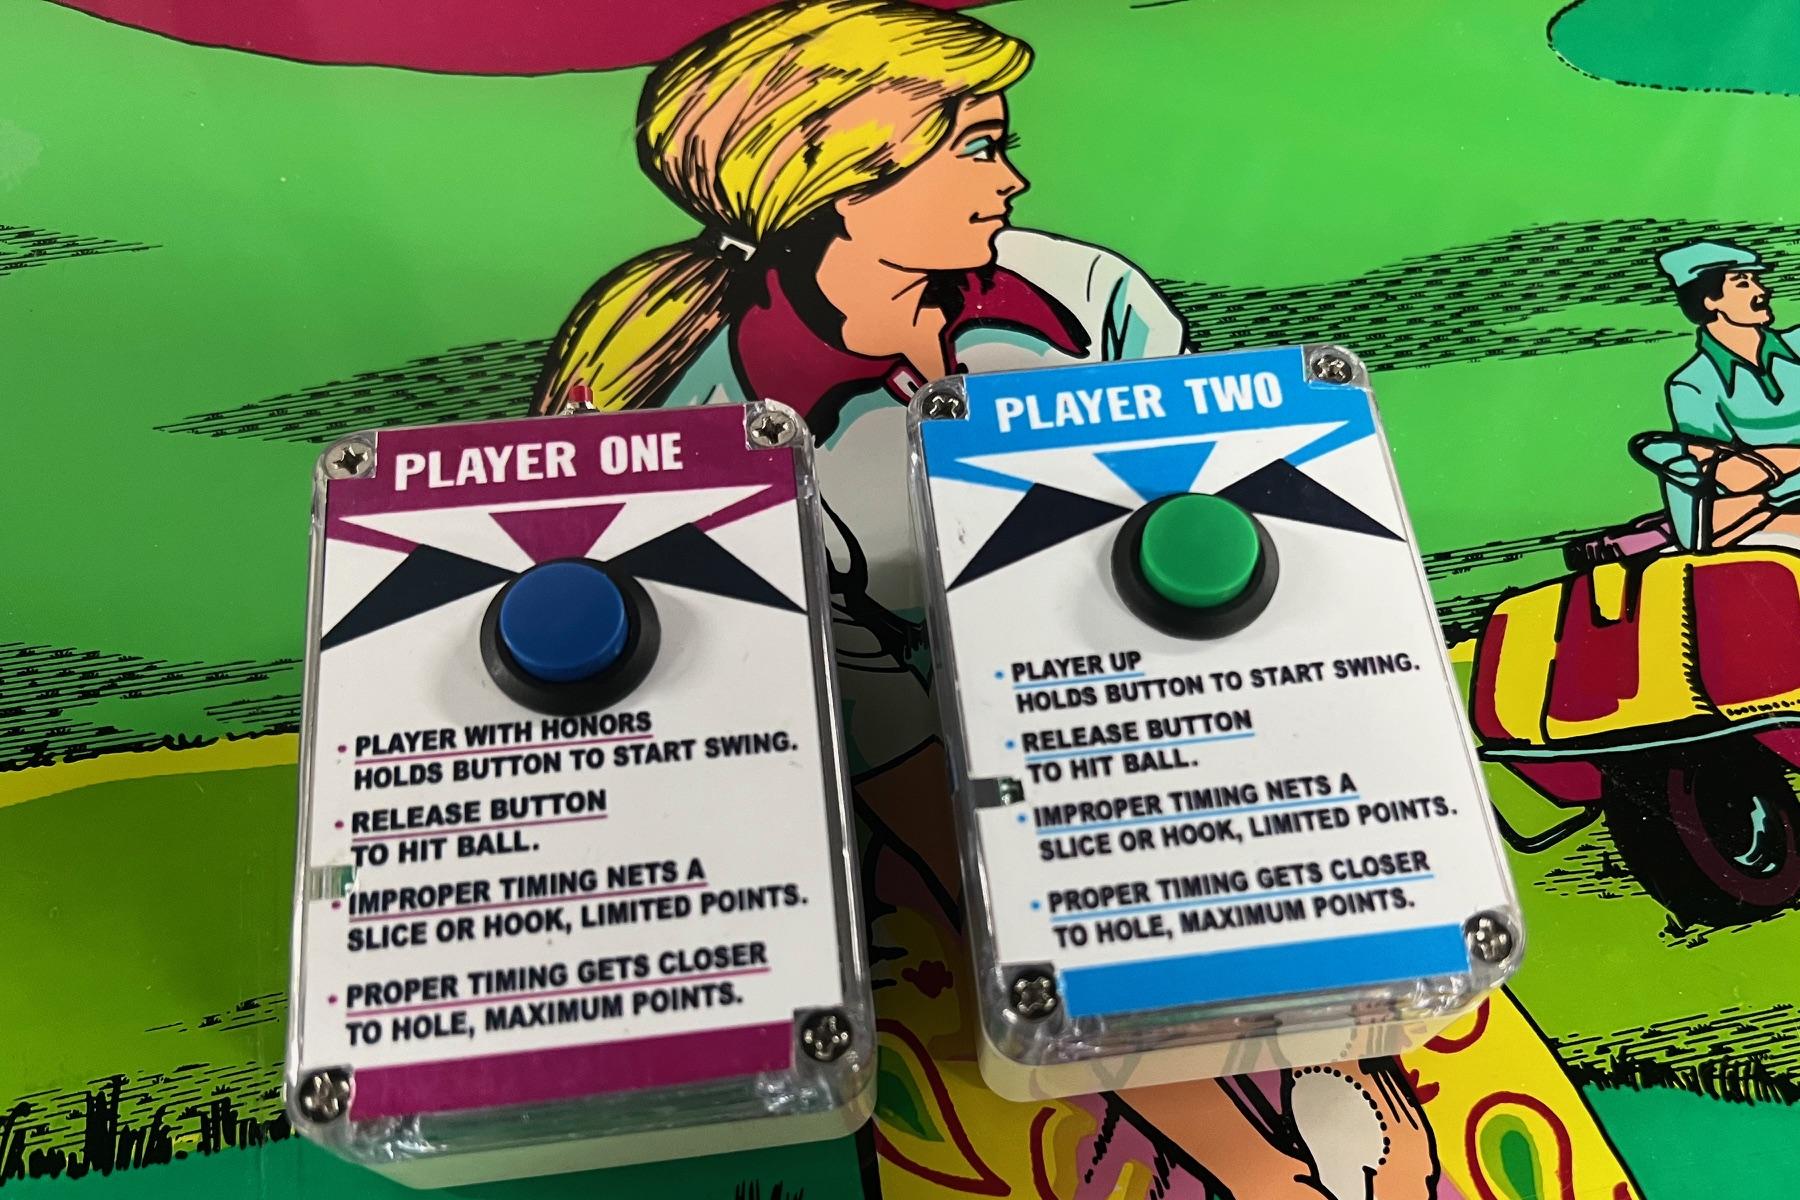
New remote control boxes for Midway Golf Champ. The Amazon remote key fobs are mounted inside the boxes.
Notice the start button on the top of the player1 remote.
Midway Golf Champ showing installed MP3 player, new remote board, amd Timer board. Stock Midway Vibration switch
(which the timer board utilizes) also shown.
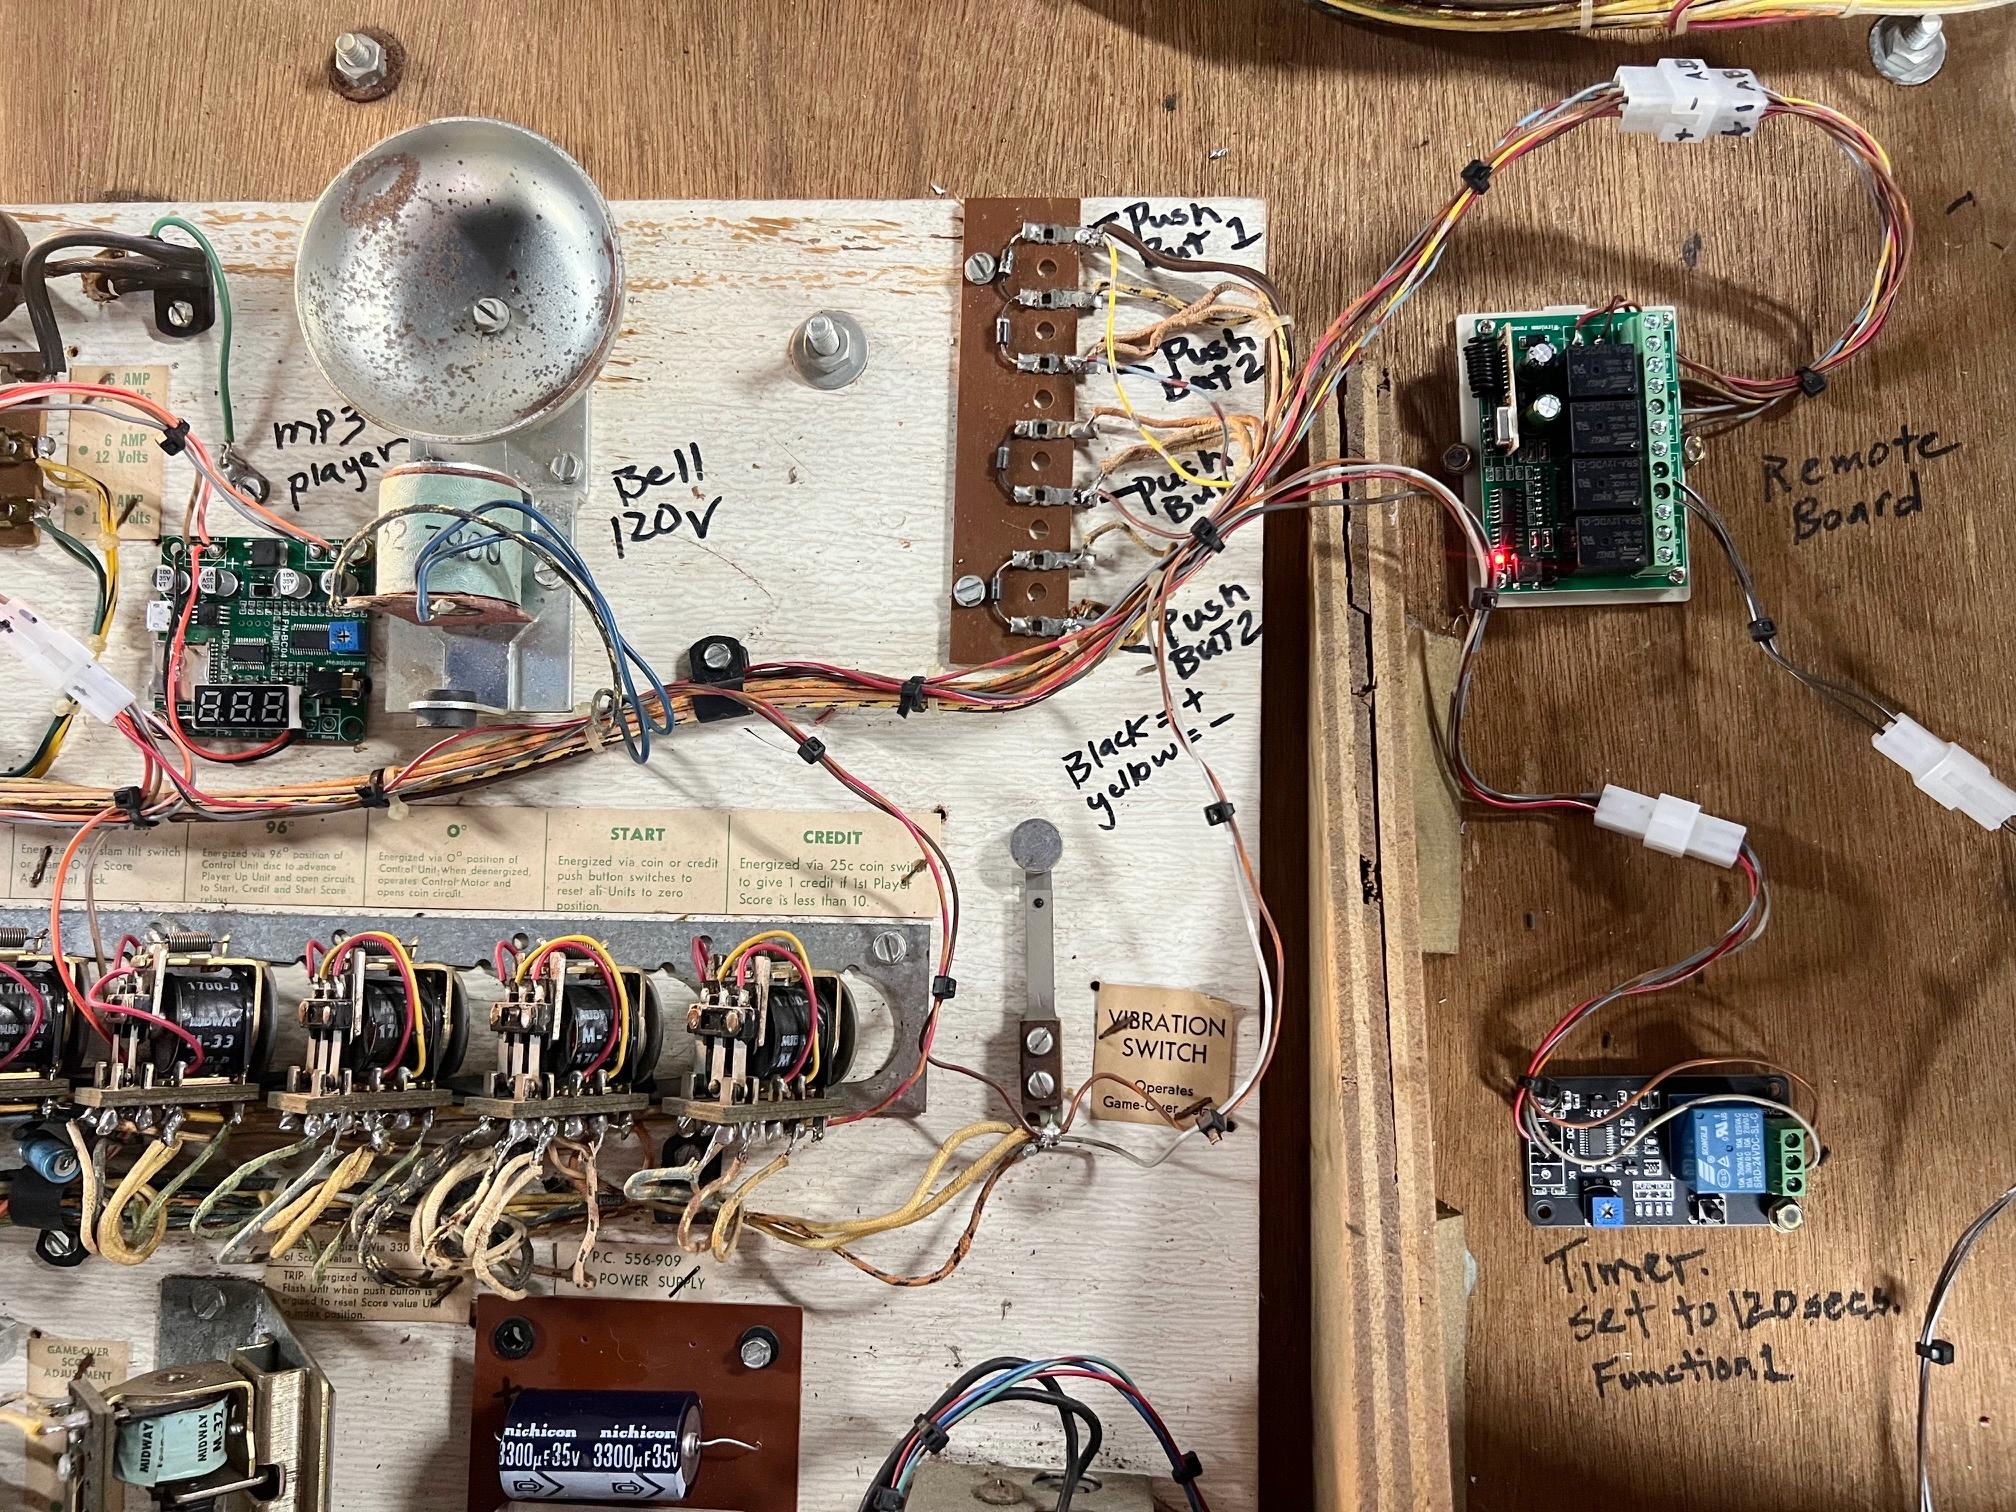
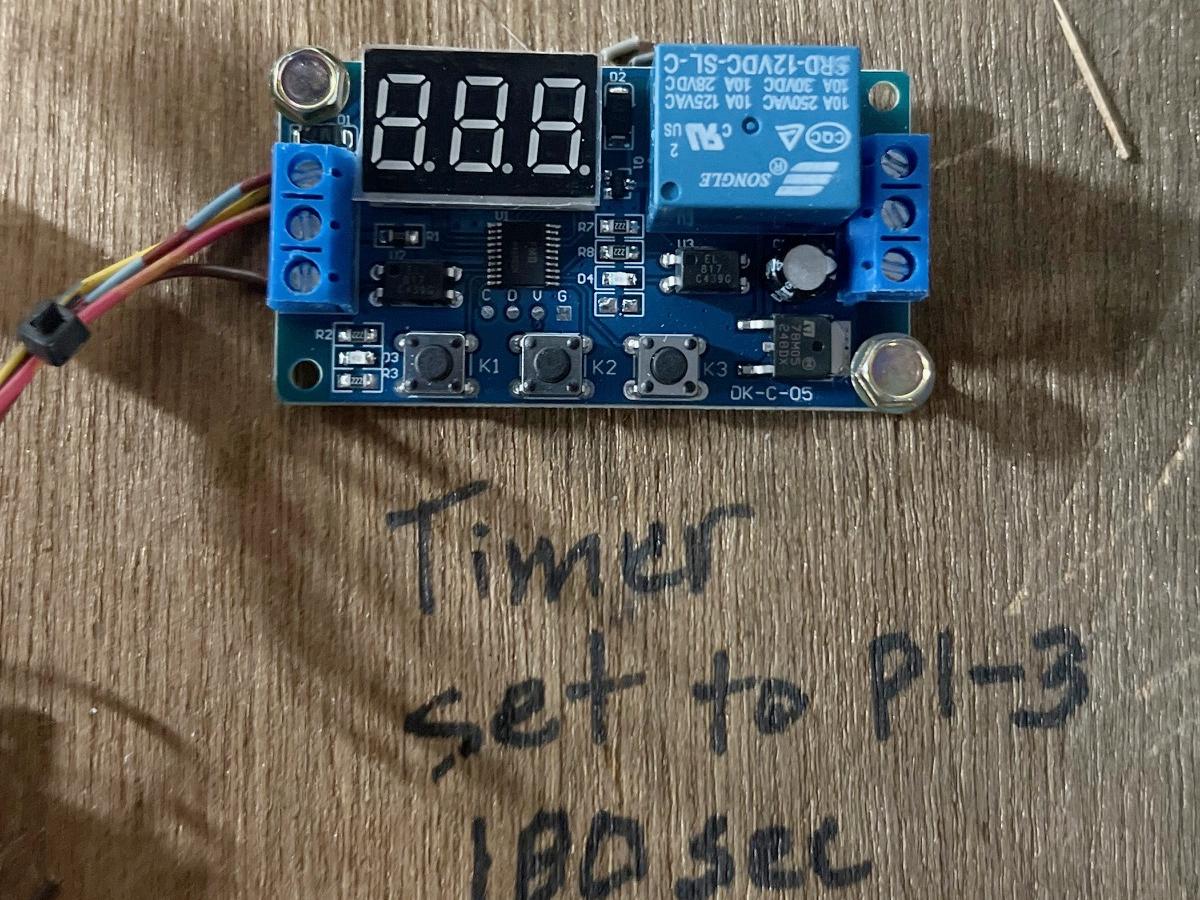
Here's a different timer board (ebay) that is nice in that it has a countdown LED display for the time.
This one needs to be programmed as "P1-3" and set to 180 seconds. The relay has NO contacts that
connect to the Vibration Tilt switch, same as the other timer board. Also uses the MP3 power for this one too.
Works very well, but is a bit difficult to program. This timer version allows a wider range of game time.
|
* Email the collector cfh@provide.net * Go to the EM Arcade History index * Go to the Pinball Repair/History index |