(Example used: 1971 Gottlieb 2001) by cfh@provide.net, 01/02/08. Copyright 2008 all rights reserved. For hardcore pinball restorers only. This document is part of the Pinball Restoration document. Update of this document are available at http://pinrepair.com.
I bought this game from my buddy Rick for $250. It's a very cool single player EM Gottlieb wedgehead with *20* drop targets (two banks of ten targets each). Gottlieb only made two games with this many drop targets, the Gottlieb 2001 (replay) and it's sister game Gottlieb Dimension (add-a-ball) in 1971. I was really looking for the 1971 Gottlieb Dimension, but when this Gottlieb 2001 came up for sale locally, I knew I had to have it. Unfortunately the game was pretty trashed. Rick got the game for next to nothing, and there was a good reason for that - it needed a TON of work (as you will see). Besides the playfield being very worn (76,000+ plays on the meter), the game had lots of other electrical and missing/broken parts which needed work. For the purpose of this document, only the playfield paint restoration will be covered. Note this isn't the only way to do this, but in the end it worked out pretty well. My objective was to have a playfield that did not look like it was touched up and clearcoated (well, didn't scream it at least). This is unlike say the work that professional restorers do (like HSA and Playfield Renovations) - these just scream "clearcoated", a look which I really don't like, as it looks out of place and stupid on older EM games. The objective is to not make the playfield look "unnatural" in a 30+ year old game. Note the pictures are very big in this document, bigger than in the normal repair guides.
|
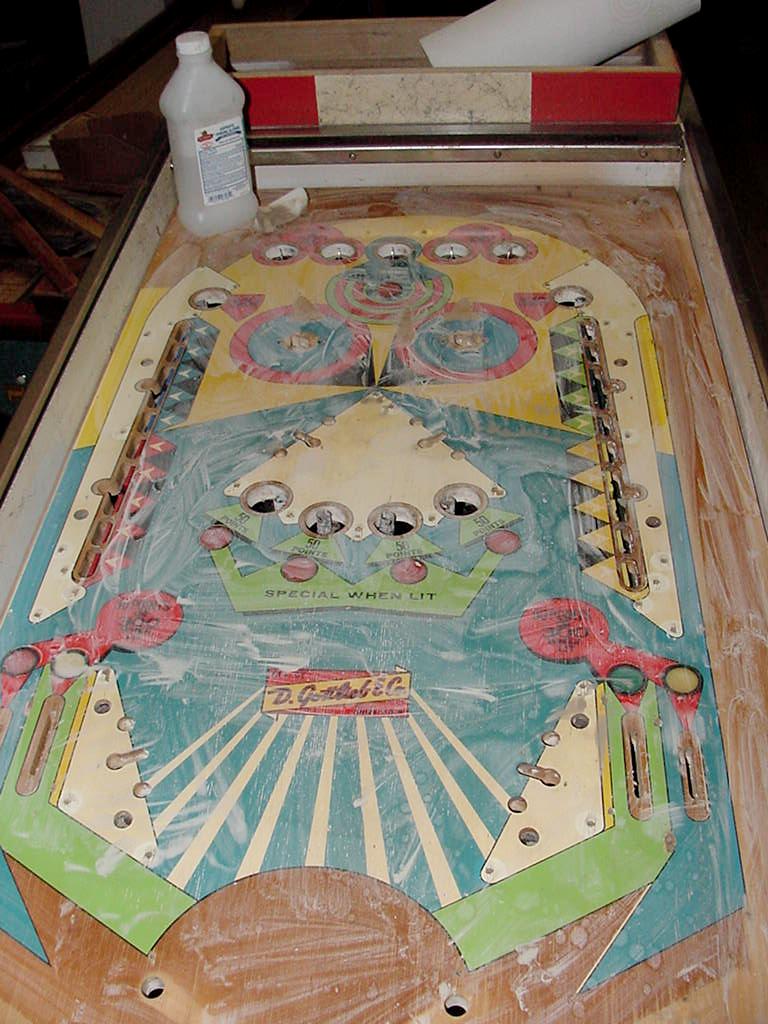
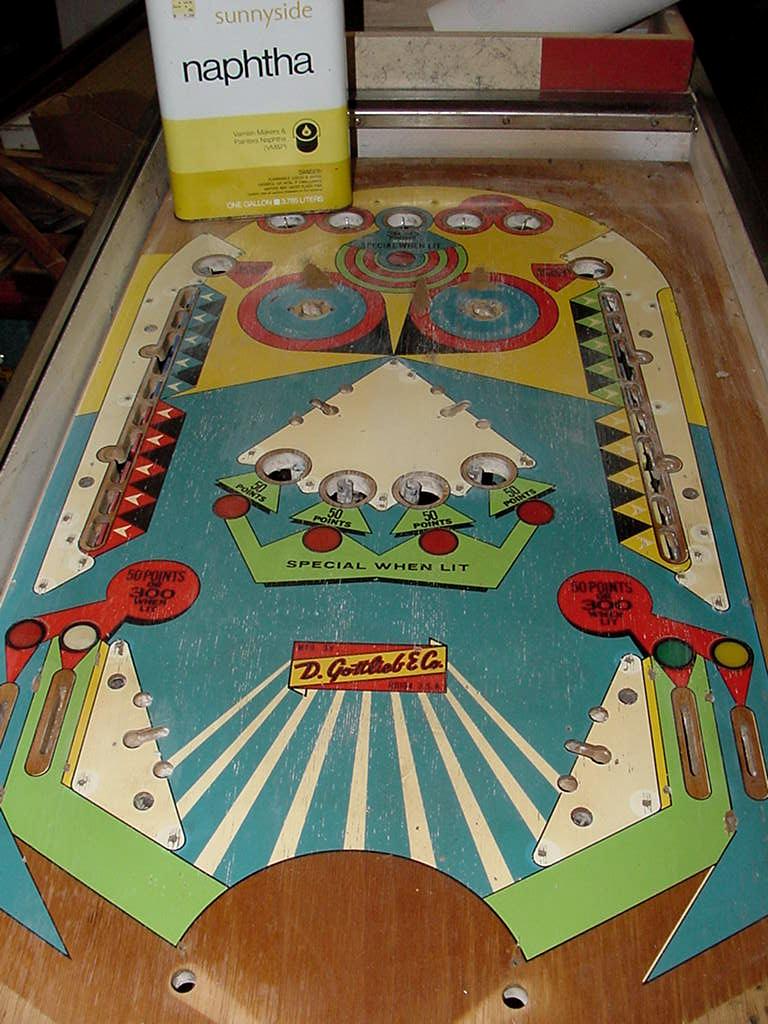
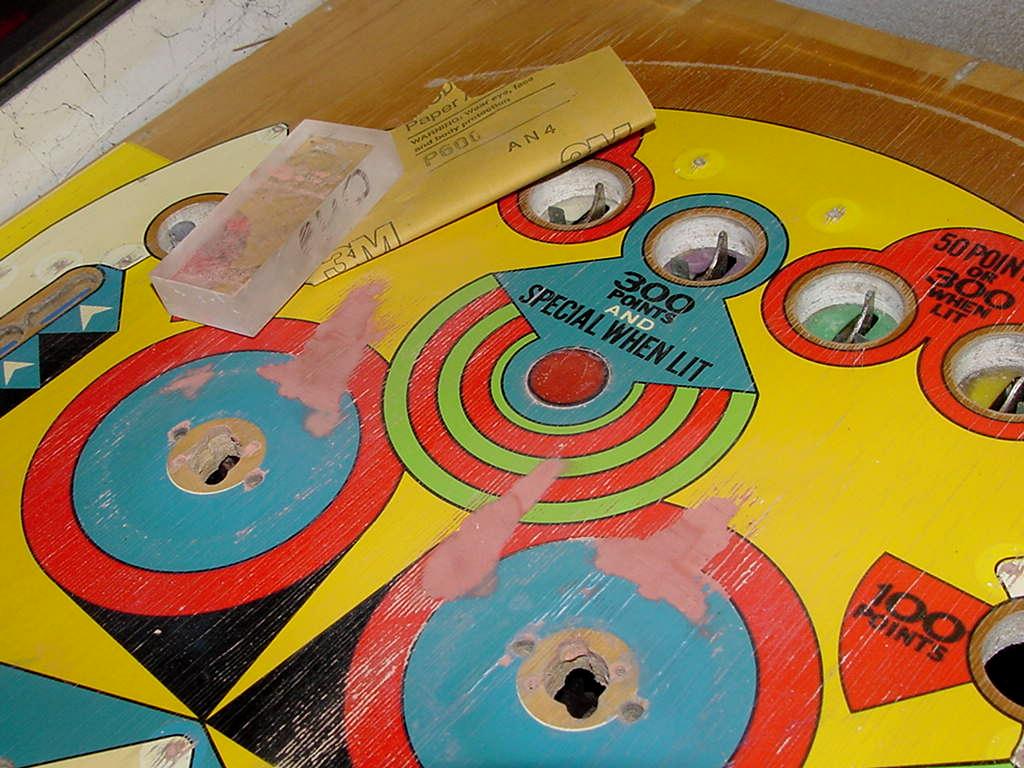
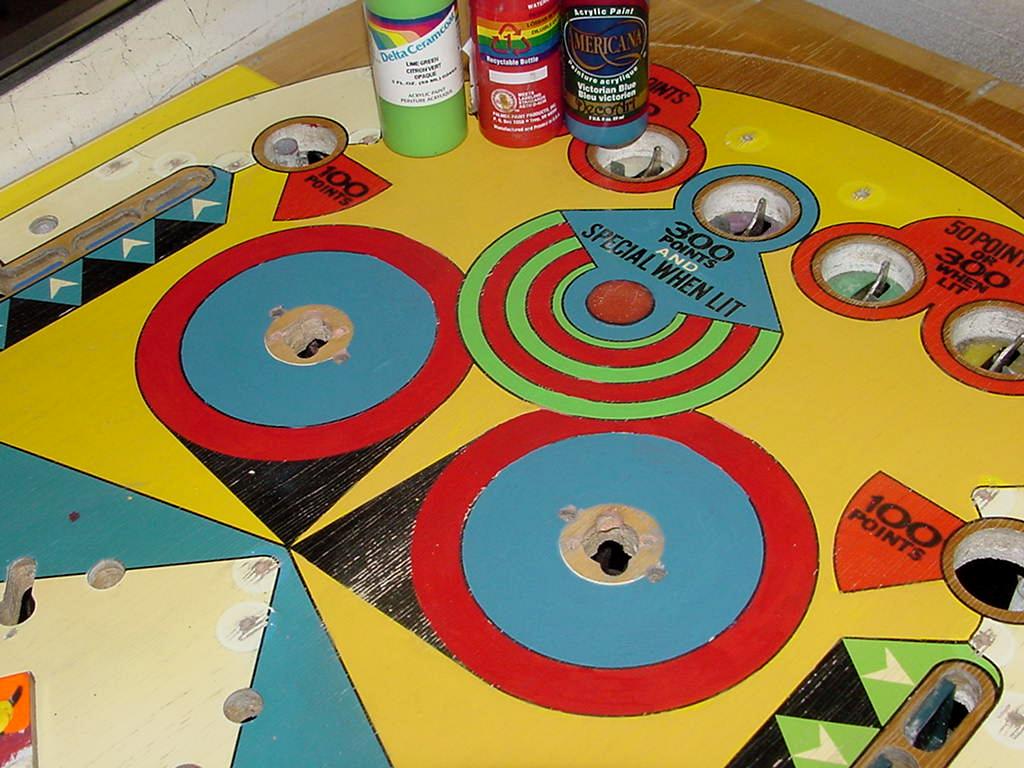
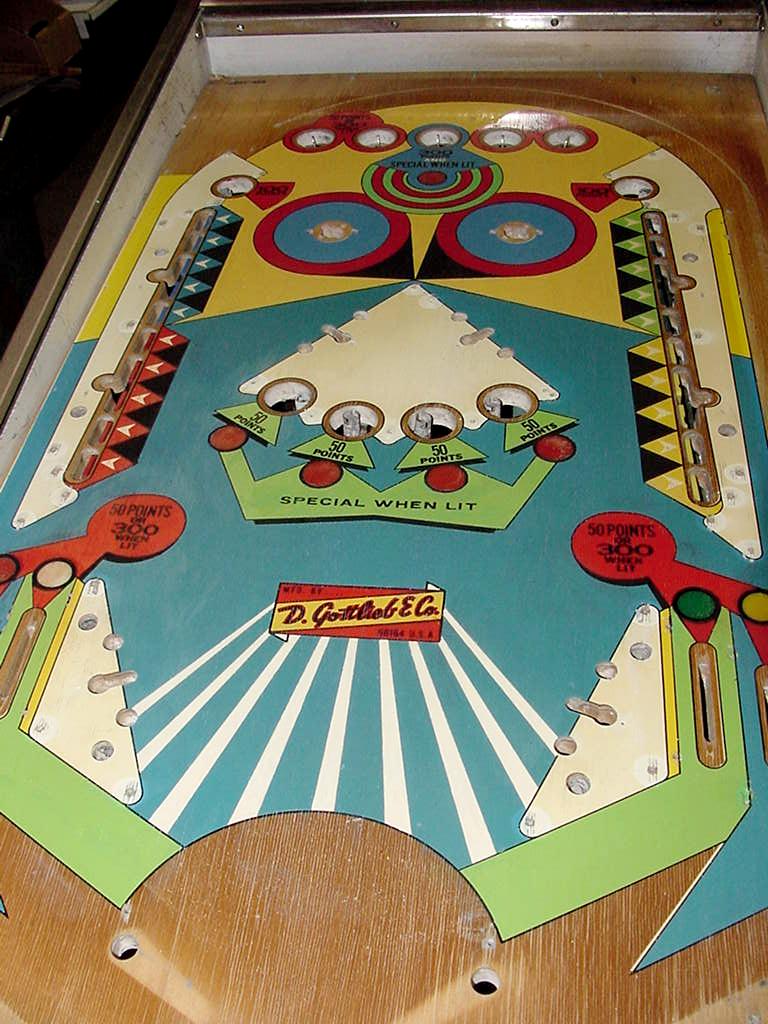
| Here's the playfield as I received it, minus the playfield parts. I removed all the plastics, posts, metal guides, flippers, pop bumpers, side rails, and other parts. The playfield needs to be completely free of all this, as it will only get in the way during the touchup and clearcoat process. |
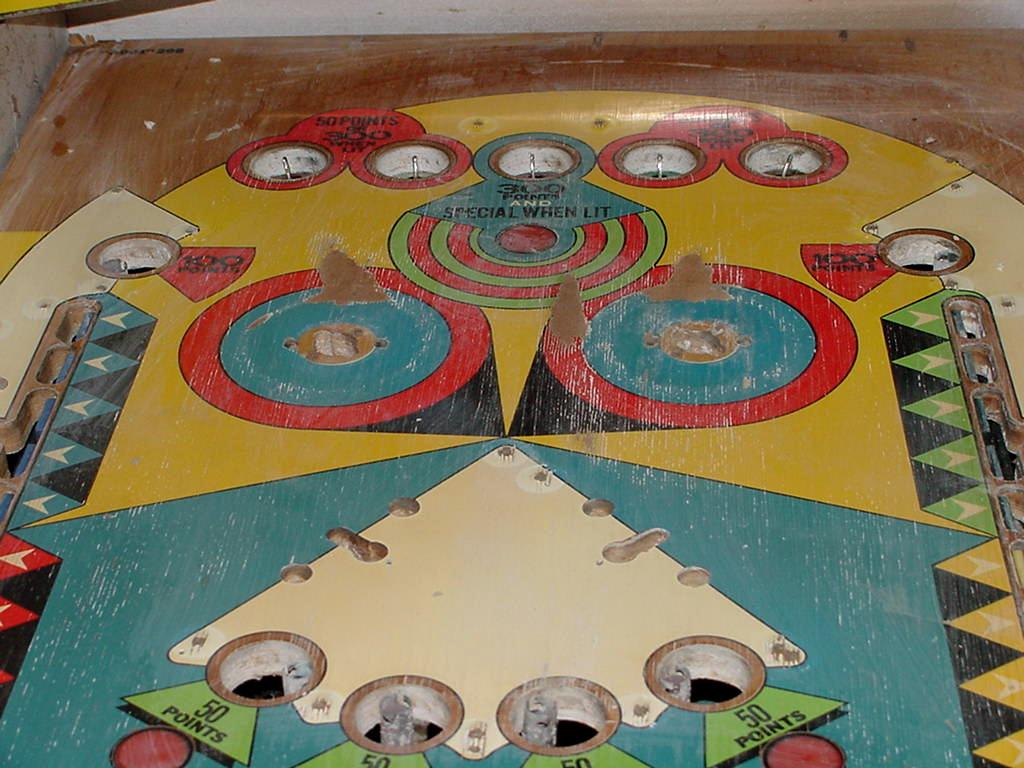
| The wear from the five kickout holes can really be seen here. Also notice the "planking" on the playfield (the vertical grain lines that show through on really worn playfields). Planking happens a lot when playfields are cleaned with water based liquids, and the grain raises, leaving cracks in the finish. It also happens when the humidity swings from wet to dry (the wood expands/contracts due to humidity changes at a different rate than the lacquer playfield coating, which causes the cracking in the lacquer playfield finish.) Add to this some 76,000 plays, and you get this kind of wear as the ball travels over the raised grain areas of the PF. |

| The planking can really be seen here. The worst part about this is the FEEL of the playfield - it feels worse than it looks. The planking leaves ridges in the wood, and this will make the game play awful, so it needs to be addressed. |
|
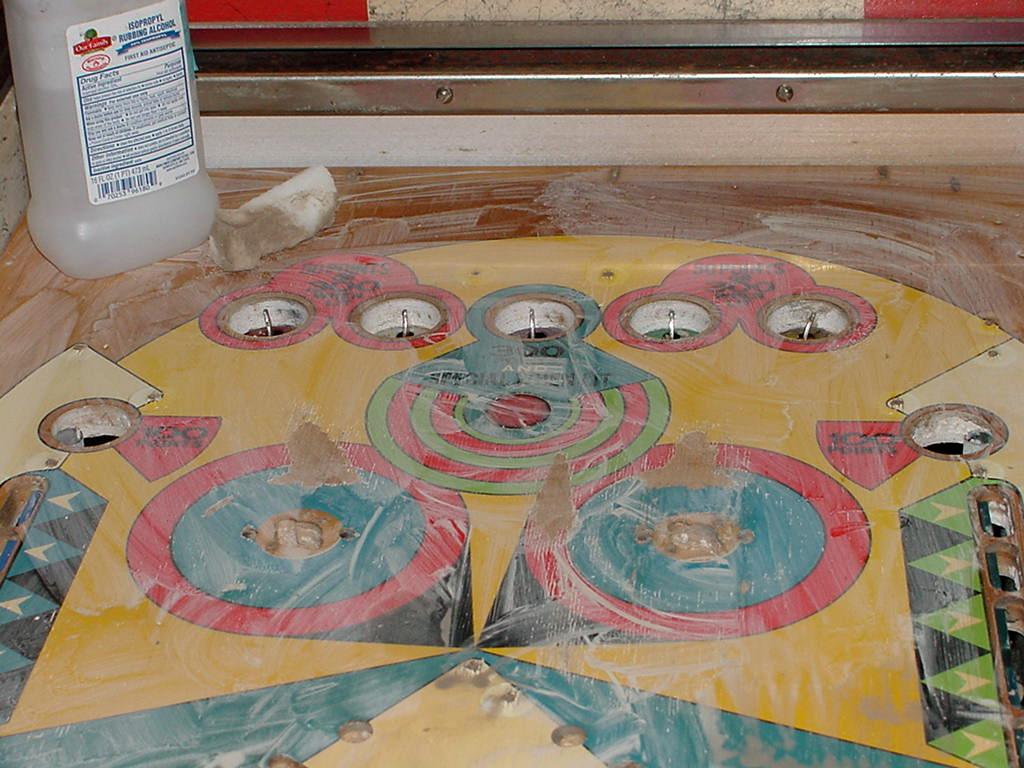
Here I'm using Melamine Foam (Magic Eraser) and 92% rubbing alcohol to clean the playfield. This will also remove a lot of the contaminants from prior playfield waxing and cleaning. It also will get out the deep dirt. Just note though that it's very easy to remove what little playfield paint is left with the Melamine foam. (Go easy and slow.) The white haze left from the Melamine foam will clean off in the next step. |
|
Now Naptha is used to clean off the Melamine foam's white haze. It also helps clean off any old wax and contaminants, so the Naptha cleaning serves a dual purpose. |
|
Next I use Novus2 to really clean the playfield. This is purely optional though, as it really gives the playfield too much gloss for good touchup paint adhesion. But I like to do this because it gives me a better idea of how much paint work the playfield is really going to need. To me, the playfield is almost usable without any touchups, if you can get past the nastly Planking and kickout hole wear by the pop bumpers. Note I don't use 600 grit sandpaper on the playfield before touchups. Heck this playfield has enough paint loss, I don't want to add any more! But the real reason I don't use the 600 grit is I find it easier to touchup a Novus2'ed playfield (with slight gloss), rather than a playfield that is dull - it's just easier for me to see the playfield defects. |

|
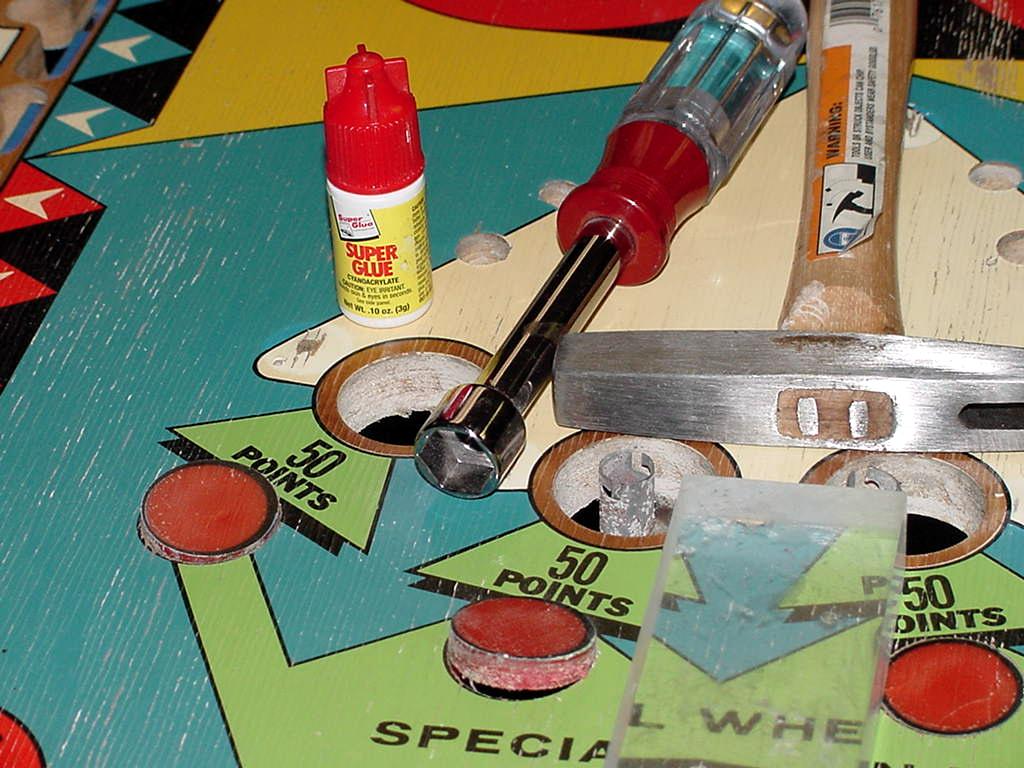
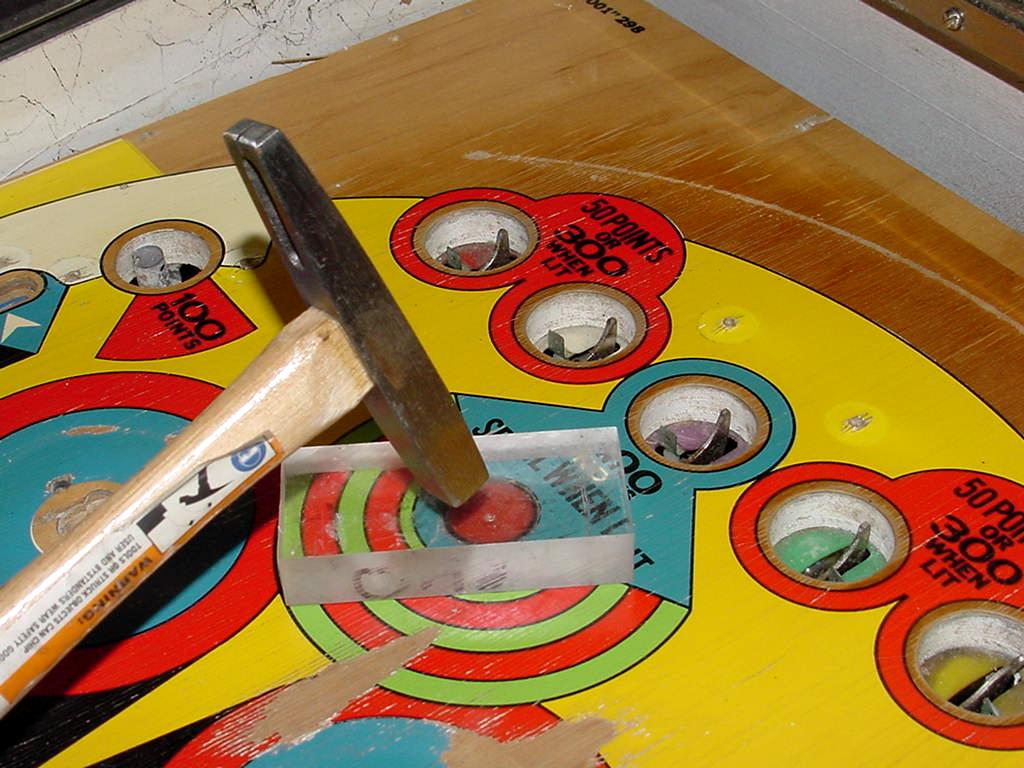
Before doing any touch up, it's time to level the light inserts. The plastic inserts tend to shrink, and become lower than the playfield finish. This makes the game play strange, as the ball can actually get stuck in the inserts. It also causes the wood/finish around the insert to wear. So I remove all the playfield plastic lens inserts and reseat them to be level with the playfield surface. To do this I use a nut driver or a metal socket from the underside of the playfield, and gently knock the inserts up and out of the playfield. If one won't come out with a few gentle blows, I use a hair dryer from underneath the playfield to heat the insert. Again a few hammer blows with the nut driver or socket, and the lens usually pops right out. If the inserts are cupped (con-cave), i sand them flat (assuming they don't have any text on them, which these don't.) I then reglue the inserts with Gel Super Glue. An acrylic block is used to make sure the insert is level with the playfield surface. |
|
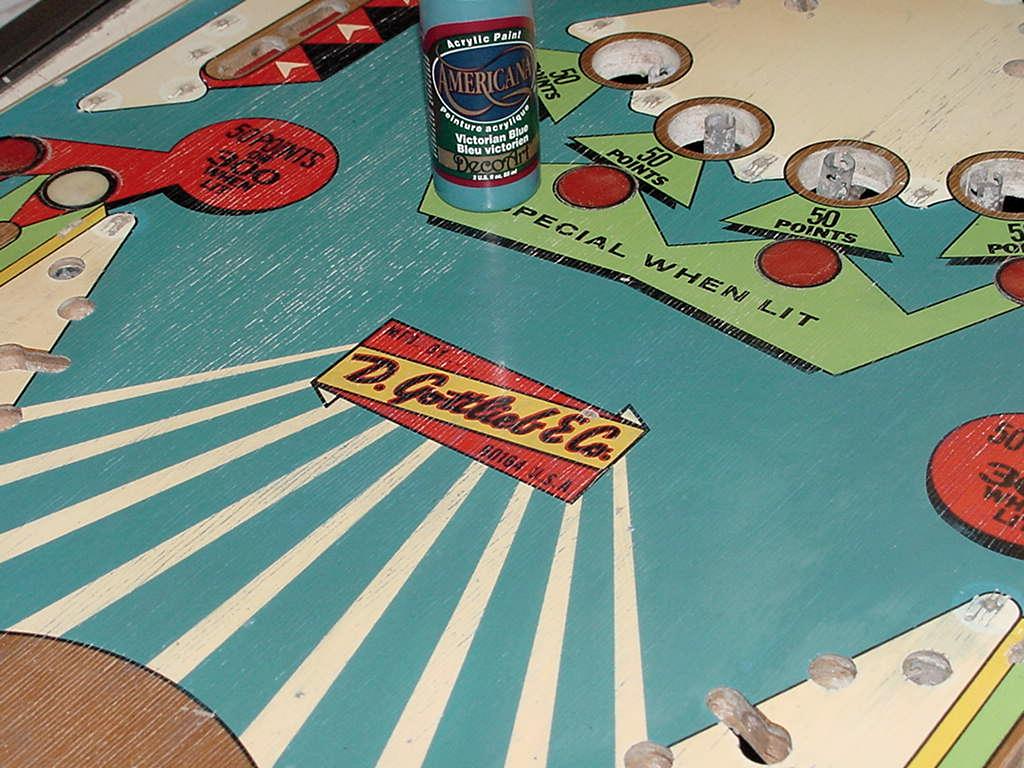
Now I can start the playfield touchups. Normally you should start "inside and work out" (start in the inside most touchups, like the blue interior pop bumper rings). But for some reason I did just the opposite and worked "outside in"! (Not recommended.) Here's a close up of the blue planking around the flippers. There are two ways to fix this. First would be just to repaint the entire area with a (close) matching color. I didn't do that for some reason. Instead I used a second technique known as "paint and smear". This involves sloppy painting a matching blue, and then wiping it off with a clean dry rag or paper towel. This will leave the blue touchup paint in the low Planking of the playfield. The advantage to this is type of touchup is this: it's not precise. (That is, any hack can do this, and it requires little painting talent.) Also if the paint match isn't perfect usually that is Ok with this method. |
| Here's the blue area partially touched up with the "paint and smear" technique. It is working amazingly well! Note I am using Americana Acrylic water-based paints. I highly recommend these. I don't suggest using Testors enamel paints for this work, as there is no room for error. In the case of water-based acrylics, if I don't like my work, I can easily wipe it away with a damp rag. This can not be done with enamel Testors paint. Also the acrylics are inexpensive and available in hundreds of colors. |
|
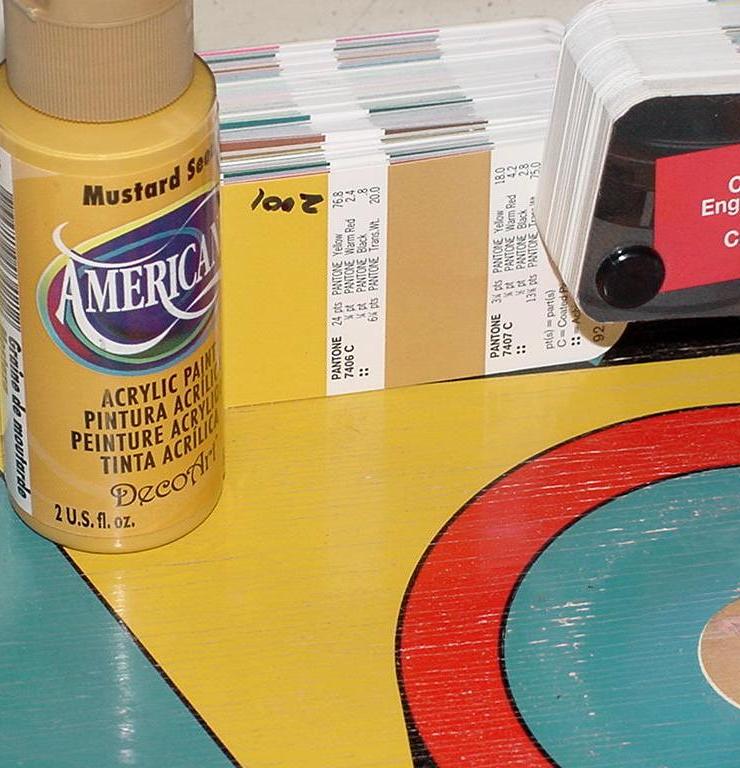
Are you wonding how I match colors? To do this easily, I bought a Pantone gloss (coated) color guide on ebay. I find the closest color match using the Pantone guide, and then take the guide to the paint store (Micheals Crafts). There I buy the closest color match I can find. Note I always try and use Americana or Palmer acrylic paints, as the other brands like Apple Barrel don't cover well (they seem to have less pigment). I have gotten so anal about colors, I have ended up buying ALL the Americana colors available (over 250). That may sound like a big investment in paint, but it really isn't. |
|
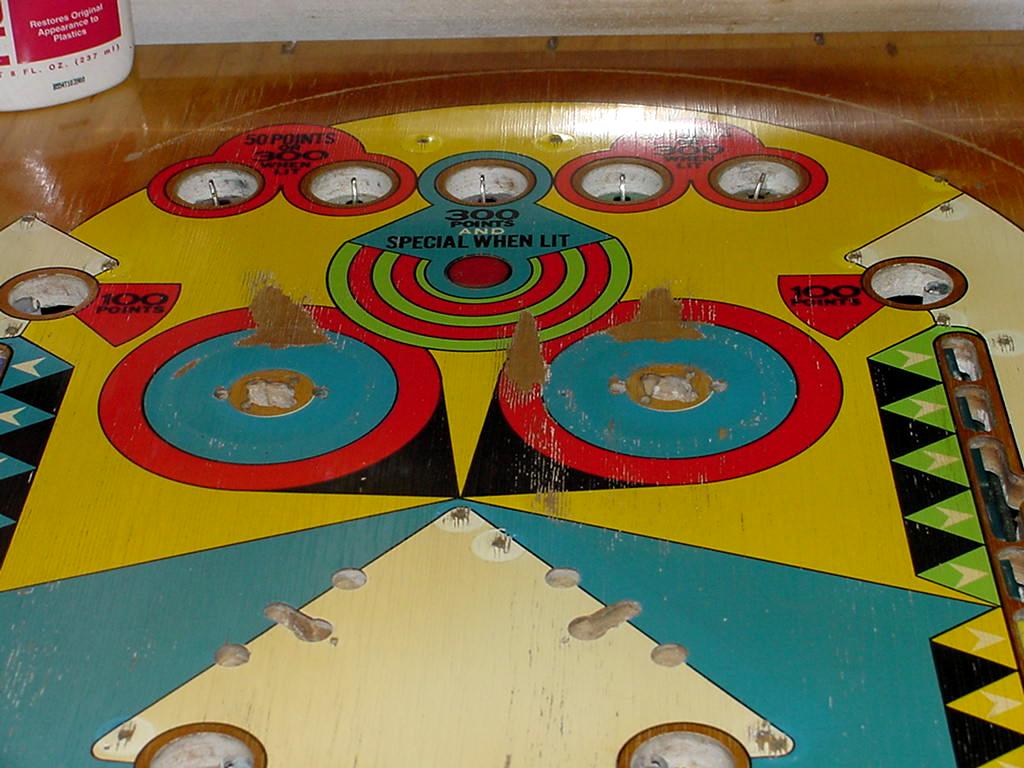
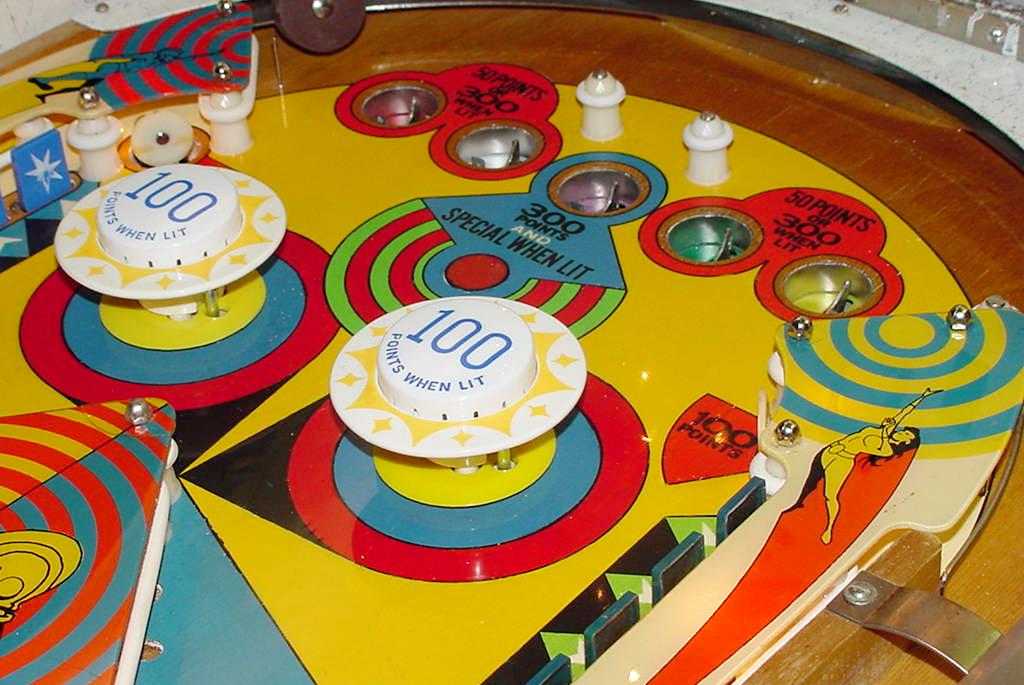
Here I'm touching up the pop bumper areas. I have three colors picked out for this task (yellow, blue, green - there's no worry about matching black, and black is black). The touchup paint covers the Spot Putty areas very well. I'm not being too careful around the black lines, as I will touch those up last. Sometimes they won't require much touch up, but just some "tweaking". I use an Exacto knife to remove any "over paint" onto the black "key line" area edges. This saves me from doing more black touchup than I really need, and makes the transitions between colors much sharper and crisp. |
|
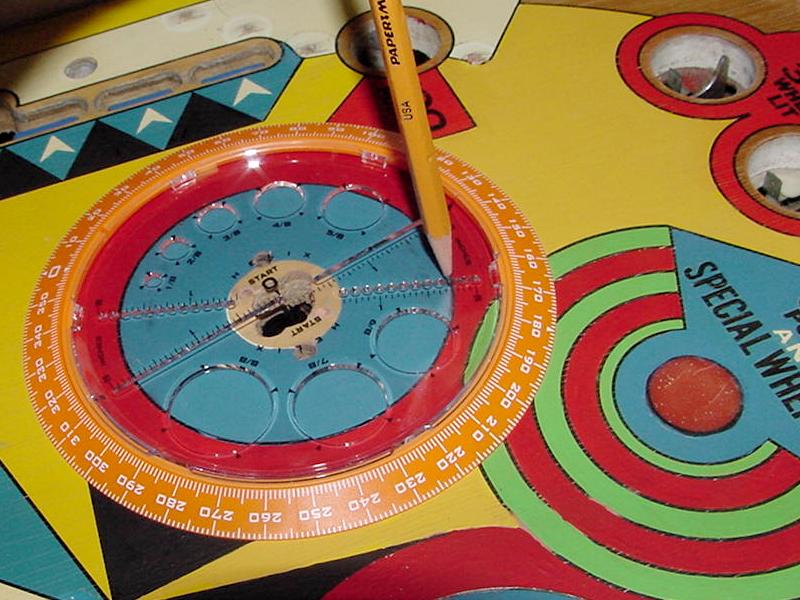
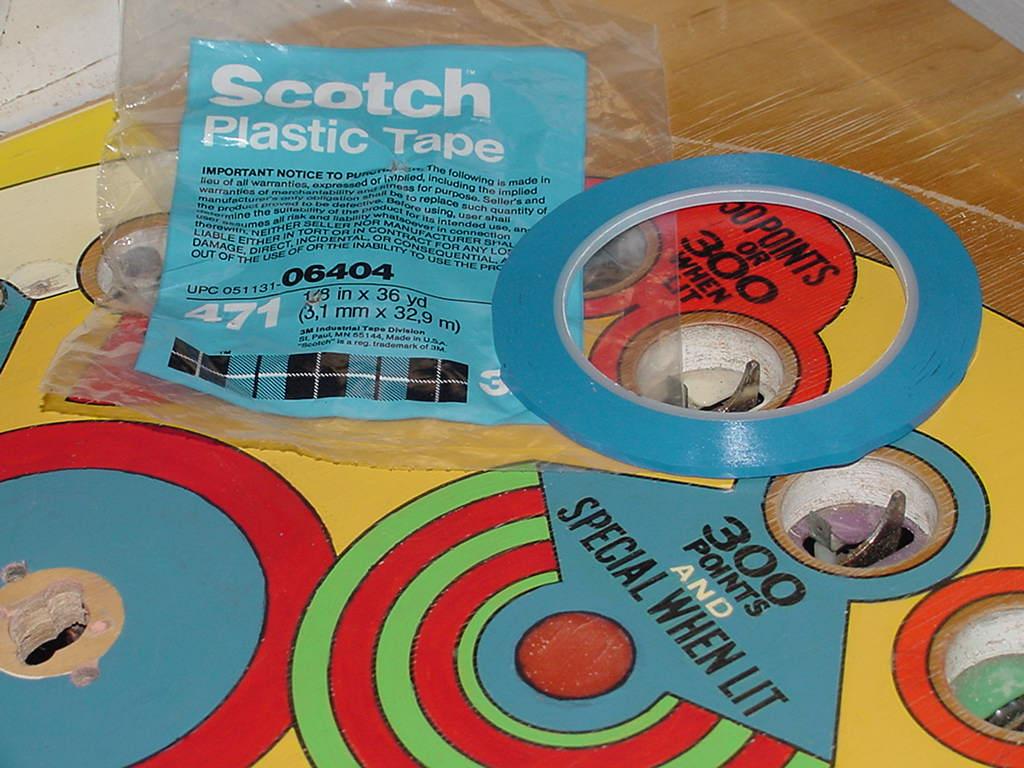
In the case where I must re-paint the black "key lines" between colors (here in the pop bumper area), I use some guides to make this easier. This is a circle drawer. Using a #2 pencil, this puts down a perfect circle around the colors. This line will be re-painted in black. Now I use Scotch 1/8" wide pin-strip tape. This is a very flexible tape, and will mask off the areas I don't want black paint. Then I can be pretty sloppy about repainting the black inside the blue tape lines. Note after painting the black and removing the blue tape, sometimes the tape will pull up your outside colors. So a bit of touchup may be needed. |
|
All the black key lines are touched up too around each of the
playfield lamp inserts. Again because of inserts shrinking,
usually these black key lines around the lenses are worn.
A little black acrylic paint and a steady hand fixes this.
If you go outside of the original key line, don't sweat it.
Either wipe the paint off when wet, or
after the black dries, use an Exacto blade. The Exacto trick can make an
otherwise "drunk" line look pretty straight and clean.
(That is, I don't use the blue 3M pin stripe tape for re-doing the lamp insert
key lines.)
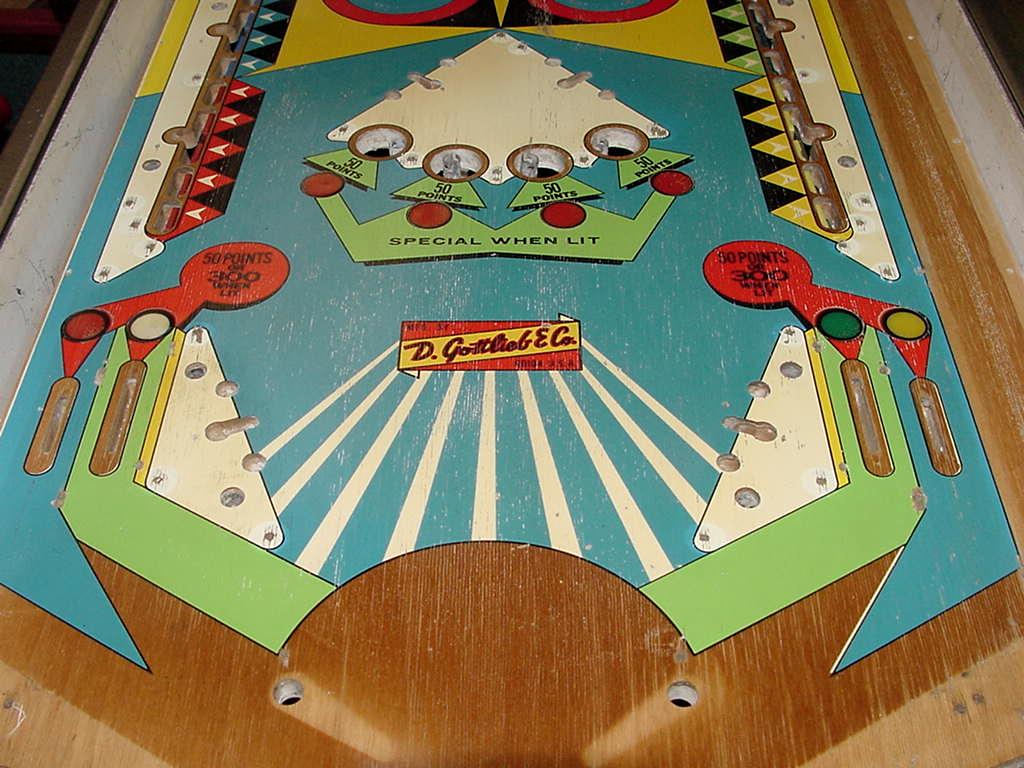
Now all my black lines and black areas are repainted. The touchup is complete, and ready for clear coat. Note I could have gone a step further, and repaint ALL the white areas (like in the center), which would hide color fade. But there are downsides to this type of approach, and it doesn't really help get the "look" I want for this playfield. I did however repaint the white "spokes" coming from the Gottlieb logo to the flipper area, and some of the white "arrows" in front of the drop targets. This gave better color contrast in these areas. |
|
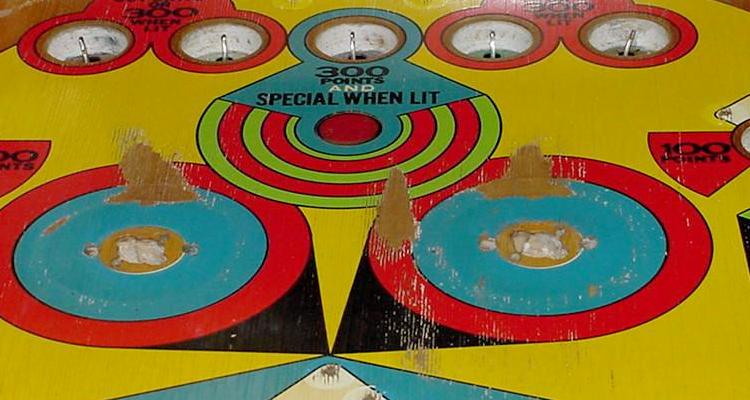
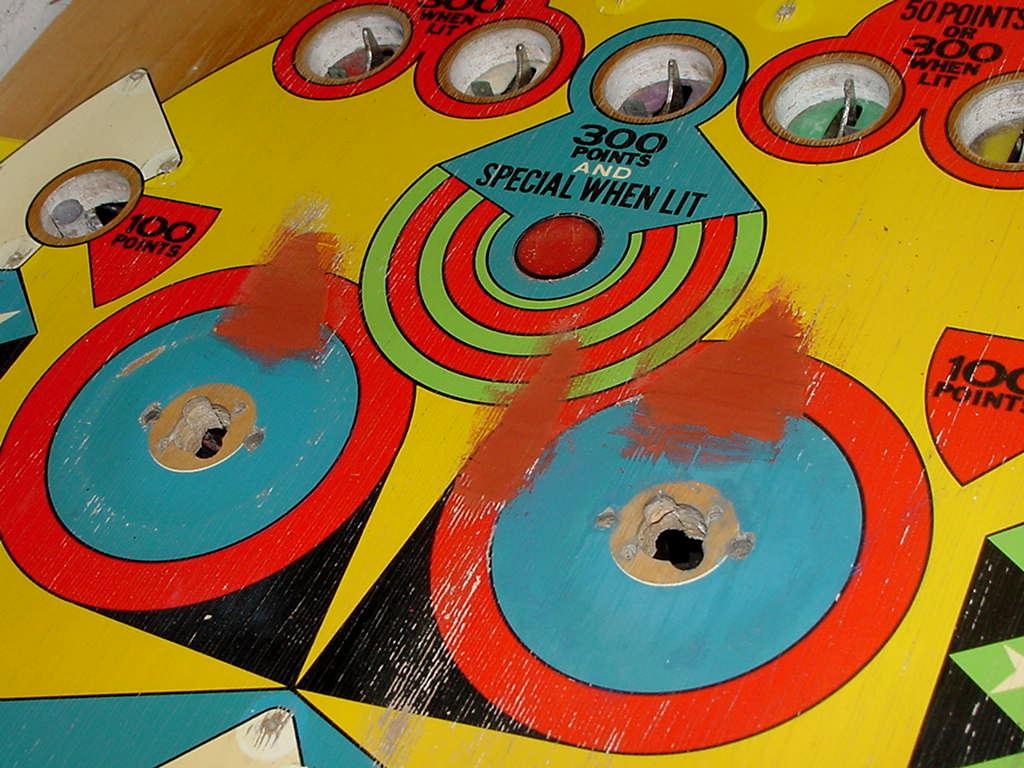
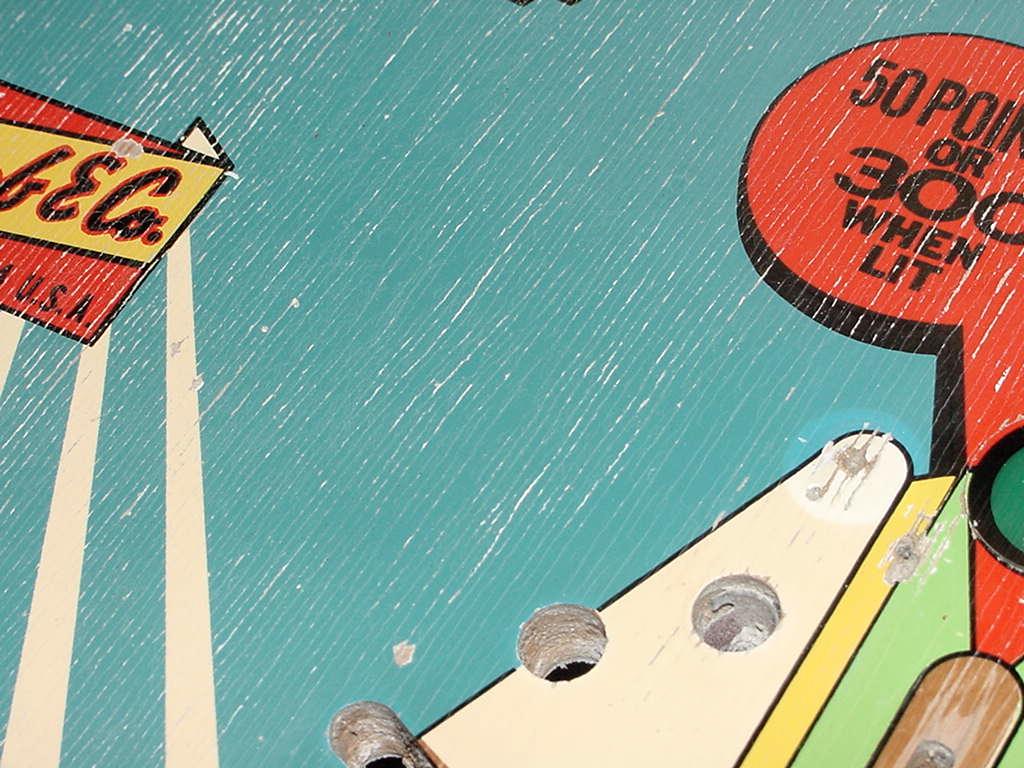
Notice I did make a mistake here though. I used the "paint and smear"
technique on the red areas (red is a very difficult color to paint match,
so the "paint and smear" technique works well for this as you don't need
a perfect color match to get a good touchup). Look around the side
"50 points or 300 when lit" areas, that I have red overcasts on the
blue surrounding areas. I should have cleaned this up better with a wet rag, or
gone over it with blue. Because this red haze did show up after
the final clearcoat. It's not real noticable, but I could have easily
fixed this if I had noticed the problem at the time.
Using a digital camera and looking at the pictures would have
identified this problem earlier!
Another thing I considered doing was repainting the natural wood area around the flippers with brown wood colored paint. I generally HATE doing that though, as it looks very fake to me. But it would have made the clearcoating a bit more smooth in this area and hid the Planking there. It would have also hid the discoloring of the old clearcoat underneath the flipper bats. But again, that's a HSA or PFrenovations trick, and one that I personally feel is a bad thing to do (I just don't like that look). |
|
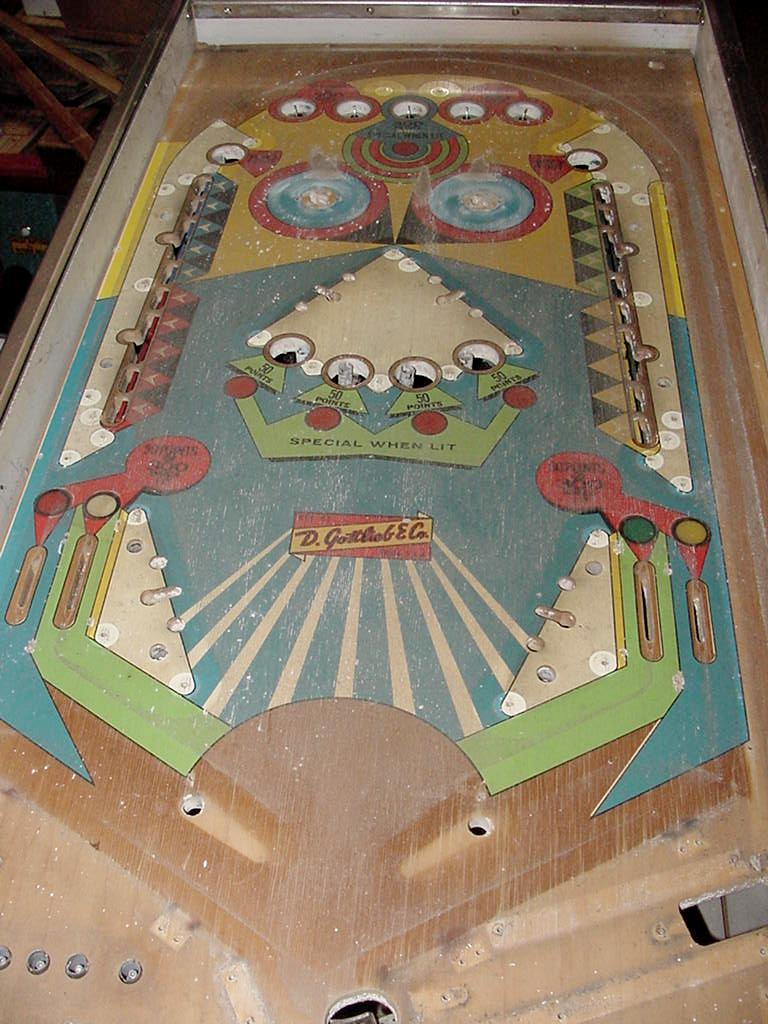
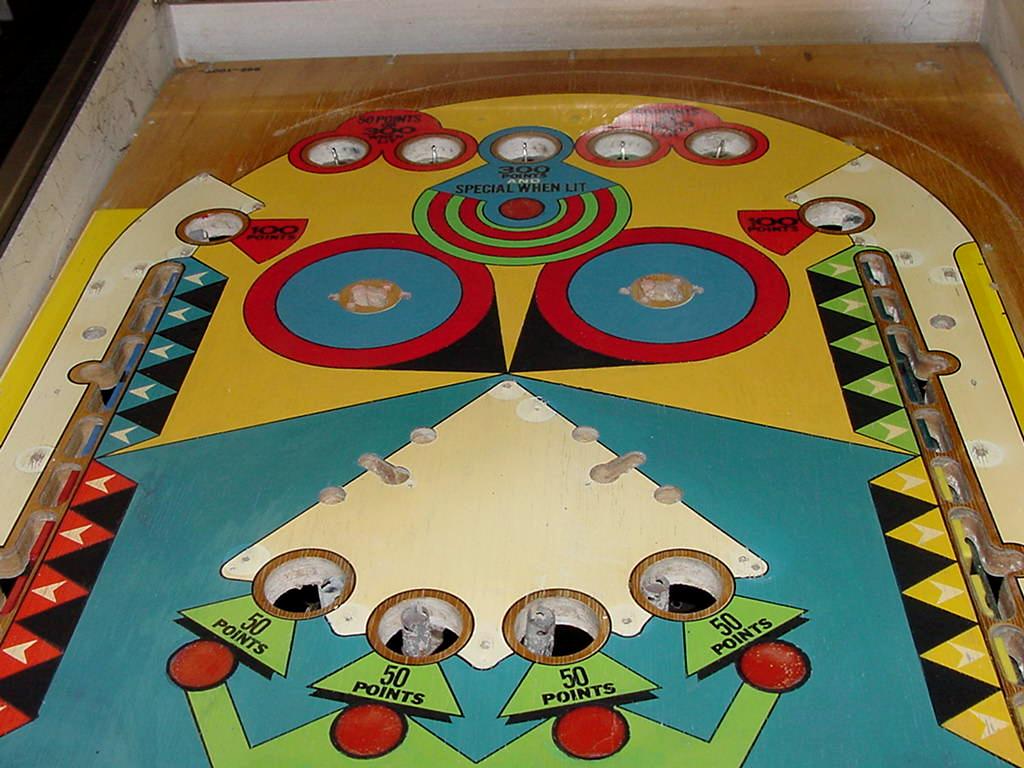
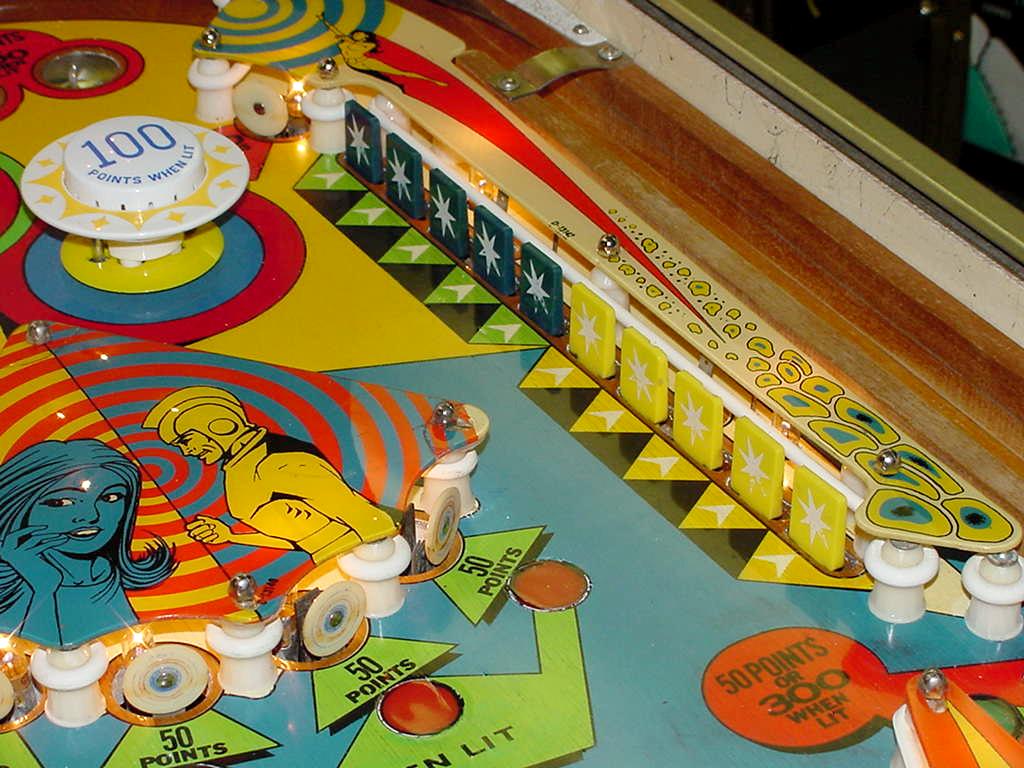
Here's the playfield after the automotive Urethane clear was applied, and all the playfield parts re-assembled. I sprayed four coats of clear, and then used an electric DA sander with 600 grit wet/dry paper to smooth out the finish. Then I hand sanded with 1200 and then 2000 grit. Finally I rubbed out the playfield with Novus2. It came out pretty good except for the red smears (as noted above). Also the planking is still a bit noticable in the natural wood areas arond the flippers. But frankly I like that look, as it doesn't make the playfield look like it was touched-up and clearcoated. |

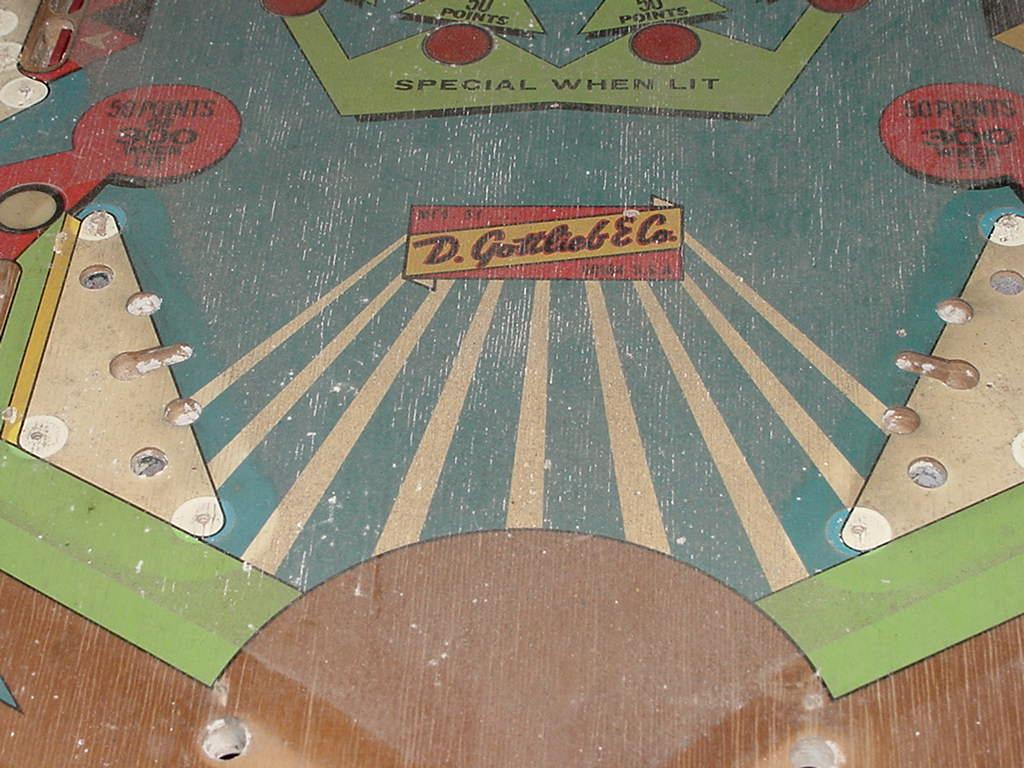
| If I had applied more coats of clear, the lines around the "50 point" inserts would have been "filled" more. The white you see there is sanding dust. (I can remove that for a cleaner look using some Novus2.) The problem with filling those areas is this: it would have required another 3 or 4 coats of clear, which would then need to be DA sanded flat over the whole playfield. This would fill the small number of low spots at the expense of sanding off the high spots (which would be 99.9% of the playfield clearcoat). A lot more work and time and money. But the outcome would have been a more "perfect" playfield (like say HSA or Playfield Renovations does). This really isn't the look I'm going for. It's not that I like an imperfect job, but the game is 35+ years old. I don't really want it to look brand new. So some minor imperfections in the finish don't bother me, and it better matches the patina of the rest of the game. |
Conclusion.
More information on clearcoating can be seen in the "This Old Pinball" videos TOP #1,3,4,7. This shows the whole procedure of touching up and clearcoating a pinball playfields. Also see Pinball Restoration Guide, part two and Gottlieb Quickdraw Playfield for more info.
* Go to Pin Fix-It Index |