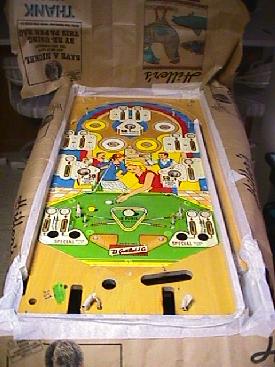
2i. The Cabinet: Touch-up the Playfield
-
If you have wear on the playfield, and you were successful touching up
your backglass, you might consider touching up the playfield too.
I don't really recommend this (after all, you don't "play the paint",
it's purely cosmetic), but it is something to consider.
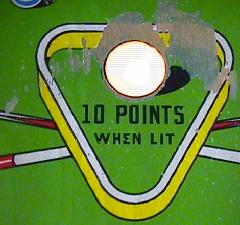
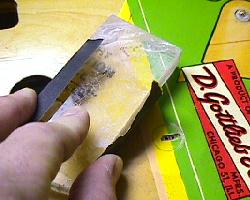
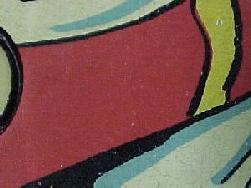
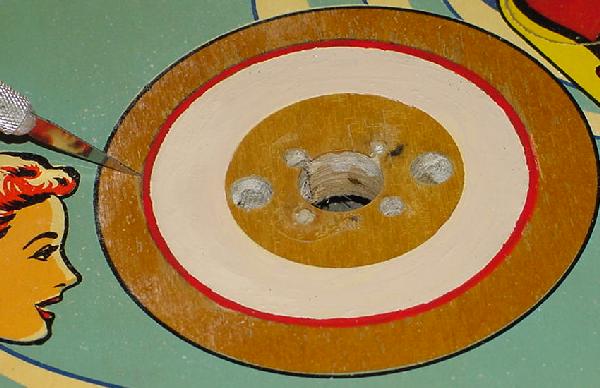
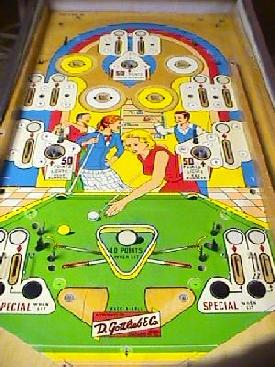
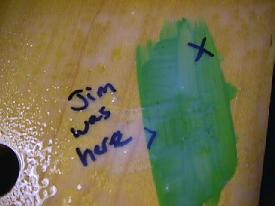
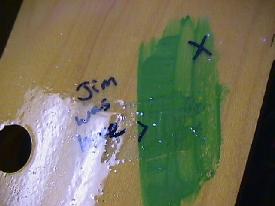
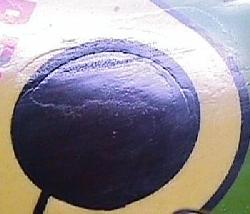
Right: After the touch-up. The green was the hardest to match.
-
Preventing Wear in the Future.
Much of this wear could have been prevented. Keeping your game well waxed with a good hard paste wax (like Trewax or an automotive Carnauba wax) will do wonders to prevent playfield wear. But if the damage is done, there isn't a lot you can do about it at this point but hope your color matching skills are good.
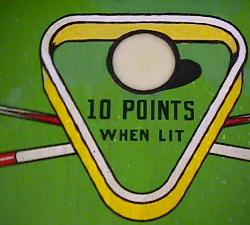
Right: After the touch-up.
-
What Causes Playfield Wear?
The initial factor that causes playfield wear is dirt and grime. As games are played, and dirt accumulates on the playfield (from ball collision with rubber and solenoid dust), the ball has to "plow through" the dirt. This pushes the dirt around, acting like sandpaper. It also accumulates on the ball, and scratches the ball. This turns the ball into fine sandpaper too.
Once you have a "spot" worn in the playfield, this spot can contribute to further playfield wear (even if you keep the playfield cleaned and waxed). As the ball rolls over the lower worn spot on the playfield, it collides with the edge of the wear spot. This collision causes additional wear, and cause the ball to "jump" slightly as it goes over the edge of the wear. As the ball lands, this too wears more paint.
Acrylic Paint Touch-Ups.
(thanks to Jim Bonkowski for helping with this work!)
Again, water-based acyrlics were used. These are the same paints used in
the backglass touch-up section. These have the advantage of being
very forgiving; if you don't like a color you put down, just wipe it off
with a wet cloth. All the same matching tips apply here as they
did in the backglass section.
Note there are higher quality Acrylics paints available that will give better results than the $1/bottle craft store paints. These are known as "artists acrylics" and are available at art supply stores. They are more expensive, but the colors are more vibrant and often easier to mix and match to the original playfield colors. The brand of artist quality acrylics most people seem to like best is by Liquitex.
There are some other brands of hobby store $1 acrylics that are better. You will have to experiment. For example, I don't like the Apple Barrel brand of colors at all, as the pigment (color) seems weak to me. Americana is pretty good, but the color selection is not a vibrant as I would like. Delta Creamcoats are pretty good and have a lot of color selection, but again not real vibrant. My favorite $1 acrylic brand is Palmer, as the color are very strong and bright (just I wish they had more colors available). But again the best acrylics are the artist quality types like Liquitex, available at art supply stores, but these are more expensive and not as convenient to buy. So I usually end up with Americana and Palmer as my weapons of touchup.
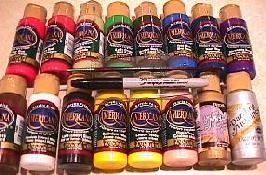
Left: A wide array of water-based acyrlic colors are available.
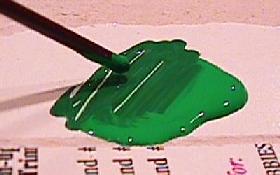
Right: Using the end of a paint brush to mix a bit of black
into some green to darken it. This is done on the shiney side
of some scrap cardboard.
-
Paint Retarder.
There are some products available for water-based acyrlics called "retarders". These increase the drying time of the paint. This allows the paint to lie down more and dry smoother, with less brush strokes. I would recommend using this product when touching up playfields. Liquitex makes a good retarder. This can also be used to thin paint for an airbrush, or to make a color more translucent (for backglass work).
Clean PF Before Starting Touch Ups.
Before starting the playfield touch, clean the playfield.
I use Melamine Foam and Novus2 first and see how that does. If there are still
dirty ball swirl cracks and ground-in dirt, I get more agressive with the Melamine Foam
(Magic Eraser) using Iso Alcohol as the wetting agent
(see here for more details).
Then follow up with Novus2 to get the white ME residue removed.
Some people use Naptha to remove the white Melamine foam residue,
but I prefer Novus2 (because often after the Novus2 it looks good enough to
stop right there.)
The Melamine Foam is the key trick here, as it will get ground in dirt out of the tiny cracks of the playfield. Just don't go nuts with the MF as it will remove paint if you are too agressive (Melamine foam is like sanding with 2000 grit sand paper). Always use Iso Alcohol (92% preferred) as the wetting agent for the foam. Melamine foam will also often remove *some* of the yellowing of the white areas of the playfield. But don't go too nuts with it, or you'll end up doing more touchup as the foam will remove finish.
The reason I prefer Novus2 to other playfield cleaners is because Novus2 is "paintable". That is, it has no wax or silicon. Many cleaners have wax or silicon and this will cause problems if you are going to clearcoat the touchups. NEVER EVER use Millwax! It contains silicon, and will totally screw up any touchups or clearcoat you try and apply.
If you are ultimately going to clearcoat the playfield, after it is cleaned, it's a good idea to gently sand the whole playfield with 600 or1000 grit wet/dry sandpaper (dry, no water). If you are *not* going to clearcoat, then do NOT sand it. The sanding provides a "tooth" for the clearcoat to bite, and removes the gloss. It increases the surface area of the playfield, allowing the clearcoat to have better adhesion. But to be honest, after the Melamine Foam and the Novus2, I rarely sand (it just makes me nervous, as it's rather agressive). Mostly because it's easier for me to see contrasts in touched-up areas, if there's a slight amount of gloss to the virgin areas.
Filling Divots and Fixing Woodgrain.
If some wood is "chewed up" (like around a kick out hole),
it can be smoothed out by using a couple of layers of Super Glue as a filler.
Super Glue comes in different thicknesses. Start with water-thin viscosity
to seal the wood fibers. Apply a couple thin layers and sand it out.
If needed you can to to a thicker vicosity.
After the worn spot is filled and leveled, then repaint the area.
This is not the preferred method, but it does work.
A better approach is to use U-Pol "High Viscosity Dolphin Glaze" (#BAGDOLHV). This is an auto body product, and works great for filling imperfections in a playfield surface. The HV Dolphin is two-part Polyester putty which dries quickly, is very easy to sand, ultra smooth, tack free and is stain free. Mix a small amount (exact mixing ratio is not critical, although over or under catalyzation may affect the gel time), and apply with a putty knife or rubber spreader. Dries in about 5 minutes and is ready for sanding in 30 minutes. It's extremely smooth and easy to apply, like a smoother and softer version of body filler. Note Dolphin also comes in a liquid paintbrush-appliable version, but you don't want that, get the High Viscosity Dolphin. This type of repair is shown here (but uses a different product than Dolphin).

Lightly block sanding dry with 1200 grit.
-
Mixing the paint.
You'll need to mix some paint to match colors on the playfield. This is the most difficult part of the entire procedure. Your ability to match colors will give the best outcome. I would highly suggest you have someone help you with this. A second pair of eyes and perception always helps.
The best approach is to buy the right color of paint, so you don't have to mix paints! This is not always possible, but often you can get pretty darn close with paint "out of the bottle". The craft store touchup paints are usually a $1 a bottle, so don't be shy and buy a bunch of colors. I use a Pantone color guide to match the color, and then bring the color guide to the store. This sure is a lot easier than hauling a playfield around. I have bought every color that Americana sells in their craft acrylic paint line. Yes it cost me over $200, but it's well worth the cost to me.
-
Notes on Pantone color guides.
These can be bought on Epay, just type in "pantone" into their search engine. There's a bunch of choices, but you don't need a brand new guide, used is fine. Pantone issues new guides every year, because they claim the colors in the guides fade (which may be true, but I have not found that to happen). But basically Pantone guides come five ways: solid coated, solid uncoated, solid matte, "solid to process", and 4-color (there's also a metallic color guide, but you would never need that for playfield/backglass work). Solid colors is how pantone inks are mixed (by formula which key to the guide), and are used in silkscreening. If you are doing general work, solid coated is the best/cheapest, it shows the colors in gloss format. That is, it shows the Pantone ink with a clear topcoat over it (which is really what happens in a playfield). So I find the solid coated guide to be most useful. If you are trying to match colors to your computer, the "solid to process" is the one to get (as this gives a Pantone color that inkjet printers can duplicate, and you can type the Pantone color number into Photoshop). The 4-color guide is obviously used for those doing 4-color process. Some Pantone guides are combo guides, and these are more expensive, as they may include both the coated and uncoated colors (and even the matte) all in one guide. These are nice to have, but more expensive. Personally I use the coated guide for most work, and the solid-to-process guide when I'm trying to duplicate a playfield color on the computer's printer (so I have and use two different Pantone color guides). The solid-to-process guide has two side-by-side color chips for each color. You match the solid color, and next to it is how the computer will duplicate that color (using inkjet 4-color processing).
Mix the paint on a piece of acyrlic plastic. Just squeeze out the colors from the bottles, and mix it with the end of your paint brush. Also have a glass of water and some paper towels nearby. When done mixing, wipe off the end of the brush on a paper towel.
off the playfield, and buying the right color at the craft store.

-
Another tip is when doing color matching is to use a small piece of wood
as the mixing area. Some find this helps with getting the correct match
because the paint looks different on various surfaces.
Sometimes when using clear plastic as the mixing
surface, after the mix was applied to the worn areas on the playfield,
it wasn't the same shade as on the cardboard. Since the touch-ups are going
over wood, it sometimes helps to use a wood piece for testing the paint color match.
I usually start with a darker color than I need. Then I add a touch of white or the same color pastel to lighten it. Alternatively, you can start with the light pastel color and add a dap of the deeper color or black to darken it. But be careful trying to darken a color with black. Adding a touch of black to green will make it darker, but it also makes the green "blacker" in the process, and not really "greener". It's much easier to darken a pastel with a deeper version of the same color. It's a lot easier to lighten a color doing the reverse. Add other colors as needed to change the overall shade of the color.
Let the Paint Dry Before Evaluating the Color Match.
This is very important. After you paint the playfield, let the
new paint dry for about 5 minutes. As acyrlic paint dries, it
will darken. You can not tell for sure if your color match is
good until the new paint is dry. If the color match is bad,
just wipe off the color from the playfield with a damp rag.
Often I will force-dry a freshly painted surface using a hair dryer (*not* a heat gun!) This can make your touchup work go faster as the dry time/color evaluation step goes faster. This works really well, especially if you are paint the colors with thin coats. Painting a spare wood block, then hit it with the hair dryer, makes matching playfield colors a lot quicker.
Another color matching tip is to use a digital camera. Take a few pictures of the touch-ups to make sure they're matched correctly. Cameras pick up nuances in the colors that you may or may not see in regular light. The camera does not lie. If the color is not right, dab a small artists brush with Goof-off, remove to touchup, and try again.
Yellows and Reds.
The craft acrylic yellow and red colors are often
not as deep as the other shades. Because of this,
a good idea is to put a layer of white paint
down first (to cover the old finish), and then paint
the yellow or red over the white. This will give the
best results with these two color shades. The white acts
like a primer and a color block.
Matching Wood Color.
If a playfield spot was originally bare wood with no silkscreened art, and
you had to repair that area with Dolphin or some other product,
you can reproduce the look of the original wood. Just use a light tan color as a base paint,
then dry brush a lighter shade of tan on top, and then finally drybrushed a median
shade of tan. It take a little practice but the end result looks just like wood.
This drybrush technique can also be used to "freshen up" other small areas of wood
grain if it has darkened quite a bit over time. This effect still
lets the woodgrain show through, but gives it a lighter appearance.
Laying down the Wrong Color.
If you apply a color to the playfield that you don't like,
wipe it ALL off before applying another shade. This is VERY
important! Do not just apply the new shade over the old
mis-matched shade. You don't want
the mis-matched shade underneath to show through as the
correctly matched paint wears in the future.
Dealing with Darkening Colors after Clearcoat.
Also some clearcoats will darken acrylic touchup paints. Varathane
is particularly known for doing this (auto clearcoats do it too though).
Some people will touch up an area, let it
dry (checking for color match), and then brush a little Varathane
over the new touch up area and re-check the color match. If it's wrong,
use some Naptha or Goof-Off to remove the Varathane and the acrylic color, and start over.
There are some other techniques that can be used to deal with the darkening problem. First, paint the entire color area. That is, say you have a blue wear spot the size of a dime. Match the blue color and paint the wear spot. But overpaint the area so the entire section of blue is painted. go right up to the black keylines. this way the exact color match is far less critical.
Now sometimes this technique is not possible. Instead you have spent a lot of time matching the color perfectly. But will it stay perfectly matched after the clearcoat? The solution is to touchup the area and let it dry overnight. Then take some water and lightly put it over the touched up area. The water will simulate a top clearcoat, and the darkening effect will be shown. If the color does not match, you can use Naptha to remove the acrylic touchup and start over.
After the Paint Dries and the Color Match is Good.
Ideally, it would be best to lightly block sand the touched up area with 1200 grit
wet/dry sandpaper to smooth the new paint out. But in reality,
I rarely do this, especially if I'm clear coating the playfield.
If you sand too much and cut through the touch up, it is too
difficult for me to try and rematch the color again
and fix the sand-through. But block sanding does ensure the new paint is the same
level as the original paint. If you are not going to clear coat the
playfield (as described in the next section), it is much more
important to sand your touched up area flat, and following
with Novus2 to polish the area, and wax.
Personally if you are not going to clearcoat, a better type of paint to use is Testor's Enamels. There are less colors to choose and it's more expensive, but the Testor Enamel is very durable and does not have to be clearcoated. Acrylics paints are too soft and will need some sort of clearcoat to last. Hence using Testor's Enamels for small touchup areas can save you from having to clearcoat an entire playfield.
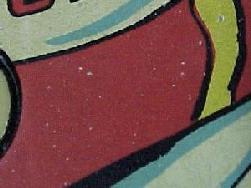
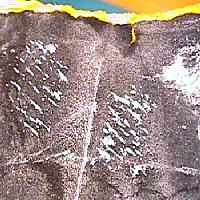
Left: These white dots in the red area can be easily and nearly invisibly touched up. Just dap
paint liberially over the entire area. Then wipe off the paint with a rag. The paint will remain in the
recessed white dots, and will be removed from the higher surfaces with the rag.
Right: The white dots after this simple touch up.
-
Fixing the White "dots".
In solid color areas of your playfield, often you'll see many white pinhead dots in the color. This is the start of playfield wear, and are very easy to fix. Just match the main color as usually, and sloppily brush on some paint over the white dots. Then take a clean dry rag, and immediately wipe off the paint you just applied. The paint will stay in the recessed dots, covering them. The remainder of the paint is wiped off. This works amazing well.
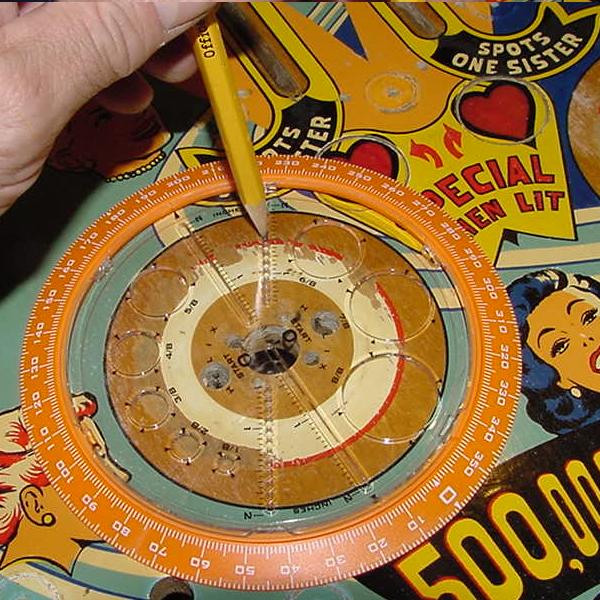
Right: Use a pencil and go around the black lines on the light inserts too, then paint them.
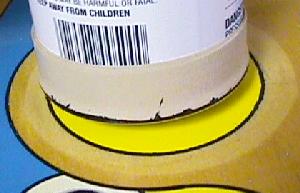
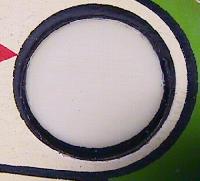
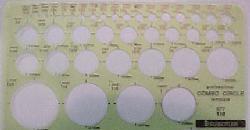
You'll need this circle template for doing the
black lines around light inserts. You can get
one at any office supply store. The most common
circle size you will use is 1" and 1.25"
-
Touching-up the Black Lines (Key Lines).
After you have leveled the paint by block sanding, touch up the black accent lines. Plastic light inserts often show the most black wear, and are very easy to touch up with circle template (available at most office supply store). You will use the 1" and 1 1/4" circle template sizes the most. Use a pencil to draw the new circle, then fill it in with black paint. If you get too much paint on the insert, use an exacto blade to scrape off the excess.
When doing the key lines, do NOT use Sharpie pens, as the color thickness is just not the same as paint. The inks can cause problems when clearcoating. And the Sharpie ink is not durable at all to stand up to game play without a coating. I much prefer to use either acrylics, Testor's Enamels, or even black lacquer when doing black Key lines.
-
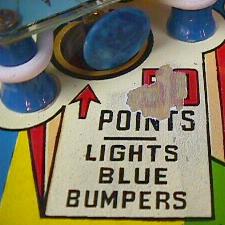
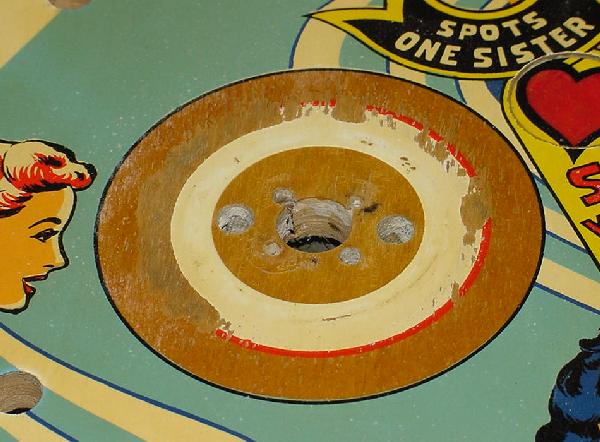
One area of a playfield that gets a lot of wear is
around the pop bumpers. These areas are usually
pretty easy to touch up too. What follows is an example
of this touchup. This information certainly applies to
other parts of a playfield too.
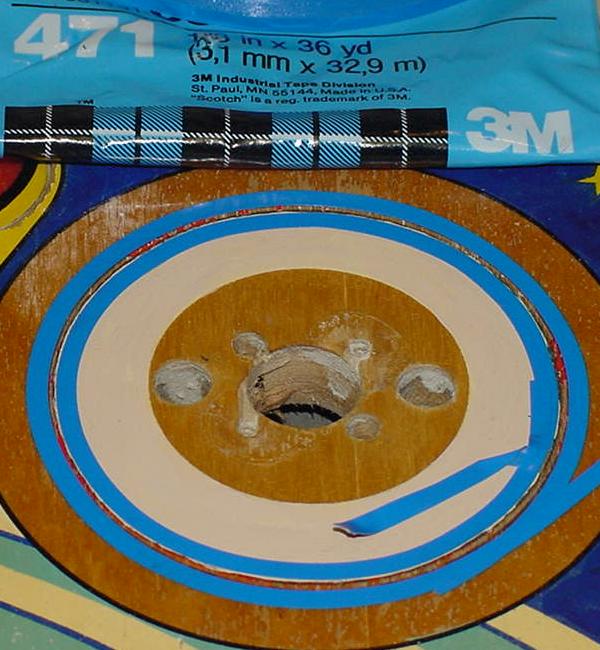
Drawing the circles with a circle-maker (office supply store) and a pencil.
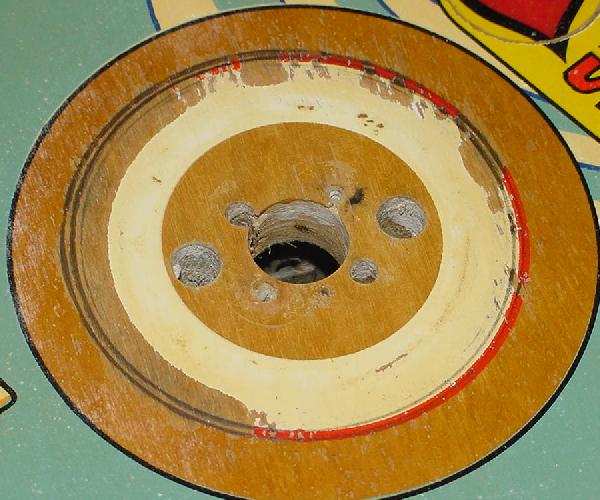
Both inner and outer lines have been drawn with a pencil.
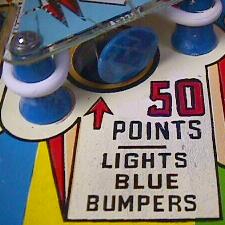
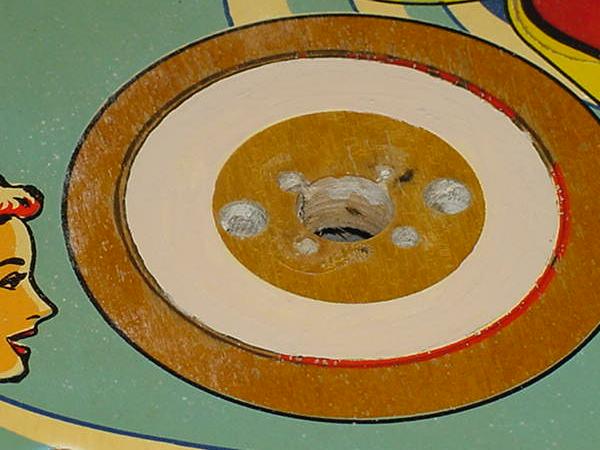
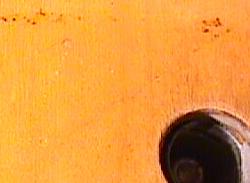
The inner area is painted. Color match is not critical, since the entire area was painted.
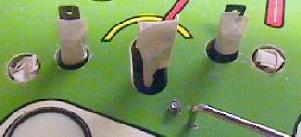
Applying blue pinstripe tape as a paint mask.
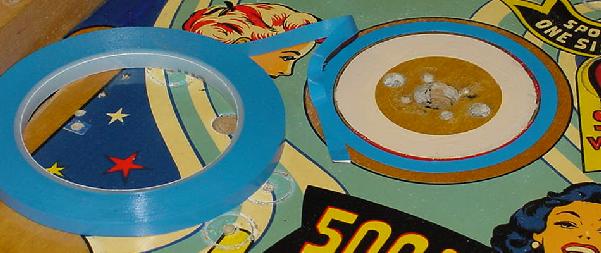
Two layers of blue pinstripe tape are applied, awaiting the new red paint.
(This is a 3m product, 1/8" thick 471 plastic pinstrip tape.) Make sure the
inner touchup paint has dried a full 24 hours BEFORE applying tape.
Otherwise when the tape is removed it can pull-up the fresh white touchup.
Paint is applied with ease, since the blue tape masks well.
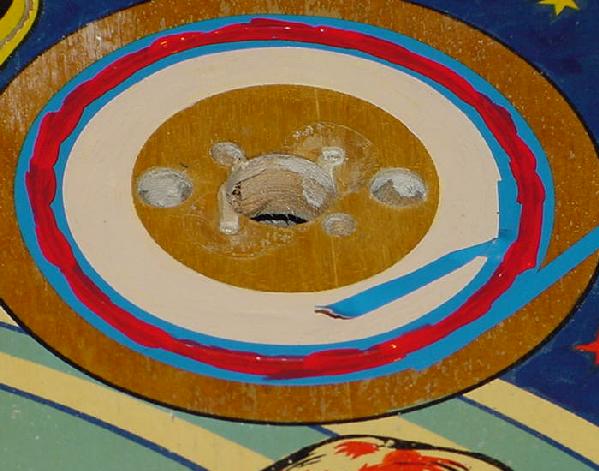
Any stray paint can be removed with an exacto knife, and any stray pencil marks can
be erased after the paint has dried 24 hours. Area can be spot clearcoated, or the
entire playfield clearcoated. If spot clearcoated, use an adhesive Gottlieb Trim Ring
to help hide the clearcoated spot under the pop bumper.
-
More Playfield Example Touchups.
To see more info on playfield touchups, check out these pages. Each of the pages shows different problems and solutions to playfield touchups and restoration techniques.
2j. The Cabinet: Clear Coating a Playfield ("Diamond Plating").
-
If you really want to protect your playfield, you can clear coat it.
This will give your playfield additional life because the ball will
be rolling on the new clear coat, and not the original playfield
paint. You can also clear coat a brand new, NOS (new old stock)
playfield before you install it to increase its life span
(not a bad idea since all the parts are already removed and
the surface is already leveled and clean).
The Smithsonian Restoration Principle.
It should be mentioned that clear coating a playfield
is NOT the ideal thing to do from a pure restoration point
of view. The Smithsonian museum, for example, when
doing restorations of items that are now regarded as "art",
hates it when an object has been "touched up".
If the Smithsonian was going to put antique pinball games
in their museum, they would want a pinball playfield
with wear and no touch up, instead of one that was perfectly touched
up and clear coated. You should keep this in mind before
proceeding.
Lacquer Properties: the Original Finish on your Playfield.
Your original playfield was most likely factory clear coated
with lacquer. This was the product used by most pinball manufacturers
until about 1990, when pinball manufacturers switched to a hardcoat
urethane material (like what is used today on hardwood floors).
Lacquer is known as a "hot" paint. That is, when you spray a coat of lacquer, its solvents soften the previous layer(s) of lacquer (no matter how old), and physically bind to it. The newest top coat becomes one with the previous layer(s). Enamels and newer urethanes don't work this way. These coating can only chemically bind to an older, previous coating (though you can get a binding effect with these coatings if spraying multiple coats, and the last coat is sprayed before the previous coat fully cures).
For example, take a cloth and wet it with lacquer thinner. Now wipe it on your playfield in a small inconspicuous area under the lower ball arch. Notice the original finish becomes very soft. This is lacquer. If you do the same thing to the cabinet finish, you'll notice it doesn't turn this paint soft; it has no effect on it. That's because the cabinet is painted with Enamel. Even if you use Enamel reducer (which isn't as "hot" as lacquer thinner) and try this, the same thing will happen; the old Enamel won't soften. After Enamel or urethane is fully cured, solvents generally don't effect them.
This is why GM and other car manufacturers used lacquer paint until as late as the 1980's; it was extremely easy to apply and to repair. If you wanted to do a spot repair, and you had a good color match, the spot repair could be done and not seen (because of the binding properties of lacquer). Enamel and urethane paints don't allow spot repairs; the repaired paint doesn't blend in well with the original finish, leaving a "shadow" where the new paint meets the old.
What Clear Product to Use on a Playfield.
There has been a lot of talk about the water-based
urethanes, particularly the "Varathane" brand.
This is the same type of product that is used today
on many hardwood floors. It is also similar (but not the same!)
as the protection used on
new Williams "diamond-plated" playfields. These urethanes cure hard,
with minimal shrinkage, and good film thickness.
The only problem with using a urethane over a lacquer playfield is potential binding problems. Though not a problem for manufacturers (who are painting in a controlled environment), putting a urethane down on an existing playfield in your garage can be tricky (especially compared to clear coating with lacquer). The big advantage to urethane is it has far better wear resistance than many other products.
Using acyrlic lacquer to clear coat a playfield is probably the easiest product to use. Mistakes can be easily corrected, and the end result will be good. The problem with acyrlic lacquer is its the same material already on your playfield; this means it will wear just as easily as regular playfield paint (just you'll have an increased film thickness to protect it longer). Do not use nitrocellulose (furniture) lacquer! It yellows signicantly with time. Only use acyrlic lacquer if you choose to use a lacquer product.
Another question is about spray can polyurethanes seen at the Home Depot type stores. Avoid these products as they often contain linseed oil (which causes the finish to yellow with time). Here's a description of these consumer spray polyurethanes, taken from a manufacturer's web site:
-
"Polyurethane is classified as an oil based varnish,
although some purists will disagree. Initially developed to be used as
a substitute for other plastics, polyurethane has become on of the most
commonly used resins in the manufacturing of many wood finishes...
There are many types and
forms of polyurethane, but the kind of polyurethane finish you are used to
seeing in paint and woodfinishing supply stores is not pure polyurethane, but
rather an alkyd varnish that has been modified by adding some polyurethane into
it. That is why polyurethane should be classified as an oil based varnish. Perhaps a
better description would be modified varnish, but nevertheless, still a varnish.
It is applied and it cures in the same manner as other oil based varnishes."
The remainder of this section will describe how to clear coat a playfield using the "Varathane" brand of urethane. Although slightly harder to apply than lacquer, it will give the best wear resistance. Most (if not all) of the steps and tips given below will apply to clear coating with lacquer too, if you choose to use that instead.
Varathane Usage Warnings and Cautions.
Varathane is a water based product that dries very hard. But
it is NOT as permanent as the original lacquer used on most
playfields! Varathane will come right off with a product like
"Goof Off" (where lacquer will not). Because of this, be careful
using any harsh cleaner like CP-100 or Goof Off on your newly
Varathaned playfield, as it will remove the finish! There is also a
good side to this; if the Smithsonian ever wanted to remove
the Varathane or water based acyrlics from your playfield, they could do it
without disturbing the original lacquer paint beneath it. Note if
you use a mineral spirit based polyurethane, these do not come off
with Goof Off. But the yellowing characteristics of these mineral
spirit products make them unacceptable for this usage.
Should you Clear Coat your Playfield?
Note if your playfield is not worn and not touched up, clear coating it is probably
"overkill". Keeping your playfield cleaned and waxed is all you
really need to do to prevent playfield wear. But if you have touched-up your
playfield with water-based acyrlics (as described above),
applying a clear coat over the
touch ups will ensure your repairs stay permanent. Also, if you are
installing a NOS (new old stock) playfield for a valuable game,
clear coating it before you install it will ensure you get
maximum life from the new playfield.
A Note About Your Touched-up Areas.
If you did touch-up your playfield, clear coating it will lock in
your touched-up areas permanently. There will be no going back. Be aware that clear
coating your playfield will NOT make your touch-ups look better. It won't
fix a bad color match. It may actually make a bad color match more
noticable. The clear coat will only make the "texture" of the touched-up
area more uniform with the rest of the playfield.
Before you clear coat the playfield, make sure your touched-up areas are level. If they aren't level (still divots), clear coating them will make the divots more obvious. You can fill these divots with clear coat and block sand them level. But I would recommend filling the divots with the touched-up color instead (as described above) and leveling them before applying the clear coat.
Which brand of Urethane?
For the general pinball hobbiest,
I recommend using the Flecto brand "Varathane Elite Diamond Finish IPN
Coating" in the silver and black can. Unfortunately this product
does not exist anymore.
Flecto was bought by Rustoleum, who renamed the product to "Varathane
Interior Diamond Wood Finish (Water-Based)", still in a blue and black can.
The UPC number is 0_26748_20008_3 for gloss, and
0_26748_20008_2 for semi-gloss (the UPC number is handy if special ordering
the product from say Home Depot's Contractor desk or a similar large store).
This is also known as "Varathane 200081", if doing a web search or part number search.
Personally I would get the gloss version, but some people like the semi-gloss
on older games. There
is also an exterior version with UV protection, but I have
personally not used that version. These new versions are widely available at
Sears Hardware stores, and many other places.
It's interpentrating polymer network (IPN) technology
provides good chemical binding and a harder finish than standard urethanes. It's also
water based. This finish will NOT yellow with time. Solvent based spray can urethanes
have linseed oil in them which will yellow. Avoid any spray can urethane that is
NOT water based because of this.
Other Urethane Alternatives to Varathane.
Although Varathane is not the ultimate answer to playfield clear coating,
it does have some advantages. It won't yellow, it's inexpensive, and
it's easy to apply. It also has some disadvantages like long curing
time, and it's not as permanent as solvent based products.
Varathane is not the ultimate solution, but it works decent. Automotive
urethane clear coats (like Dupont's 7600 or PPG's Omni AU)
will provide far better wear, and quicker drying. But these are also
more expensive, and don't come in convenient spray cans (you can't buy a $5 spray can of
these automotive clear coats, like you can with Varathane). The raw
material costs of automotive products will be at least $30, and
will have to be brushed on (or sprayed with some type of compressor and spray system).
For more info on automotive clear coats, see my article on clear coating playfields with
automotive clears.
Spraying or Brushing Varathane?
Using spray cans to clear coat your playfield works much better
than brushing. You will get a better final outcome with spray cans.
When brushing, it is much more difficult to get a completely
flat surface. You can rub out most of the defects after brushing,
but there will still be some "waves" to the playfield. When spraying
these "waves" aren't a problem. This is why
I recommend spraying your playfield instead of brushing it.
What you Need.
Varathane Elite comes in spray cans and pint cans. I used and recommend
the spray cans (and you'll see why),
but you could easily brush the product on too. Buy two
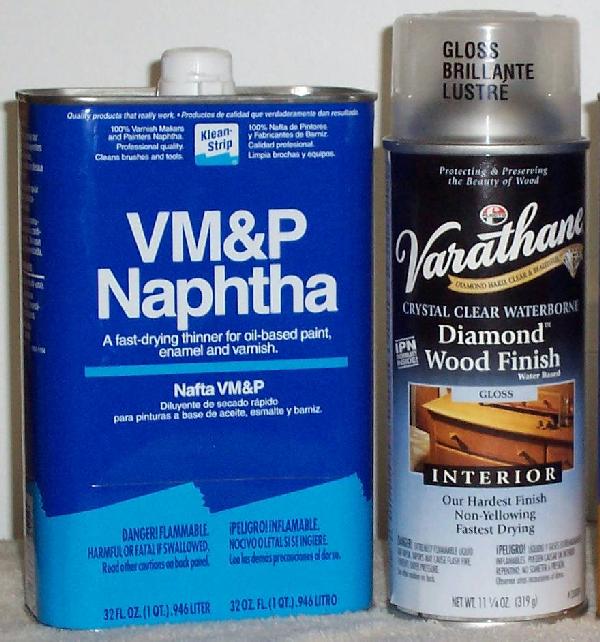
spray cans for a playfield. Also buy some 340, 600 and 1200 grit wet/dry
sandpaper, and a quart of both lacquer thinner and naptha. The naptha
will be used as a playfield cleaner to remove old wax. The lacquer
thinner will be used to clean the nozzle of the spray can (it also
works nicely to clean bumber rubber too when you're done). Do NOT
use steel wool! Steel wool is too messy and leaves too much metal
fibers behind.
Varathane Elite comes in three finishes. I recommend using the "gloss" variety. If you are doing some spot repair and not the whole playfield, the "semi-gloss" may match the existing finish better. But for overall playfield clear coating, the gloss finish seems to provide better looking results.
How Far Away do you Spray? How Fast do you Move the Spray Can?
Experience will tell you best, but start with what the spray can
recommends. I find the recommended 6" to 8" spray distance to be
about right. Also, don't move the can too fast when spraying (except
for the first coat, which should be applied thin!) You want a good
"wet" coat of varathane.
Have the playfield sitting flat and level. The best approach to film thickness is this: start with thin coats, especially the first coat (if you are using Sharpies, this is really important). Then as you get a few coats layed down, slow the movement of the spray can so the coats get wetter and thicker. After a couple coats have been applied, you can spray thicker and wetter coats. If the Varathane clouds up a bit, that's a good indication that is about as thick as you should spray (the cloudiness will disappear as the Varathane dries).
Shake your Varathane Spray Can WELL!
When spraying Varathane, it is VERY important that you shake the
spray can for several minutes. This will mix the spray propellant and
the Varathane completely. If you do not shake the can well, the
Varathane can spray "lumpy", and ruin your previous coats. Note
when brushing Varathane, do NOT shake the can (it will put air
bubbles in the Varathane, which you do not want when brushing).
-
Step 1: Strip the Playfield of all Parts.
The first thing you will need to do is strip the playfield of all parts. Remove all the stuff you can; it will only get in the way. I was able to get everything off the playfield except for the metal lane guides. They lifted the playfield paint when I tried to remove them; I should have tried heating them gently with a soldering iron, and then tried removing them; the soldering iron would soften the surrounding paint and wood without damaging it. Another thing I do is use the handle of a rubber gripped pliers to get under the metal guides and to lift. The rubber handle pads the metal and the playfield from damage.
Remove the entire pop bumper assemblies too (you're gonna rebuild them anyway, as described below). Remove the upper and lower ball arches. Remove any lamp sockets or switches that stick up through the playfield. Trust me on this; the more you remove the easier and better results you will get. It's well worth the time to remove as much as you can. Sanding around parts is much harder work (and doesn't give good results) than removing the parts in the first place.
If the game has round rollover buttons or star rollover buttons, remove these. Pinball Resource sells new ones, so don't worry about damaging the buttons.
You can also remove the wooden side rails from the playfield too. This is a lot easier than it looks, and makes clear coating the playfield MUCH easier. There are usually three wooden side rails: two for the shooter lane, and one on the opposite side of the playfield from the shooter lane. On Gottlieb playfields, these are attached with nails (and sometimes a couple of screws). From the bottom of the playfield look for any screws, and remove them. Then from the top of the playfield, you can pry the wood rails loose and remove them. Then hammer the nails sticking through the playfield down through the bottom of the playfield. You will have to remove these nails completely or the playfield will not lay flat.
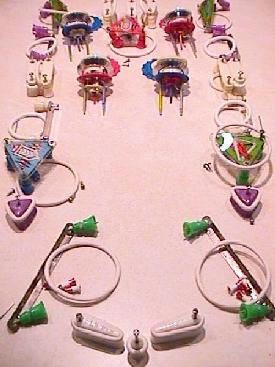
Place all the parts on a table in their prospective positions to simplify the re-assembly process. If you're not confident you can put all the parts back correctly, take pictures or videos of the playfield before you strip it.
Right: All the removed playfield parts, in their corresponding playfield positions.
-
Step 2: Remove Mylar and Clean the Playfield.
If your playfield has mylar or those dumb woodgrain pop bumper trim rings, you'll need to remove it. This can be done easily using one of the three mylar removal methods: a hair dryer and naptha, "freeze spray", or an orange-based solvent remover.
The first method I use for mylar removal is Freeze Spray (cold in a can). I always try this method first, as it provides the best mylar removal results with the least amount of playfield paint lift. The cheapest source for Freeze Spray is an office supply store. Buy the compressed air/dust removal cans. Then turn the can upside-down, and instant freeze spray! Now generously spray the edge of the mylar. It may take 5 or so seconds of spraying, but the mylar should easily delaminate from the playfield. The hardest part is getting an edge started, but once it starts to lift it should almost fall off. After the mylar starts to delaminate, freeze spray the rest of the mylar (in three or four square inch increments), and the entire mylar covering should come off the playfield with little to no effort. Be careful not to spray your fingers as this stuff is cold!
Another mylar removal method is using a Hair Dryer (I don't recommend this method on EM playfields, but it works good on later 1990s games). Heat the edge of the mylar, then gently pull the mylar off the playfield, as you heat it. Use Naptha under the mylar and around the edges to help. It is very easy to remove paint and lettering from the playfield when doing this, so do this slowly. Use lots of heat from the hair dryer (do NOT use a heat gun; these are too hot).
Last method is to just soaking the mylar with an orange-based solvent like Goo-Gone (NOT goof-off!) Soak the mylar and let it sit for 30 minutes, then use a plastic putty knife or credit card to get under the mylar and lift it.
After the mylar is removed, use the Naptha to remove the glue left behind on the playfield. You may have to scrub to get it off using an old credit card or plastic scraper. Pour some Naptha on a three or four square inch of playfield and let it sit for a few minutes. Then use a plastic scraper or old credit card to scrape up the mylar glue. Use lots of clean rags as the glue will get on the rags. If you used the freeze spray method to remove the mylar, there will be a considerable amount of glue left on the playfield (this is the disadvantage to the freeze spray method).
Another good product to try on the playfield for clean is Magic Eraser (Melamine foam) There is more information on this product here. I highly recommend this technique to remove fine ground in dirt and "ball swirl" dirt.
Once all the parts (and mylar) is removed, use Novus #2 to clean the playfield. Do NOT use any other product such as Millwax or something containing silicon. I only recommend Novus2 as it is very inert and contains no wax or silicon.
Step 3: Smooth and Level the Playfield.
Notice the high traffic areas of your playfield, especially around
the pop bumpers. Often they have a "rough" texture to them. This
is ground in dirt and the beginning of ball wear. Before sanding,
try using a Magic Eraser (Melamine foam) to clean the area as
described here. But you will need to smooth any rough areas
before applying the Varathane Elite. Use 220 then 400 then 600 grit wet/dry sandpaper dry,
or use naptha as a wetting agent (won't raise the wood grain). Sand until smooth, but
don't sand too much or you'll break through the factory clear coat.
Also clean the really high trafic areas like the shooter lane.
Again use 220 then 400 wet/dry sandpaper in these areas, followed by 600 grit.
Don't worry about breaking through the finish here, as this area
has no color coat (just clear). Don't sand any touched up playfield
areas though; you worked hard to get that area
color matched, best just leave it alone!
-
Take notice of the plastic lamp inserts too. If any have dropped below
the level of the playfield, you'll need to fix this. If you don't,
the playfield will wear easily around the inserts (even after clear coating).
If the inserts are not loose, use the hair
drier to gently heat the inserts from the BOTTOM of the playfield. Then
gently hammer the insert up from the bottom of the playfield with a punch. When
the insert is slightly higher than the playfield paint, stop. Now lower
the playfield and put your sanding block over the insert on the paint side
of the playfield. Gently hammer the sanding block so the insert is level
with the playfield surface. When level, from the BOTTOM of the playfield,
put some water thickness super glue in the seam between the insert and the playfield.
Capillary action will suck the super glue into the seam, and lock the
insert in place. If the inserts are really loose and just fall out of the
playfield, you can use the GOOP to glue them in place. GOOP is a really
thick industrial rubber cement product available at most hardware stores.
If you are clear coating a NOS (new old stock) playfield, you must use 600 grit on it too. You won't need to do any leveling, as it will already be done (the playfield has never been used!). But you will need to "rough up" the surface with 600 grit before you apply the Varathane. Sanding increases the surface area, and gives more area for the new finish to "bite" in to.
Step 4: Wipe Down the Playfield.
Using a clean, lint-free, soft rag, wipe down the playfield with
the rag wetted with naptha. Turn the rag often, and wipe any wetted
areas clean with another rag. This will remove old waxes and other
crud that will prevent the adhesion of the Varathane.
-
Step 5: Tape off the Playfield Against Overspray.
Tape off any parts you didn't remove to prevent Varathane overspray from damaging them. Put rolled up tape in the lamp sockets, or use old burnt out light bulbs, or even old coil sleeves to prevent overspray getting into the lamp sockets. Make sure everything is removed that you can remove. This will only make the entire job of painting much eaiser. Also cover the sides of the game to prevent overspray. I paint the playfield as installed in the game, but with the playfield shifted slightly forward and resting on the front (to keep it more level). The cabinet provides the perfect place and position to paint a playfield. But you could easily remove the playfield from the cabinet too for painting.
Right: Use a Sharpie pen or a paint pen and go around the black lines on the plastic inserts too.
-
Step 6: Touching-up the Black Lines.
Before you apply the Varathane, you can touch up the black accent lines on the playfield. To do this, use a NEW Sharpie pen or a paint pen (available at art supply stores). Plastic light inserts often show the most black wear, and are very easy to touch up. If you get too much black on the insert, use an exacto blade to scrape off the excess. Major Sharpie mistakes can be removed with a clean rag dipped in alcohol and wiped over the area. Paint pens are less forgiving, but you may be able to wipe them off with a rag.
Bleeding Sharpie?
Some people have mentioned that the ink from a Sharpie can bleed underneath
the Varathane. I personally haven't found this to be a big problem. I have
noticed bleeding of the Sharpie's ink IF you apply coats of Varathane too thick.
I would suggest you test an area with your Sharpie and Varathane, and your spraying technique.
Don't spray the Varathane coats too heavy. To minimize Sharpie bleeding,
spray a very LIGHT coat of Varathane over the new Sharpie areas. Let the coat fully
dry and spray a second light coat over the new Sharpie areas.
Only then lightly sand the new glossy Sharpie area with 600 grit.
You can now coat the whole playfield and the Sharpie area shouldn't bleed.
But to be safe, I am now trying to use acyrlic black paint as much
as possible instead of a Sharpie. It's not as easy to use, but the risk
of Sharpie bleeding will be avoided.
Step 7: Spraying the First Coat.
Make sure you shake the Varathane spray can for several
minutes before spraying. Then
test spray the Varthane under the lower ball arch. If you
did any playfield touch-ups, I would
recommend first putting down some acyrlic paint under
the lower ball arch in a hidden area. After it dries, draw a line through the
paint with your Sharpie pen (if you are using one to re-define
the playfield's black lines). Now spray some Varathane on this
area. This will test your Sharpie's ink to make sure it doesn't
"bleed". Also check to make sure you are getting good
adhesion, without "fish eyes". If you
are getting fish eyes, STOP and scrub the playfield
again with naptha.
Right: The same area with no fish eyes. The area was wiped down again with naptha and re-sprayed. The finish has now laid down smoothly. Note the Sharpie pen's ink has still not bled, even after cleaning off the previous finish, wiping it down with naptha, and re-coating it with Varthane. Bleeding can be a problem if you apply coats too thick.
-
If you have a tack rag (available from automotive paint supply stores), use it
now to remove any remaining dust on the playfield.
Now you can spray the first coat of Varathane. Your first coat of Varathane
should be fairly thin, especially if you used Sharpie pens for touch ups. Spray a "wet" coat,
not moving too fast, but not applying the Varathane too thick either. Spray the ball
shooter lane first. Then continue spraying the playfield going
width-wise (left and right). This constitutes one coat.
Since Varathane is water based, it may appear cloudy or milky when applied. Don't worry about this; the cloudiness will disappear as the finish dries. Don't apply too heavy a coat; If the finish is getting cloudy, you are applying it too heavy. Minimal clouding is OK, but it's best if you apply a "wet" coat with no clouding. The clouding will disappear as the Varathane dries. If the Varathane sprays "chunky", the propellant hasn't mixed well with the Varathane (you didn't shake the spray can enough, or you have a bad batch of Varathane).
Let the coat dry for 24 hours. Soak the spray nozzle in lacquer thinner between coats to prevent clogging.
Step 8: Do NOT Sand after the First Coat!
After the first coat is dry, do NOT sand the playfield. There
isn't enough film thickness at this point to do any sanding.
You do not want to break through the new clear and cut into
your touched up areas.
The first coat will be the roughest, worse looking coat. Don't be discouraged. After the second and third coat we'll try and sand the imperfections out of the finish.
Step 9: Spray the Second Coat.
After the first coat has dried 24 hours,
apply a second coat of Varathane. Make sure you shake the Varathane spray
can for a few minutes before spraying. Let the second coat dry 24 hours.
After the second or even third coat is applied and dry, you may sand the playfield to remove imperfections. Sand lightly with dry 400 or 600 grit sandpaper to remove imperfections. Don't try and remove all the imperfections at this point. There isn't enough film thickness to do that. As you apply more coats, you can spray them thicker and sand more aggressively. When done sanding, lightly wipe down the playfield with a tack cloth. Soak the spray nozzle in lacquer thinner between coats to prevent clogging.
Important Sanding Note:
I avoid sanding between Varathane coats when I can. The problem
with sanding is heat! If you sand too aggressively, the
heat caused by the sanding will soften the Varathane and cause it
to rip! This happens because the Varathane is not fully cured (it
takes a few weeks). Because of this, limit sanding between coats
if possible. The other problem is always sand Varathane "dry".
Since it's a water-based finish, using a liquid with sanding is
not recommended, because the finish is not fully cured.
Important Coating Note:
It has been suggested that not letting a coat of Varathane fully
dry before applying the next coat gives better adhesion.
By letting the Varathane dry for about 30 minutes,
this will allow the next coat to "bite" to the previous
coat better (which is still soft).
Do NOT attempt this! I have found this causes way more
problems than it solves. Let each coat dry 24 hours, and lightly sand between coats
(after the second coat). This gives far better results. The
sanding between coats does two things: it increases surface area
for the next coat (for better adhesion), and it sands out surface
imperfections (making the final product smoother).
Step 10: Apply more Coats, Lightly Sand between Coats.
Shake the Varathane spray can for a few minutes before spraying.
Apply three to seven spray coats of Varathane. About five spray coats of
Varathane is about right for most playfields with minimal wear.
Playfield with more wear may require more coats.
When sanding between coats, allow the playfield to dry 24 hours between coats. Lightly sand with 400 or 600 grit between each coat. If you sand varathane that has dried less than 24 hours, you can rip the top layer as it hasn't fully cured. As you apply more coats, you can spray them a bit thicker, and sand more aggressively between coats. After sanding, use a tack cloth or wipe down the playfield with naptha. With each coat the finish will get smoother and better looking. Each coat should have less "orange peel" and generally look more level.
the different coats. See the edge of the film of
each coat? This shows how urethanes do NOT
melt into the previous coat like a lacquer does.
This makes urethanes hard to work with, as they
are less forgiving when repairing imperfections.
-
How Many Coats?
More coats are not necessarily better. Even though Varathane is clear, it's not perfectly clear. Having too many coats will dull the playfield art and change the colors slightly. Apply enough coats to get a good film thickness, but don't over do it. I would say five spray coats would be about right. Seven coats would be a maximum, and three coats a minimum. The number of coats is dependant on how heavy you spray the Varathane and how bad the playfield imperfections and playfield wear is. Use your judgement and remember the law of diminishing returns. If you are clear coating a NOS playfield, three or four coats should be plenty.
-
If you are clear coating a used playfield,
it is VERY important to try and get most of the playfield imperfections sanded
out between coats. This may be the final determination of the number of
coats you apply. If you sand the current coat too aggressively, you will
break through to the previous coat. This would not be a problem
with lacquer, as the coats all "melt" together. But with a urethane (and
a water based one at that), adhesion is chemical, not physical. This means
sanding through to a previous coat will leave a line or shadow that you
can see. When you spray the LAST coat, it should only require a very
minimal amount of sanding to remove "orange peel" (the slightly bumpy
texture you get when spraying paint, no matter how good you are at it).
Step 11: Sanding After the Last Coat is Applied.
Sanding after the last coat of urethane is the most critical sanding step
you will do. It is absolutely important that you do NOT break through
the last coat when doing the final sanding! If you do sand too agressively,
you will leave a line or shadow between the last coat and the previous
coat. This will require you to add yet another "last coat" to fix
that problem! Sand the last coat very lightly. All the playfield imperfections
should have been removed in earlier sandings. Don't try and remove them
now!
After the last coat is applied, let the playfield cure for at least two weeks, and perferably three or four weeks. The playfield will stop "smelling" when it is fully dried. Varathane needs at least two weeks to fully cure. After two weeks, sand LIGHTLY with 600 grit (dry), and then 1200 grit sandpaper. Always do this sanding "dry", without water. Sand just enough to remove any remaining "orange peel". Remember, you're not trying to remove major imperfections at this point! That should have been done in previous sandings. Starting with 1200 grit instead of 600 grit is the way to go, as sanding aggresively would be difficult with this finer grit.
Important! If after you first start sanding you "smell" the playfield, this means the playfield is NOT dry! The most outside layer of the playfield is dry, but when you start sanding it, you remove this dry layer and expose the underlying "wet" layers to the open air. If they are not dry, you will smell them. I would suggest you stop at this point and give the playfield another week to dry. Alternatively, you could LIGHTLY sand the top layer, and then let the playfield dry a week. This will make the Varathane cure faster (since you removed the top most layer). But don't go too far, and don't sand too hard, or you'll damage the "soft" Varathane below the hard outside layer. If your sandpaper gets clogged with chunks of Varathane that don't wash out with water, the playfield is too soft to sand.
of the sandpaper? This means the Varathane
is too soft to sand. The "dust" in the upper
right corner of the sandpaper is fine; that
will wash away with water. But the other
pore-clogging chunks won't wash away, and
signify the Varathane is too soft.
-
After waiting until the playfield is fully dry,
do any finishing sanding LIGHTLY with 600 or 1200 grit sandpaper dry (no water).
After you're done, let the playfield dry another couple days. Then follow up with
1200 or 2000 grit (if you want). Always sand the playfield dry without water.
-
After sanding with 1200 (or higher) grit, finish off with Novus3, then
Novus2. Make sure you use different rags for the two different
grades of Novus. You playfield should look pretty good at this point.
You can apply a good coat of hard paste wax. But notice how the wax
doesn't seem to "stick" to the playfield? This happens because you
have sanded the surface so slick, there are no finish pores or
valleys for the wax to
hold to. Wax works because it gets into the pores, valleys and imperfections,
and fills them (to make the surface more level). If you've done a good
job sanding, the wax won't have any valleys to get in! It should
wipe off with little to no resistance, even after drying for an hour
or more.
-
I really can't stress too much that you shouldn't sand the last coat
too aggresively. You've spent all this time clear coating your playfield.
Don't waste that effort by sanding through to the previous coat. Don't worry if
there are some minor imperfections. It's a pinball table, not a shrine!
After the playfield is completely rubbed out, wax it with a paste wax. This will really bring out the shine. Now Re-assemble all the playfield parts back onto the playfield. And test your game. You'll be amazed at how "slick" and fast the game plays!
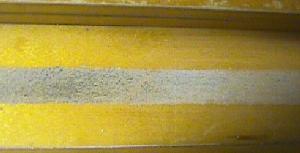
Right: The repair area after it has dried, been block sanded, and rubbed out. Can you see the "V" shaped repair?
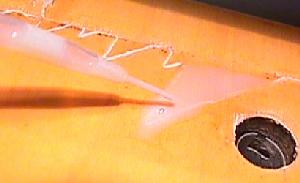
Step 12: Fixing Mistakes and Low Spots.
If you make a mistake, or you have a low spot that needs to be raised,
often you can fix it. You'll need to buy a pint can of liquid Varathane, and
some disposable "pipettes". Pipettes are used in medical facilities for doing body
fluid tests, and look like big throw-away eye droppers.
You can usually snag a few from the doctor's office for
free if you ask.
Using the pipette, suck some Varathane from the can. Then squeeze it out onto the playfield in the desired area(s). Overlap the area just slightly, and build the lower repair spot up above the surrounding area. Try not to get any air bubbles in the Varathane when doing this. If you do, suck the air bubble back into another (empty) pipette. After the Varathane dries (at least a few days), block sand this area level with the surrounding area. The repaired area blends in fairly well (but not perfectly) if you get it level with the adjacent areas.
2k. Polishing a Playfield.
-
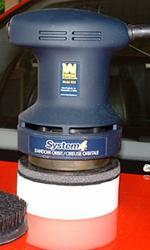
There are a number of ways to machine polish a playfield.
One is using the Wen 4" orbital buffer as seen at Topoftheline.com
here.
This is a good fool-proof 4000 rpm buffer that will prevent burn-throughs.
It has an orbital motion and if you press too hard, it will
stop spinning, preventing burn-through. Yellow heavy cutting pads are available
here, and
orange medium cutting pads are available
here, and black
polishing pads are available
here.
from TopoftheLine.
-
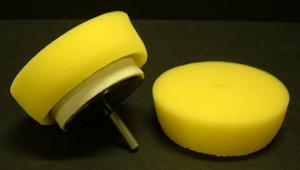
Another method is using a drill/arbor based polisher. This will
give faster polishing results because a drill system is not
orbital, and it is also cheaper. The downside is it's
much easier to burn-through the playfield finish if you are not careful.
Again TopoftheLine.com sells a 3" drill/arbor system as seen
here.
Polishing pads in both yellow (for heavy and medium polish) and
black (for fine and swirl removing) are available
here.
Wool pads are available
here.
TopoftheLine.com also sells a nice 2" drill/arbor buffing kit for around $20 available
here.
This works nice for polishing between pop bumpers and other tight areas.
-
The for compounds there are a number of choices. Personally I
don't really like the TopoftheLine compounds, but here's
a list of what they offer as seen
here:
- Extreme cut, removes 600 grit sand scratches. Only use in extreme situations. here.
- First pass compound heavy cut leveler, removes 1000 grit sand scratches. Levels orange peel really well. Pretty agressive. here.
- Second pass medium cut, removes 1500 grit sand scratches. Not as agressive as Heavy cut, still works wells on orange peel. here.
- Last pass compound light cut swirl remover, removes 2000 grit sand scratches. This is the last step, and leaves a good shine. here.

-
When polishing, if the pad is new or dry, dampen the pad surface by misting it with water.
This will aid in compound/polish dispersion. Continue periodic misting throughout
the task. I wash the pad in the washing machines after I am done
to prevent the compound or polish from drying out or becoming
caked on the pad. Do not machine dry foam pads as this will shorten the life of the pad
(air-drying is best).
Foam pads can become torn or out of balance. This not only shortens the useful
life of the pad, but also produces uneven surface patterns requiring additional
work. These pads are cheap so don't be afraid to throw a questionable pad out.
I usually start with a medium cut polish and a yellow foam pad. Have separate pads for each polish! That is use one pad for medium, another pad for fine, and another for the swirl remover. I use the yellow foam pad for heavy and medium compounds, and a black foam pad for fine compound and swirl remover. After you wash the pads they can be mixed up, but don't mix used pads. Do not apply too much pressure to the pad. Let it do the work. If you end with a quick and light pass using a dry (no compound) wool pad, this cleans the surface and brings out a nice shine.
* Go to Pinball Restoration Guide,
Part One
* Go to Pinball Restoration Guide,
Part Three
* Return to the Pin Fix-It Index