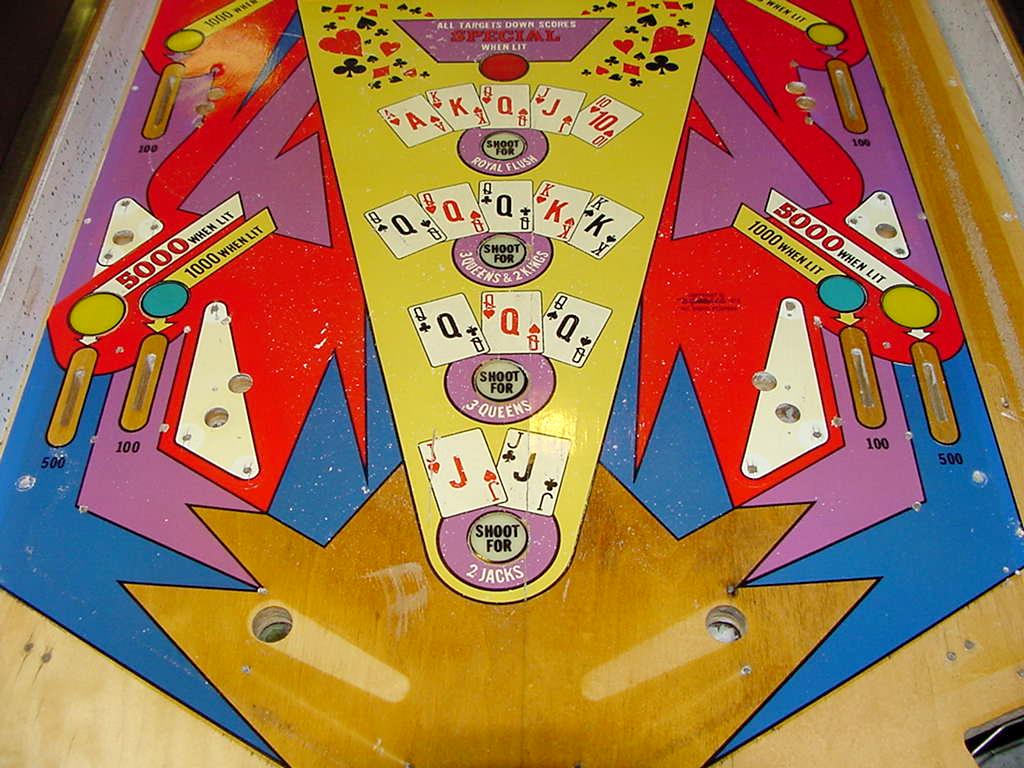
(Example used: 1976 Gottlieb Jacks Open) by cfh@provide.net, 03/06/08. Copyright 2008 all rights reserved. For hardcore pinball restorers only. This document is part of the Pinball Restoration document. Update of this document are available at http://pinrepair.com.
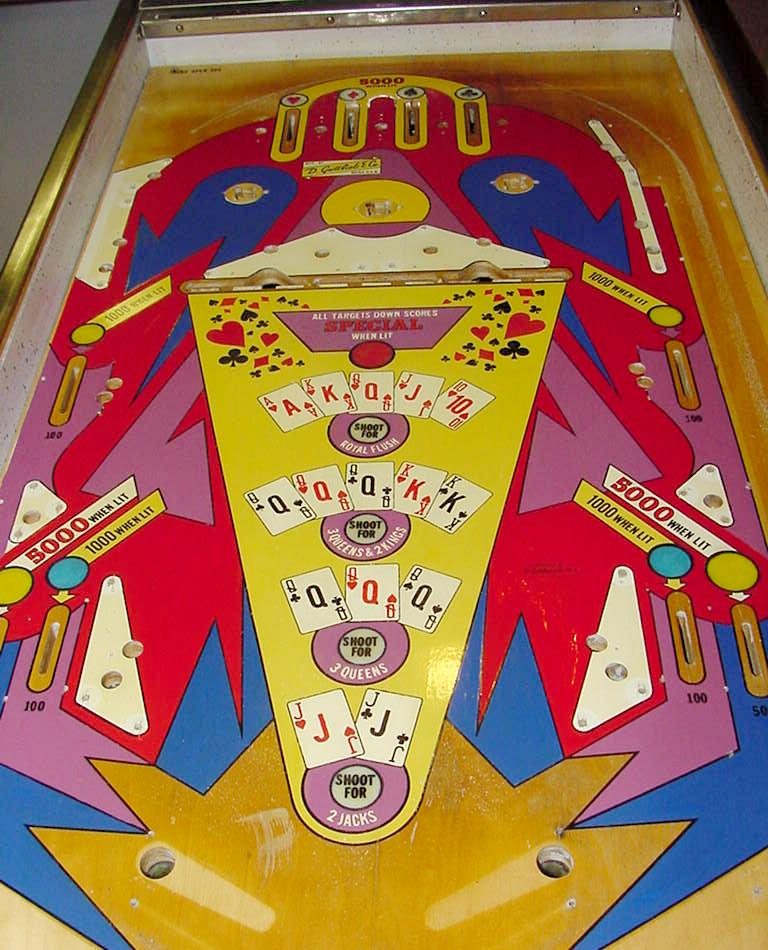
I bought this game from a guy in Lansing Michigan. He had two Jacks Open, one really nice, and this one. The really nice one was twice the price of this game, so being the cheap person I am, I bought the less expensive game. That was probably a mistake, as you will see. This game had all the pop bumper bodies hammered off the top of the playfield. Apparently the game was vandalized. No big deal, I replace those anyway. At least they didn't hammer the playfield itself. But there was some issues with the playfield from play wear, which I needed to address. I put the game together and got it all working. That wasn't too bad really. Even the broken pop bumpers worked (including their light sockets). They didn't look very good, but they worked. But the one thing that really stood out about the game play were the lamp inserts. The ball would occassionally get stuck on the lamp lenses. The lamp inserts had shrunk below the playfield wood surface, and were slightly cupped too. I see this problem often on 1950s woodrail pinballs, but not too often on 1970s EM games. To fix this problem, each of the lamp inserts needed to be removed from the playfield and reset at the proper height. It's a big job, and one I don't much like doing. But it needed to be done. For the purpose of this document, only the playfield paint restoration will be covered. Note this isn't the only way to do this, but in the end it worked out pretty well. My objective was to have a playfield that did not look like it was touched up and clearcoated (well, didn't scream it at least). This is unlike say the work that professional restorers do (like HSA and Playfield Renovations) - these just scream "clearcoated", a look which I really don't like, as it looks out of place and stupid on older EM games. The objective is to not make the playfield look "unnatural" in a 30+ year old game. Note the pictures are very big in this document, bigger than in the normal repair guides.
|
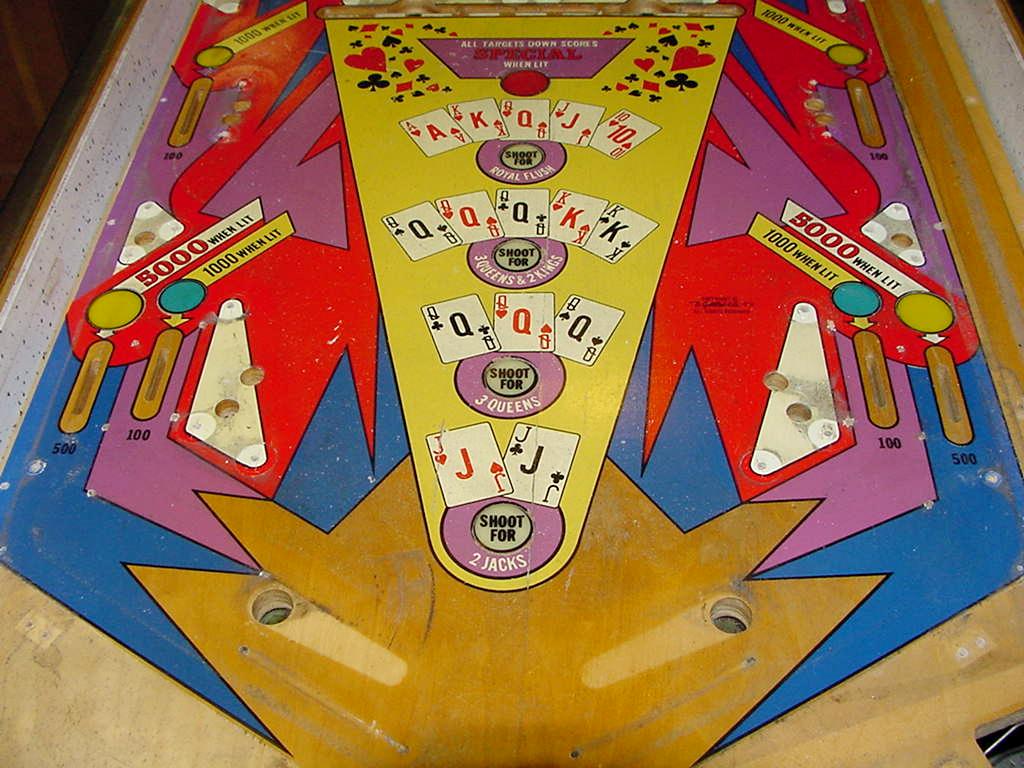
| Here's the playfield as I received it, minus all the topside parts. It was pretty dirty and yellowed. But I can fix this right? Sure I can. |
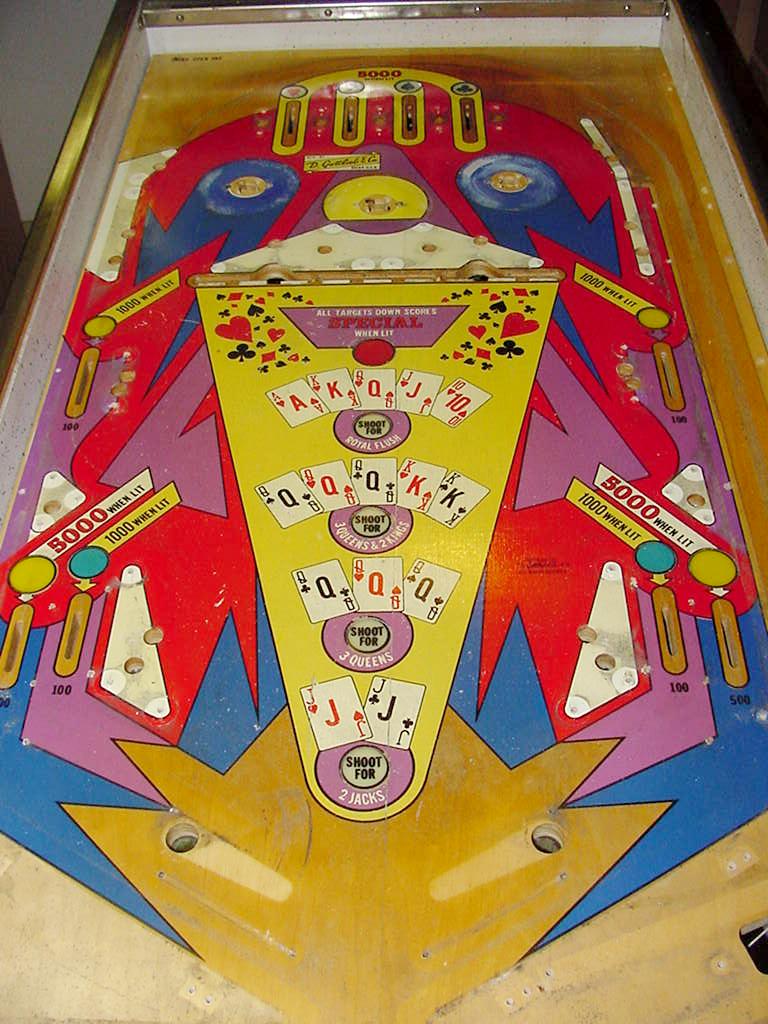
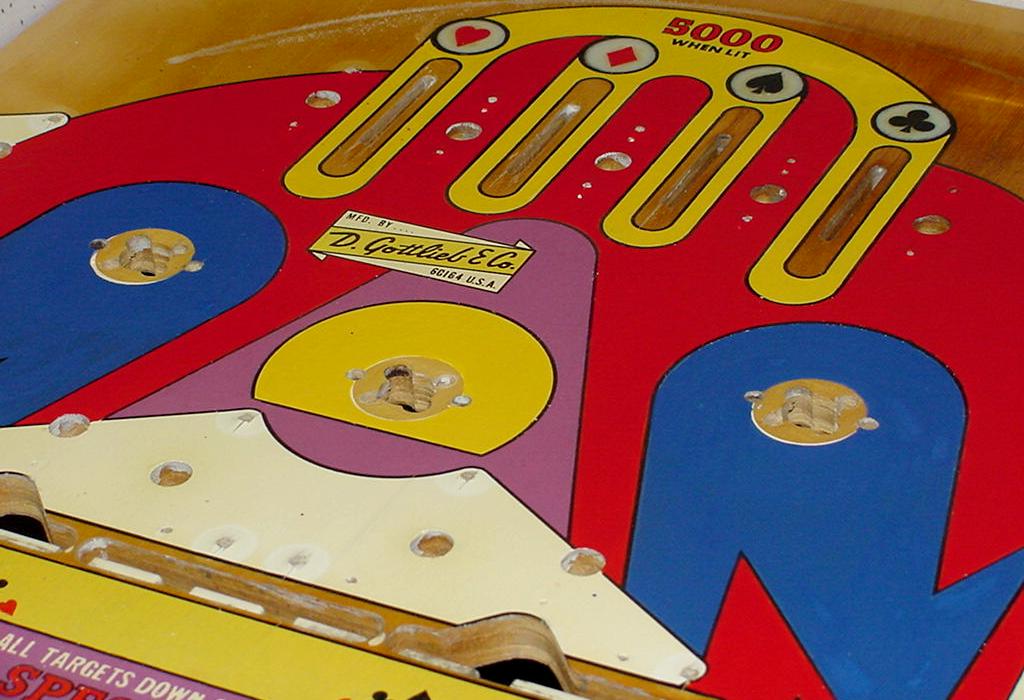
| Here's the playfield after I attacked it with alcohol and Melamine Foam (Magic Eraser) for a good cleaning. After that scrubbing I wiped the white haze off with Naptha, and then did a polish with Novus2. This give me a good idea of what I'm up against as far as touchups. I don't show the Melamine Foam step here, but below is what the playfield looks like after the MF and some Novus2. The white "wear speckles" are everywhere, and need to be fixed before they become serious wear. |
|
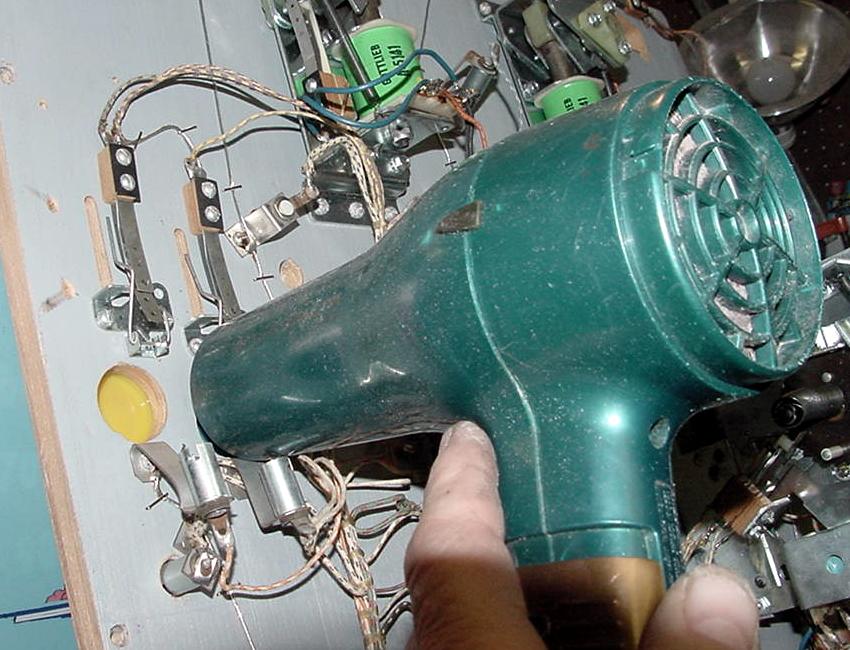
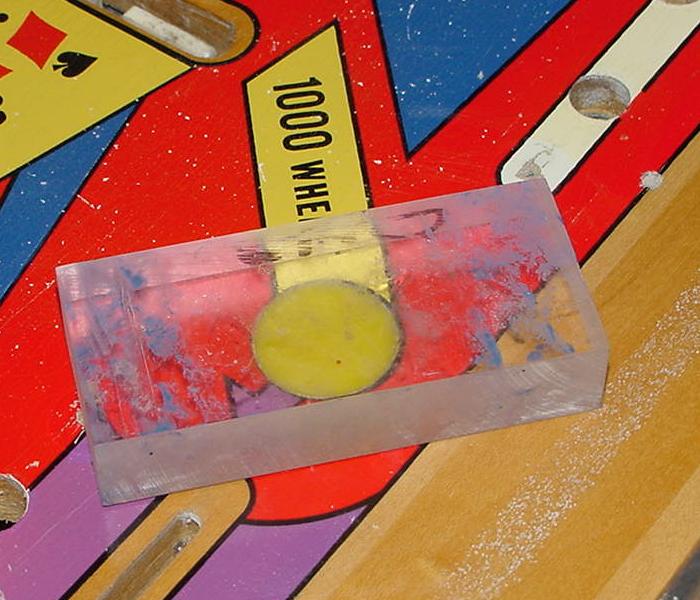
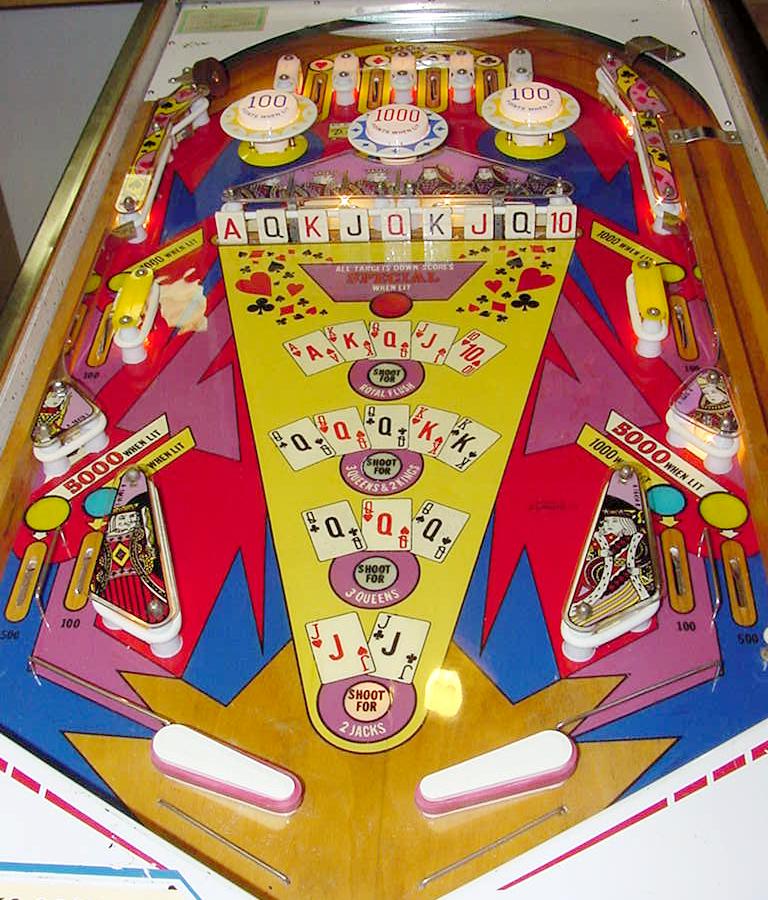
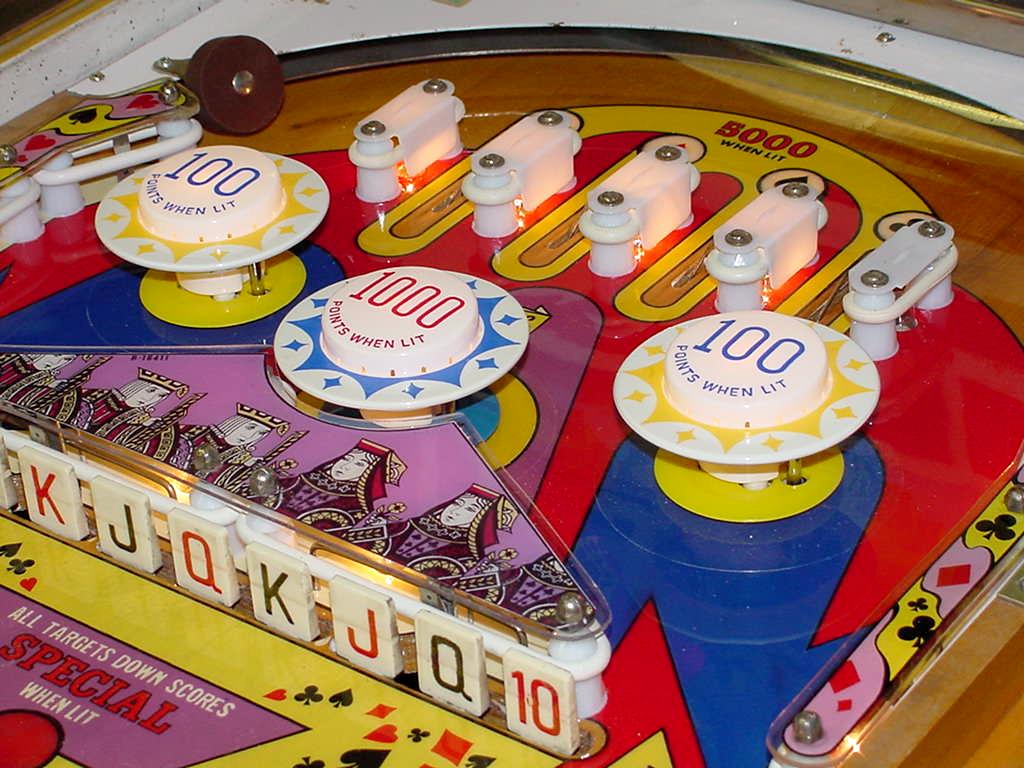
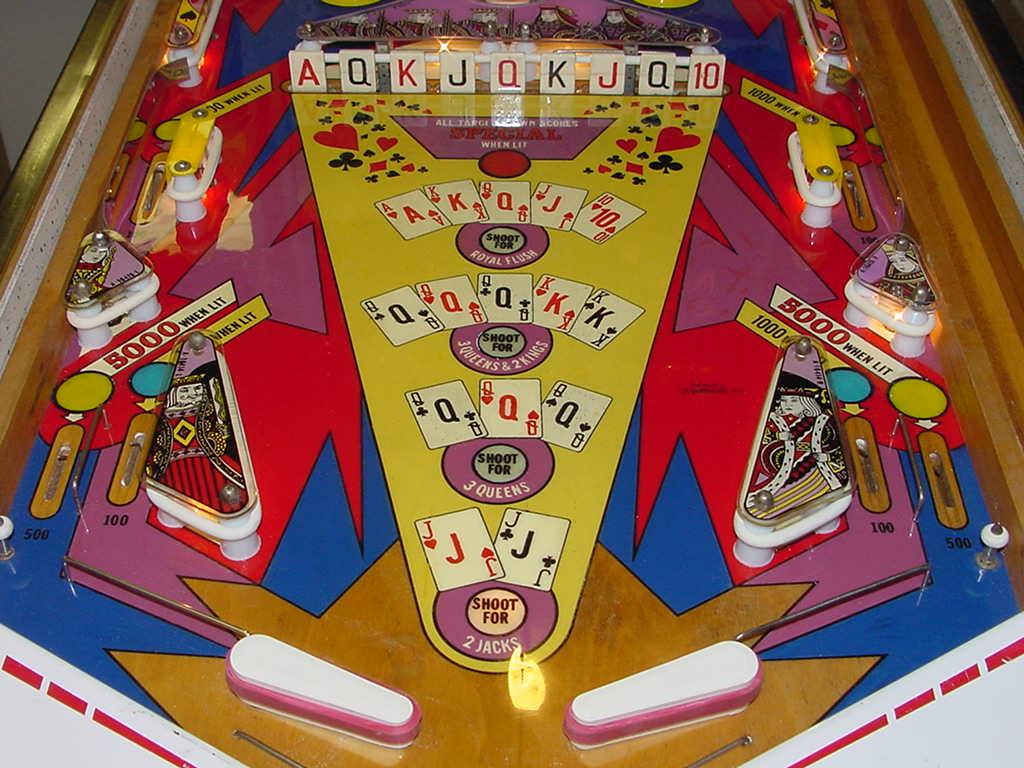
Low and Cupped Lamp Inserts. The playfield lamp inserts on this Gottlieb Jacks Open have shrunk and are lower than the wood playing surface. This causes problems with game play. In fact, the ball can get stuck on the inserts! So they need to be reset at minimum. The first step is to get the inserts out of the playfield. This is by far the hardest part of this procedure. Sometimes they just fall out (especially on 1950s and 1960s games). But on 1970s games, usually the inserts must be forced out. Remove the insert's light bulb and bend the lamp socket out of the way. Then I use a Hair Drying (NOT a heat gun!) and heat up the insert from the bottom of the playfield, as shown below. At the same time i have my hand on the topside of the playfield, feeling the insert. When i feel the insert getting warm, it's time to stop the heat and try hammering out the insert. |
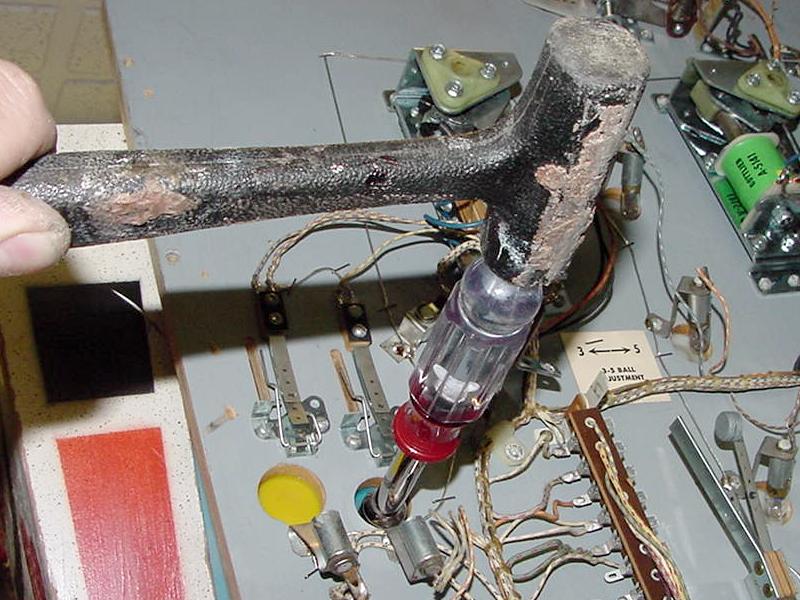
| To hammer out the insert, use a socket or a nut driver. Sockets work really well because you can often find one exactly the right size. Below I'm using a nut driver, but a socket would have been better. A few firm taps with the hammer should knock the insert out. If it doesn't, apply more heat from the hair dryer. Worse case senerio is you hammer off the top of the insert, leaving the rim still glued in the playfield. Though not impossible to fix, you don't want to do that obviously. But sometimes it happens. Superglue is your friend. Use the hair drier and get the piece stuck in the playfield out, and super glue the top back onto the rim of the insert. |
|
At this point BY HAND i gently sand the sides of the insert. (I use a sanding
block to turn the insert on its side.) Want it
to fit into the playfield, but I don't want it to be "loose" (if possible).
Test fit the insert and stop sanding when the fit is nice.
On 1950s playfields, the inserts will be loose! (So don't sand the sides
if you can help it.) I used "gel" Superglue, as a gap filler, to glue
in loose lamp inserts. If the insert fits in nicely and is not loose, I just
use "regular" Superglue.
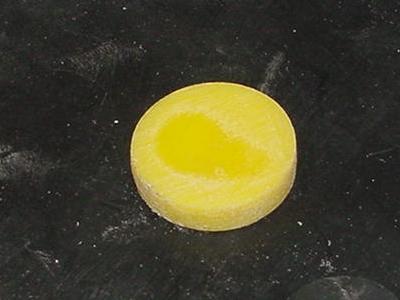
Next step is to make the insert flat. If the lamp insert has no graphics, this is easy. Just block sand the insert flat. Below the yellow insert can be seen as "cupped" (I started to block sand the insert, showing the glossy cupped area in the center that did not get sanded). Block sanding the insert flat really makes the game play better. Don't worry about sanding off the black "key line" around the outside of the insert. Those all get repainted in the playfield touchup. |
|
What if there's graphics on the insert? You have a choice. Personally, I try and leave
the insert alone and don't try to make it flat (unless it's really cupped).
But you could scan the insert,
clean up the graphics, and print it on waterslide clear decal paper. Sand the
insert flat, and reapply the graphics. Or fill the cupped area of the insert with
water-thin Superglue, then block sand it flat. I usually choose to just reseat these inserts
in the playfield without flattening them. Yes they are still cupped.
Hopefully these inserts are in areas where this will be less of a problem.
To reglue the insert into the playfield, apply Superglue to the sides of the insert. Then use an acrlyic plastic block to level the insert. While holding the block in place, push up the insert from the underside of the playfield. If the insert has fit firmly into the playfield, sometimes a gentle hammer blow to the acrylic block from the top of the playfield is needed to level the insert. |
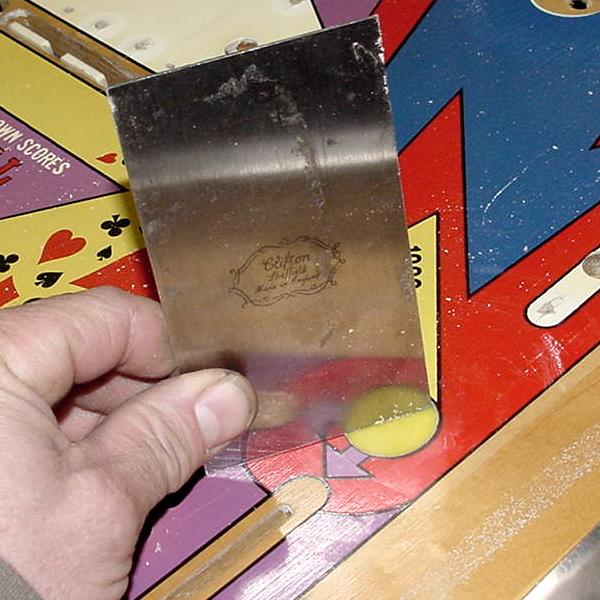
| Here I'm using a furniture scrapper to really make sure the edges of the insert are flush with the playfield. CAREFUL. You can easily scrap the playfield (which isn't a huge deal since these areas will be touched-up anyway). Don't forget that the black key-line around the edge of the lamp insert will be repainted. |
|
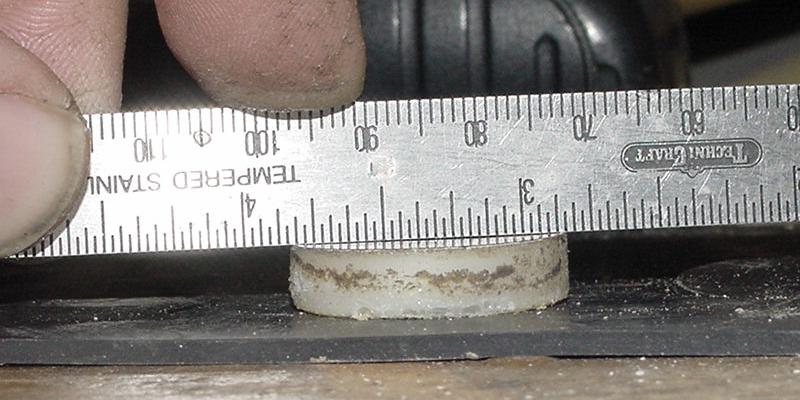
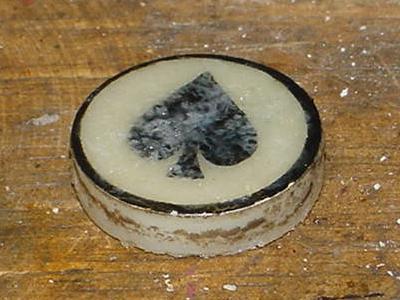
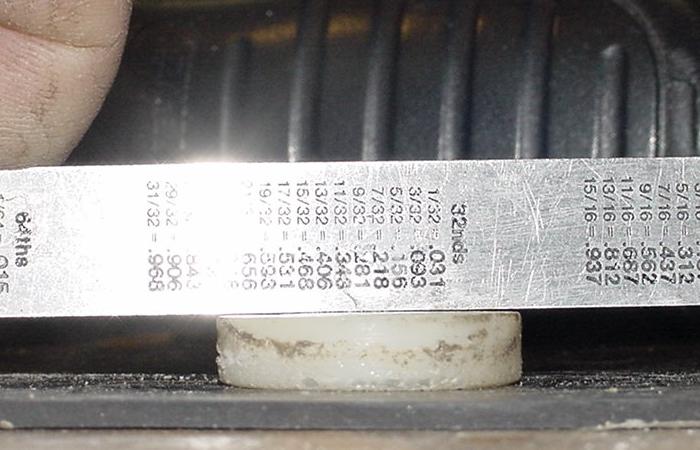
Below is a picture of one the "graphic" inserts, and I'm trying to show the cupping problem (notice the gap between the top of the insert and the bottom of the ruler). Though not a huge deal on this particular insert, older games can be massively cupped. So badly cupped that even if leveled in the playfield, the ball can still get stuck on them. The other thing effect of cupped inserts is giving "english" to a straight rolling pinball. |
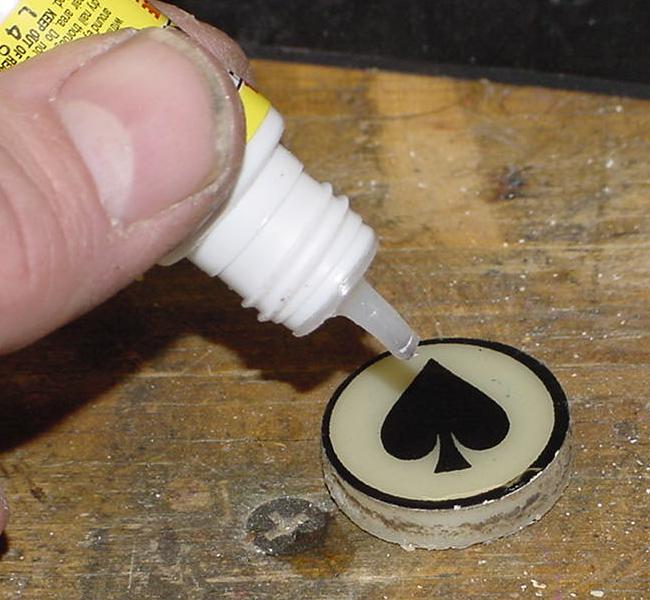
| I will now attemp to show how to level a "graphic" insert using Superglue. I'm using the "water thin" variety to build the top of the insert (and at the same time, protecting the screened graphic on the insert). Apply very thin coats! If too much Superglue is applied in a single coat, it can haze and fog (which obviously would be a bad thing). Use a toothpick to move the liquid Superglue around the top of the insert. Remember, thin coats. |
| Because I am so impatient, I used a Superglue "accelerator" to speed the drying time (NOT SUGGESTED unless you are VERY experienced with this product!) Yes the first coat will be "rough" - unfortunately Superglue does not dry nice and flat like it looked when applied. Below is a picture after my first coat of Superglue (which in this case, is enough to move to the sanding phase). |
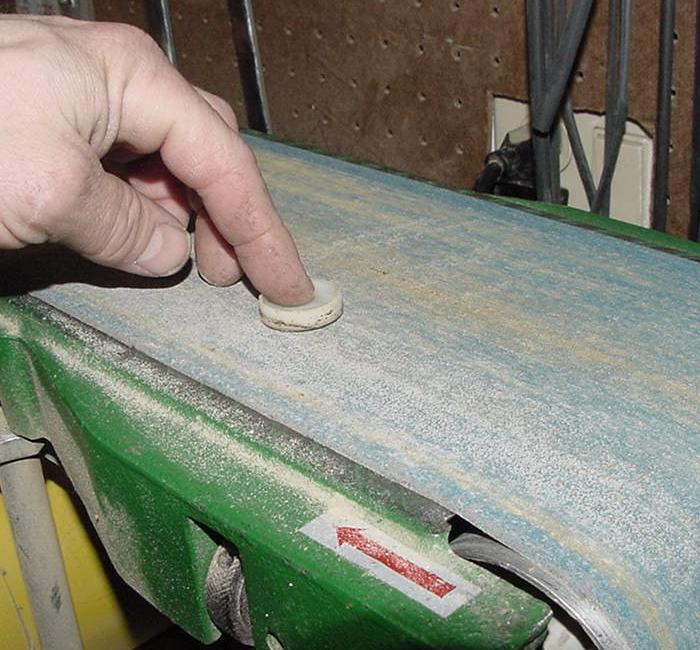
| Now to sand the Superglue coated insert flat on the belt sand. NOTE THE SANDER IS NOT "ON". Instead move the insert across the stationary belt with your finger. You are doing the work, the sander is not moving. I constrantly turn the insert too, so not to favor any particular edge during sanding. This will give a "rough in" of the top of the insert. If there are any major gaps in the glue (there always are), apply a very thin second coat of Superglue. (In total, I used two coats of superglue on this insert.) Rough sand the insert again on the non-moving belt sand. Note I have sanded the outside "key line" off in some spots. That's OK, as the key lines get repainted in the touchup phase. This lets you know you're sanding a bit close, and it's time to stop! Below is a picture after the first coat and first rough sanding. |
| Below is a picture after the first coat and first rough sanding. Now move to an acrylic block (as seen above) with 400 or 600 grit sandpaper "dry" and sand the insert (again, you are moving the upsidedown insert against the block). |

| After sanding with 400 or 600 on the acyrlic block, I used a little Novus2 on a rag and quickly polish the top of the insert. Hey it's not perfect, but remember the clearcoat will also fill minor imperfection. So don't go too nuts trying to make it "perfect". Remember, the objective is to fill the cupping. Also again don't worry about the outside edge key lines - we'll repaint those later. |

| Here's the insert after filling with Superglue. Note it's pretty darn flat now, the cupping is removed. Mission accomplished. Now will I do this on my other inserts? In this case, no. The cupping on this game is pretty minimal, and the amount of work and the risk involved is just not worth it. |
|
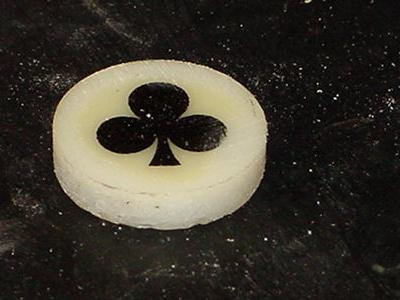
Another less caustic way of leveling an insert is what you see in the "clubs" insert below. This insert was slightly cupped. Not enough for me to go wild and do what I did above with the Superglue, but enough that I want to do *something* about the cupping. So what I did was upsidedown block sand the insert, but very gently. Since the insert is "cupped", the inside graphic is saved (assuming you don't sand too much!), but the outside raised edge is leveled. This is a good compromise, only takes a few moments, and largely fixes a lightly cupped insert (assuming you know when to STOP and not sand through the center graphic). Again, remember the outside edge black "key line" will get repainted later, and any slight oversanding of the center (black) graphic can also be touched up easily. |
|
One last thing to keep in mind when leveling "graphic" inserts.
That is, you need to glue them back in "straight". Having a
graphic insert crooked, well, it will ruin your day. With superglue,
you only have a few seconds of working time. So what I do is this:
Have the playfield in the game and up at a 45 degree angle on the prop bar.
Put superglue around the rim of the plastic insert, and put the insert
into the playfield JUST BARELY. Quickly lower the playfield and straighten
the insert, then push it in place with the acrylic block. Level the insert as needed
(using your finger and pushing up from underneath the playfield, or
by gently hammering the top of the acrlyic block from the top side
of the playfield). Again you only have a few seconds to get this right,
so work quick!
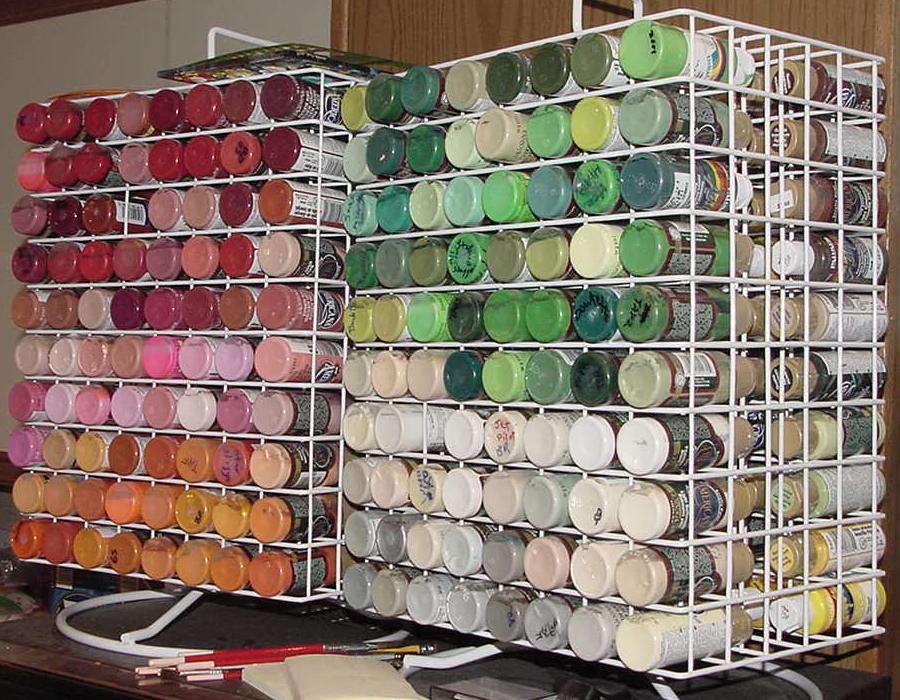
Playfield Touchups. Now that the lamp inserts are all leveled, it's time for the playfield touchups. By far the hardest part of this section is color selection. I admit, I may have an advantage, as I have bought over 200 colors (the entire Ameracana acrylic color line). This makes color selection easier, as I usually don't have to mix colors. The disadvantage to mixing is if you run out of a color, and need to mix more. Unless you weighted the input colors by gram, it is nearly impossible to get the exact same shaded mixed. But a good thing about Gottlieb is a lot of the colors they used were the same from game to game (thank the playfield company, Advertising Posters, for this.) Notice how I mark the bottom of the paint bottles with game abbreviations that I have previously touched up with that color. |
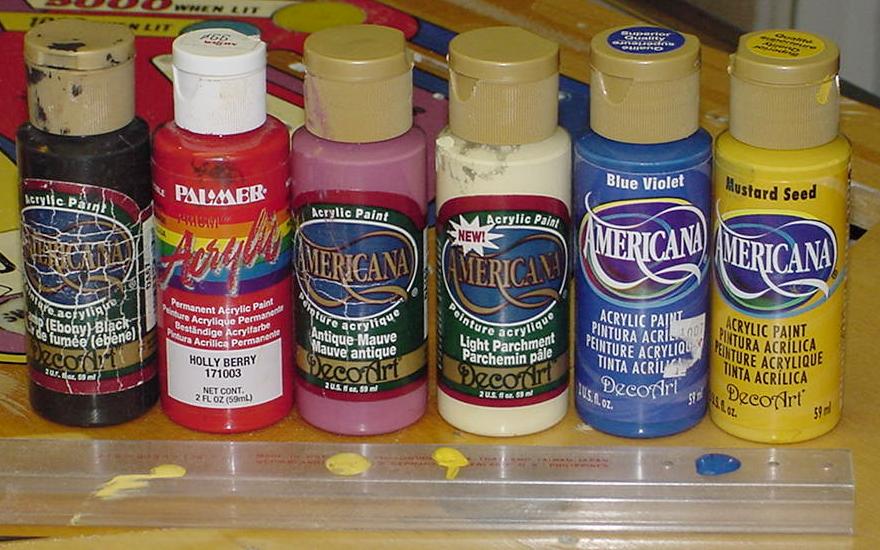
| Here's the colors I believe I'll be using on the Gottlieb Jacks Open. |
|
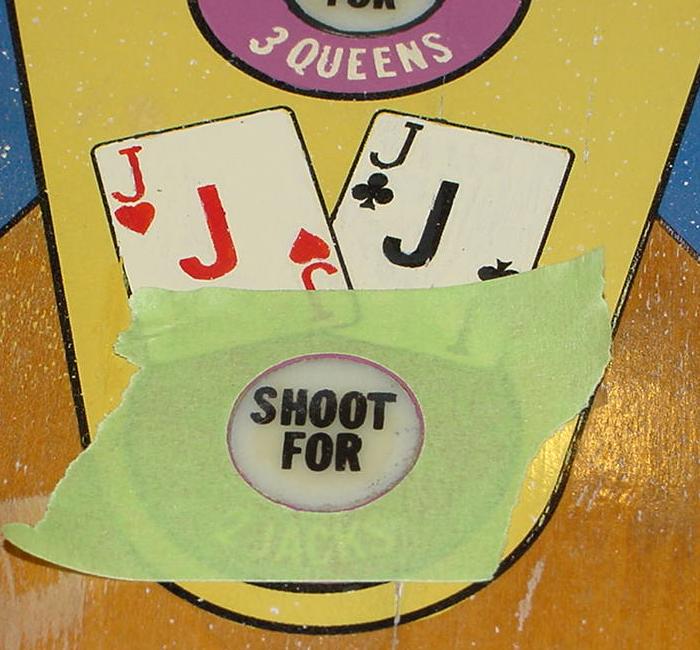
Key Lining the Inserts. The "key lines" are the black lines around the edges of the playfield lamp inserts. They are basically color separators. Though I can paint them pretty good by hand, it's nice to have a tool that makes the job easier. The tools were supplied by Vince C. The only thing he doesn't supply is the tape. You will need GREEN 3m #233 two inch wide tape ($8 a roll), available from any decent automotive paint store. Don't cheap out and try to use blue painters tape. The blue tape is too thick, and does not give good results. The green 3m #233 tape is very thin and is designed for this type of work. |
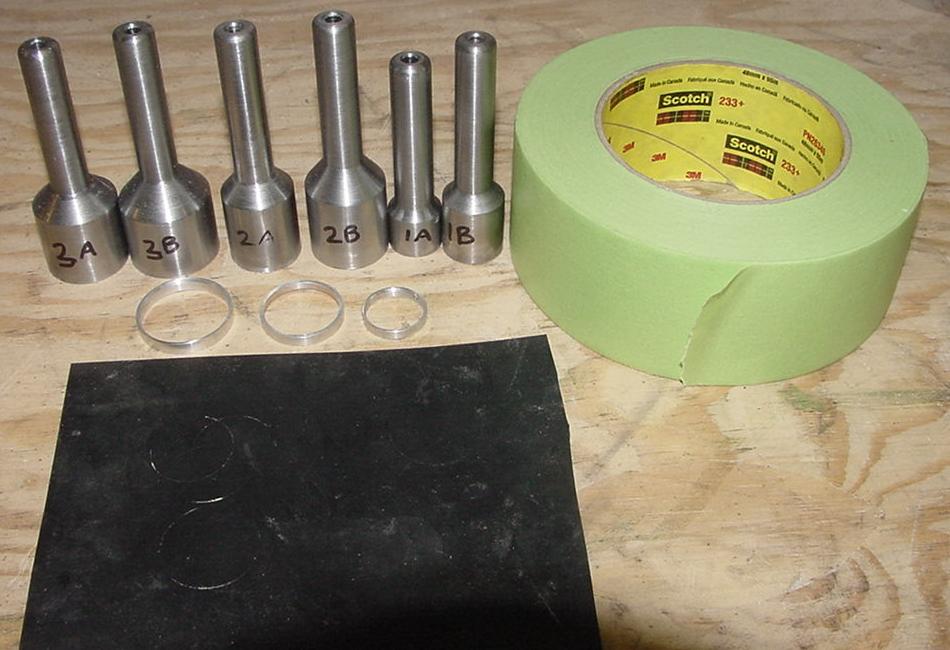
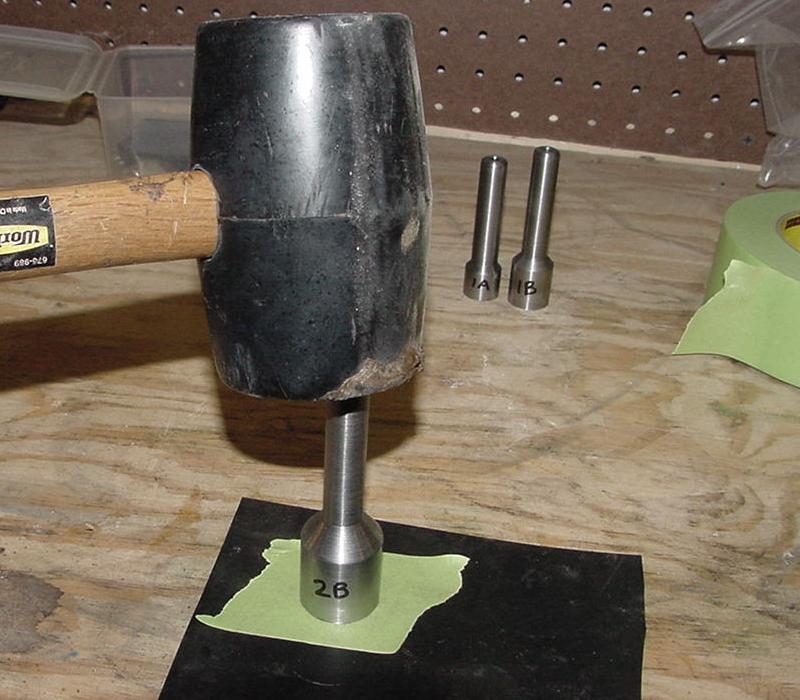
| VC includes two tools for each of the three standard Gottlieb insert sizes. One tool creates the outside tape form, and the other tool pair creates the inside tape form. Just put a piece of the green 3m #233 two inch wide tape on the black rubber pad (supplied by VC). Put the tool on the tape, and give it a good firm wack with a rubber mallet. This will cut the green tape. The larger tool makes the outside tape pattern (discard the inside cut circle). The smaller tool makes the inside tape pattern (discard the outside cut circle). |
| Next put down the outside circle tape pattern. Line it up as best you can with the playfield lamp insert you want to key line. |
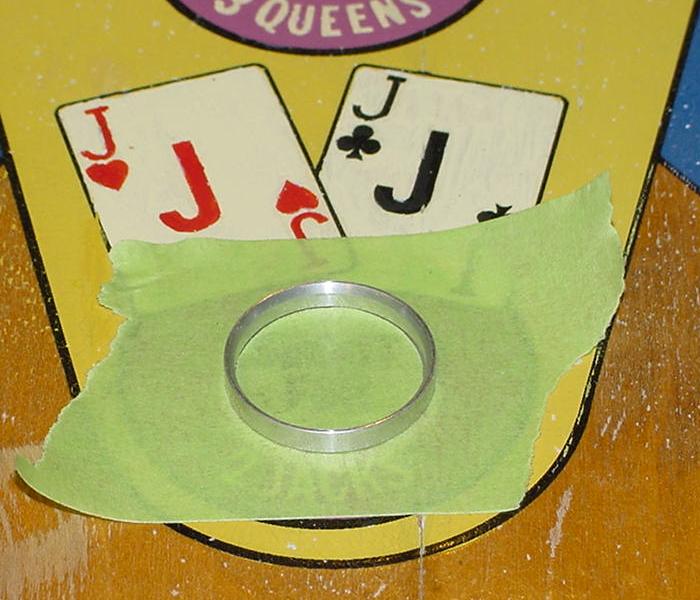
| VC also supplies a "ring". This is used for alignment purposes. You don't have to use it, but it does make the job easier. I was able to hold the inside cut circle tape inside the ring, and then put the ring on the playfield inside the already-applied tape. Then just press the inside tape circle on the playfield, and remove the ring. |

| After making sure both pieces of tape are aligned on the lamp insert and pressed down well on the playfield, paint the black over the exposed playfield between the two tape circles. |
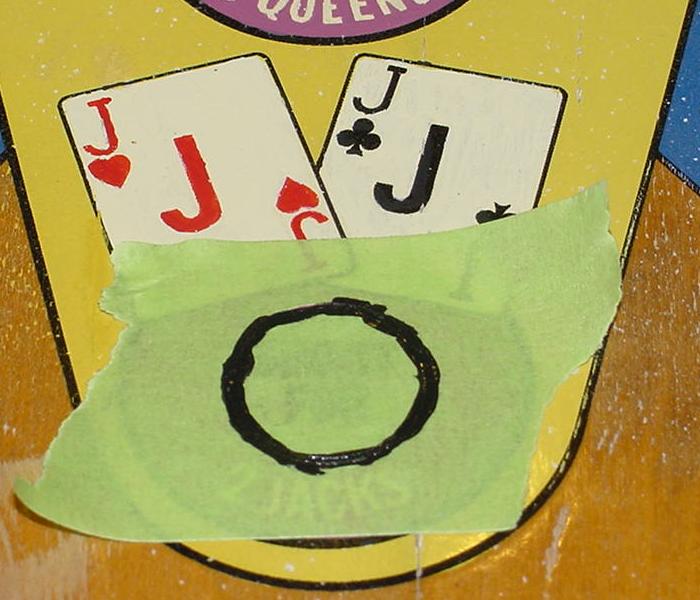
| After a few minutes of drying, remove the green tape. For the inside circle, I use an Exacto blade to lift the tape. The key line should be well painted and have pretty crisp edges. Any edge distortion can be cleaned up with an Exacto blade on the inside edge, and some acrylic paint and a fine brush around the outside edge. Repeat this process for the other inserts. |
|
Can you re-use a cut inner and outer tape circle?
Well depending on how sloppy you are with the
keyline paint, yes. I get about 2 to 4 insert
keyline paints out of a single tape pair. After that
the adhesion is compromised and the tape becomes too thick
(from the paint), and a new pair of keyline tape circles need to be cut.
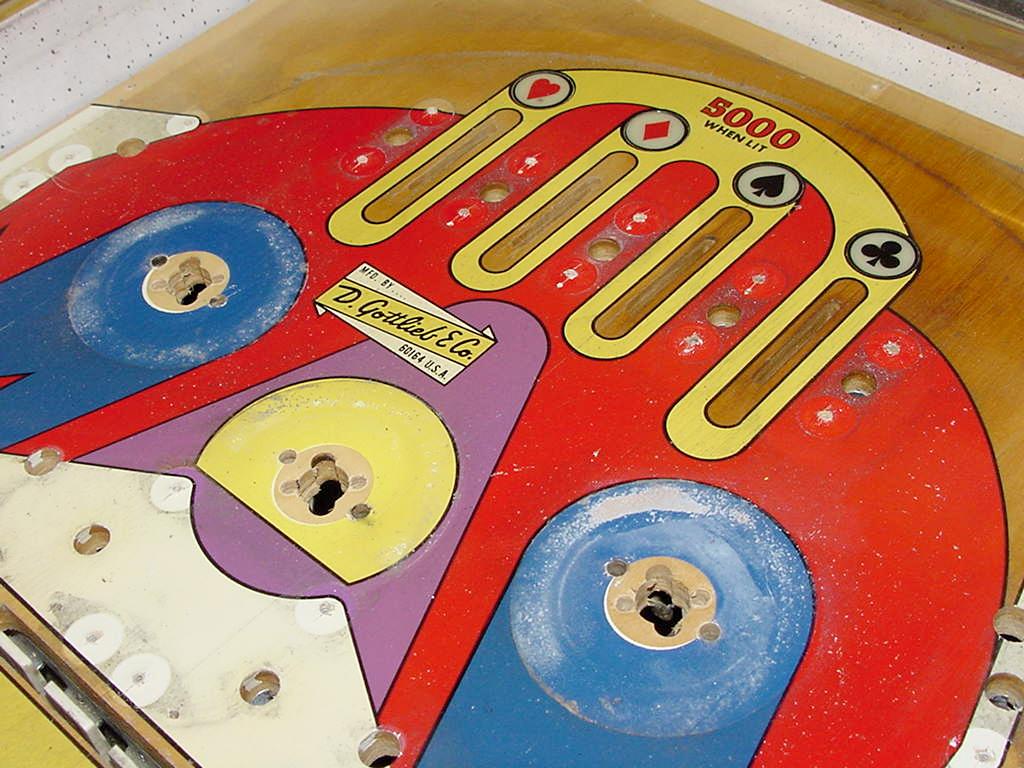
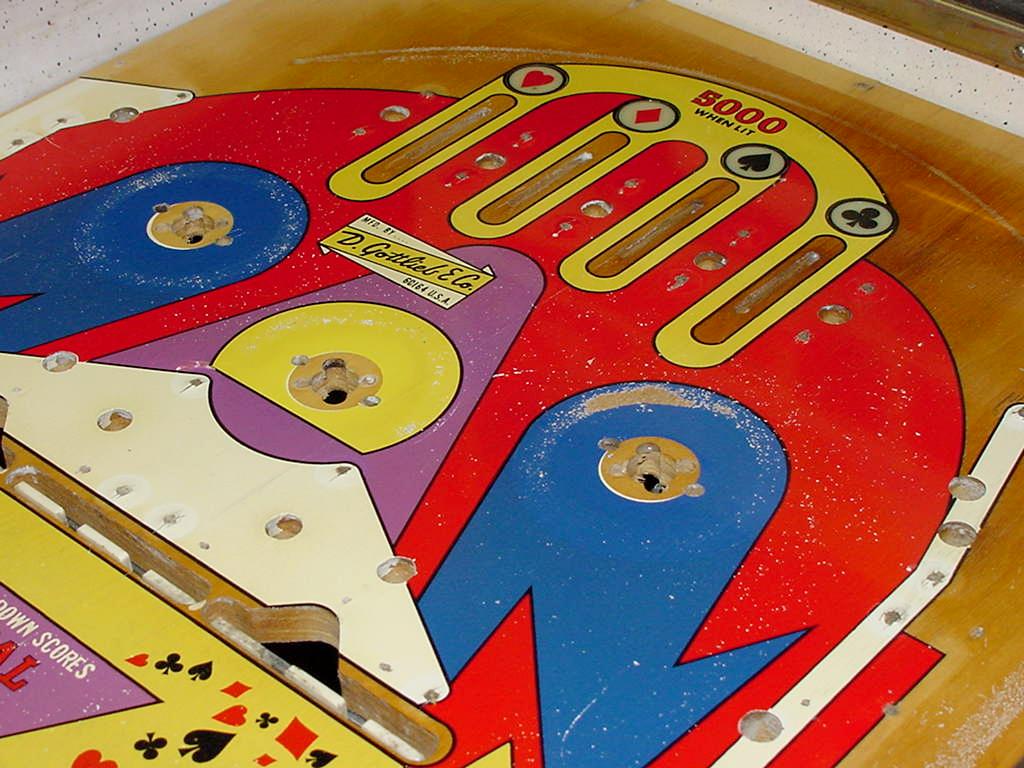
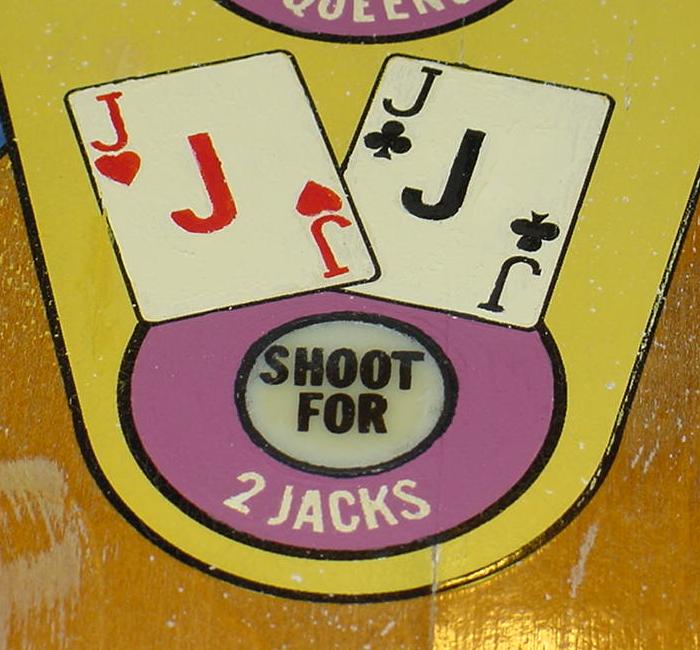
So below is the playfield all touched up and ready for clearcoat. I had to repaint most areas in their entirety. The only things I didn't repaint were (most of) the whites and the center yellow section. Those areas were in decent enough condition, in most cases, I could do the "paint and smear" technique (instead of just wholesale repainting the entire area). |
|
Clearcoating. Below is the playfield after clearcoating. I had some problems with the clear on this playfield. I sprayed four coats of auto clear urethane (like I usually). Then I used the electric DA sander with 600 grit to level the playfield. (Not doing that step will for sure give a not-so-level look to the playfield. So the DA sanding step really is needed.) The problem is, I over sanded and blew through the clear in a couple spots (mostly around inserts). This was really preventable, as I didn't wait the mandatory 10 hours until I started DA sanding. Instead I waited 5 hours, and the clearcoat was just too soft. Ten to 12 hours dry time is optimal. More than this, and the clearcoat is so hard, it's difficult to sand. Less than this, and the clearcoat is too soft. Because of my haste, I was forced to do some more touchup on the black keylines. For this touchup, I used black lacquer. Acyrlic paint is Ok, but if you're going to spray just one or two additional coats, lacquer is better. (The clear urethane flows better on top of lacquer.) I ended up spraying an addition 2 coats, for a total of 6 clear coats. Then I hand sanded with 1200 and 2000 (no DA sanding). I did something different on the playfield polishing. I used a corded drill and the Treasure Cove polishing kit (or Pinrestore.com's polishing kit), if you want to save a little money). Normally I don't do this, because it actually gives too much gloss. I used their #2 or medium liquid (basically 3m Finese-it) and a yellow pad, just putting down polish material less than the size of a dime (do not use more than that.) I then polished the playfield in 1/3 sections. After finishing, I wiped down the playfield, and repeated the process with the black foam pad and #1 or light polish (which is black glazing compound). The unfortunately part about this is just how good the playfield looks. It clearly is not original, as the 6 coats of clear is too much. Add to that the high polish of the drill/foam kit, and it just does not look right. Looks good, but it's obviously not original. |

|
Conclusion. Overall I was pretty happy with the outcome of the Gottlieb Jacks Open pinball playfield. Though not a perfect job, it was satisfying. And the game play is very good, as the playfield surface is very smooth. I did make it too thick (too much clear), and too glossy (should have just used Novus2). But man it looks good! Too good in fact... |
|
More information on clearcoating can be seen in the "This Old Pinball" videos TOP #1,3,4,7. This shows the whole procedure of touching up and clearcoating a pinball playfields. Also see Pinball Restoration Guide, part two and the Gottlieb 2001 playfield restoration, Gottlieb Gold Strike playfield restoration, and Gottlieb Quick Draw playfield restoration web pages for more info.
* Go to Pin Fix-It Index |