(Example used: 1973 Gottlieb King Pin) by cfh@provide.net, 03/20/08. Copyright 2008 all rights reserved. For hardcore pinball restorers only. This document is part of the Pinball Restoration document. Update of this document are available at http://pinrepair.com.
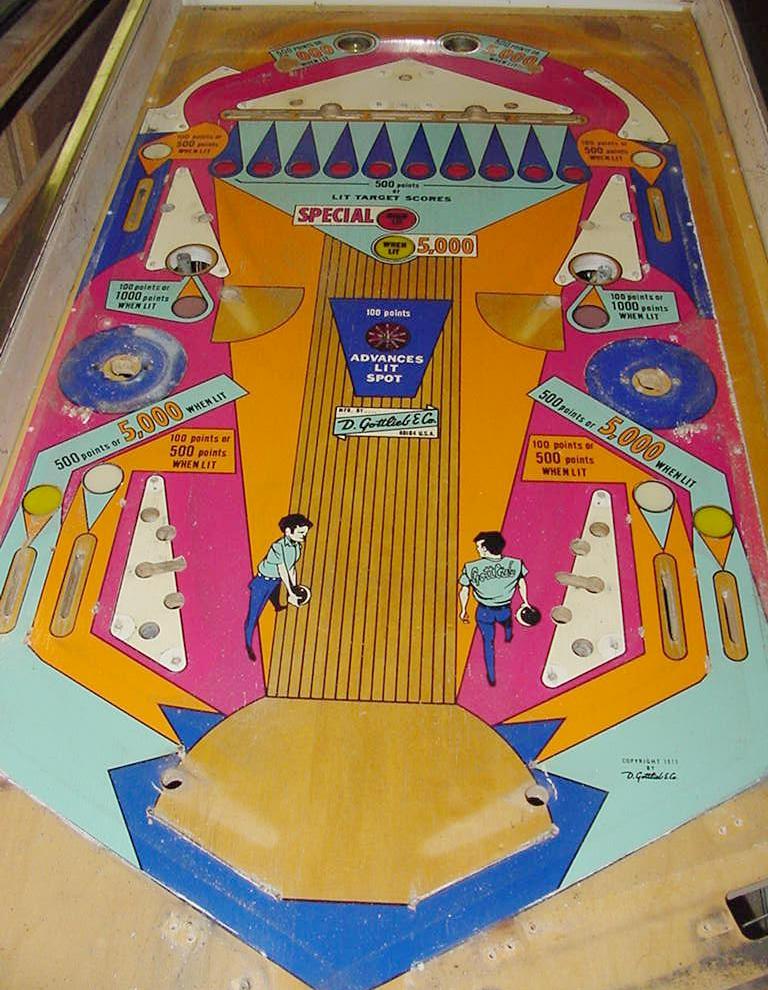
I bought this game from a guy in Canada. I dig the single player drop target Gottlieb wedgehead pinballs from this era. Similar to Jumping Jack but King Pin is a single player game. The playfield was more worn that I would have liked, but what can you do? The kickout hole at the top of the PF really wears the finish. It's difficult to find these games, so I take what I can get. Also with the cost of shipping, everything really needs to be within driving range. For the purpose of this document, only the playfield paint restoration will be covered. Note this isn't the only way to do this, but in the end it worked out pretty well. My objective was to have a playfield that did not look like it was touched up and clearcoated (well, didn't scream it at least). This is unlike say the work that professional restorers do (like HSA and Playfield Renovations) - these just scream "clearcoated", a look which I really don't like, as it looks out of place and stupid on older EM games. The objective is to not make the playfield look "unnatural" in a 30+ year old game. Note the pictures are very big in this document, bigger than in the normal repair guides.
|
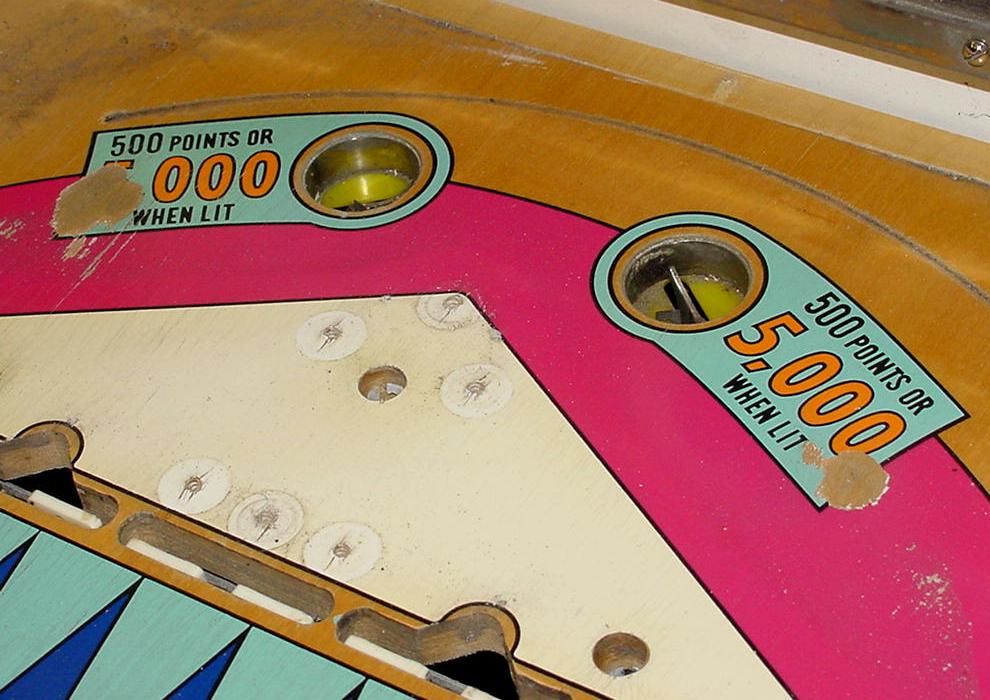
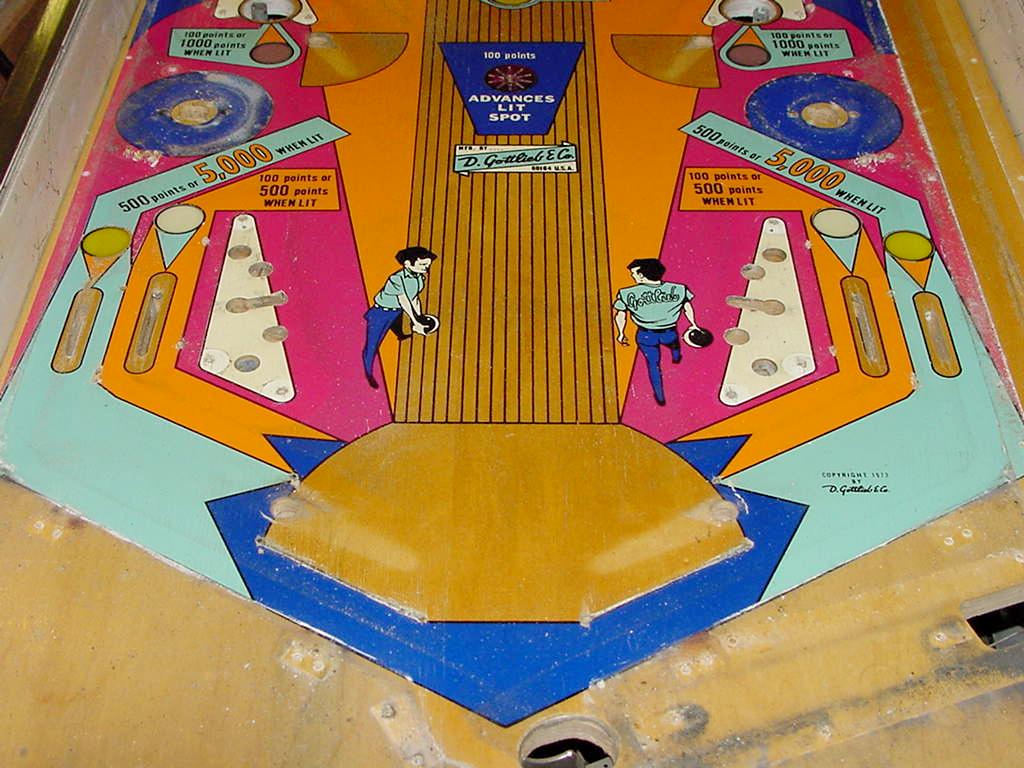
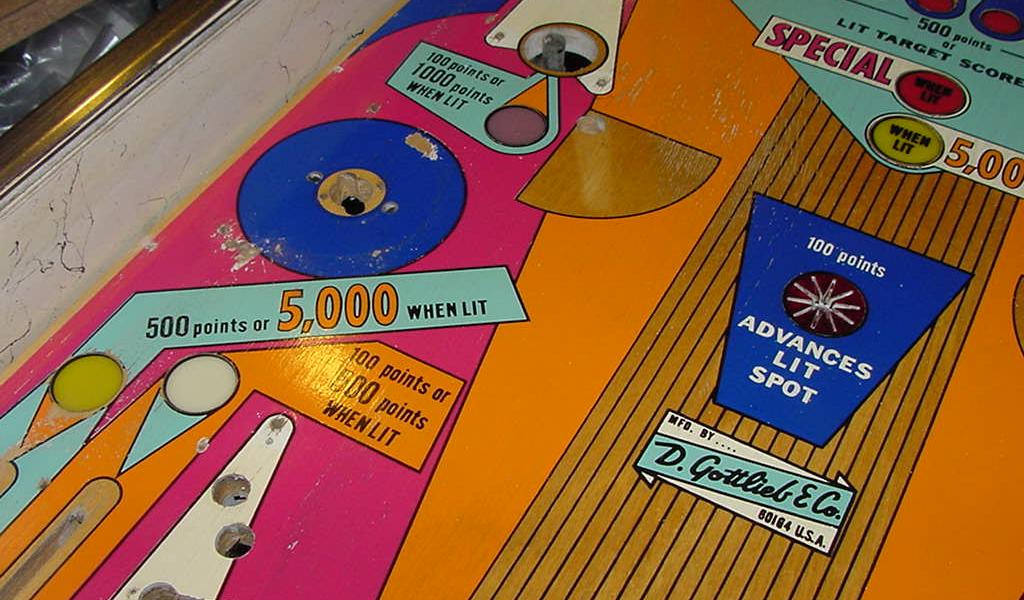
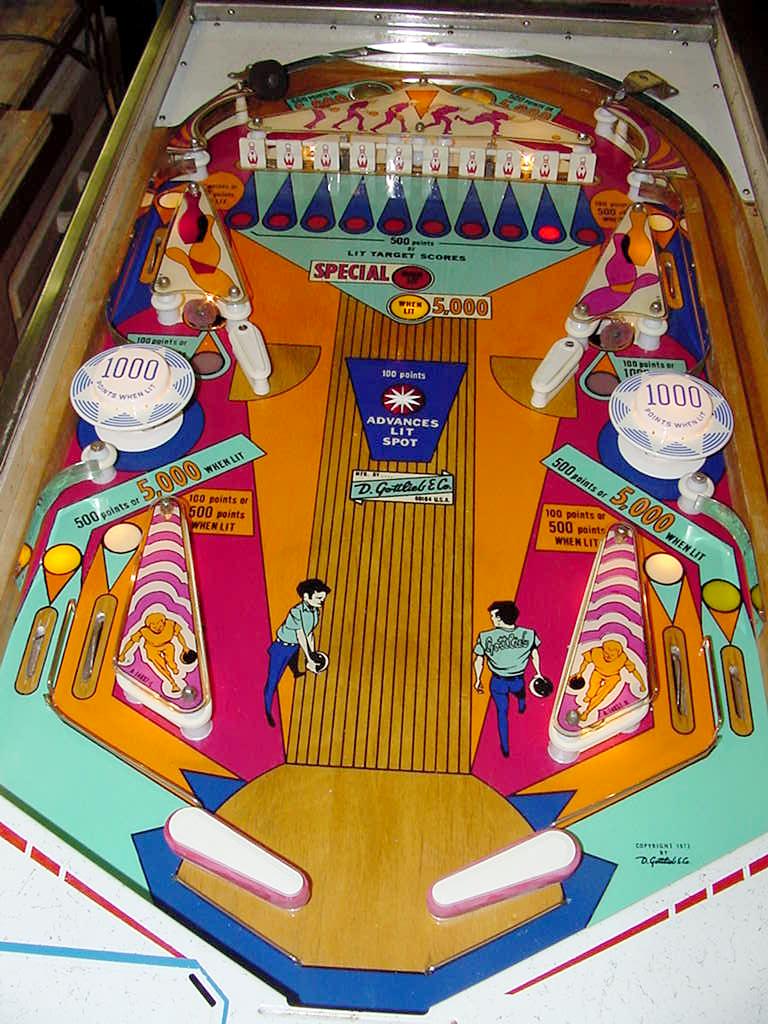
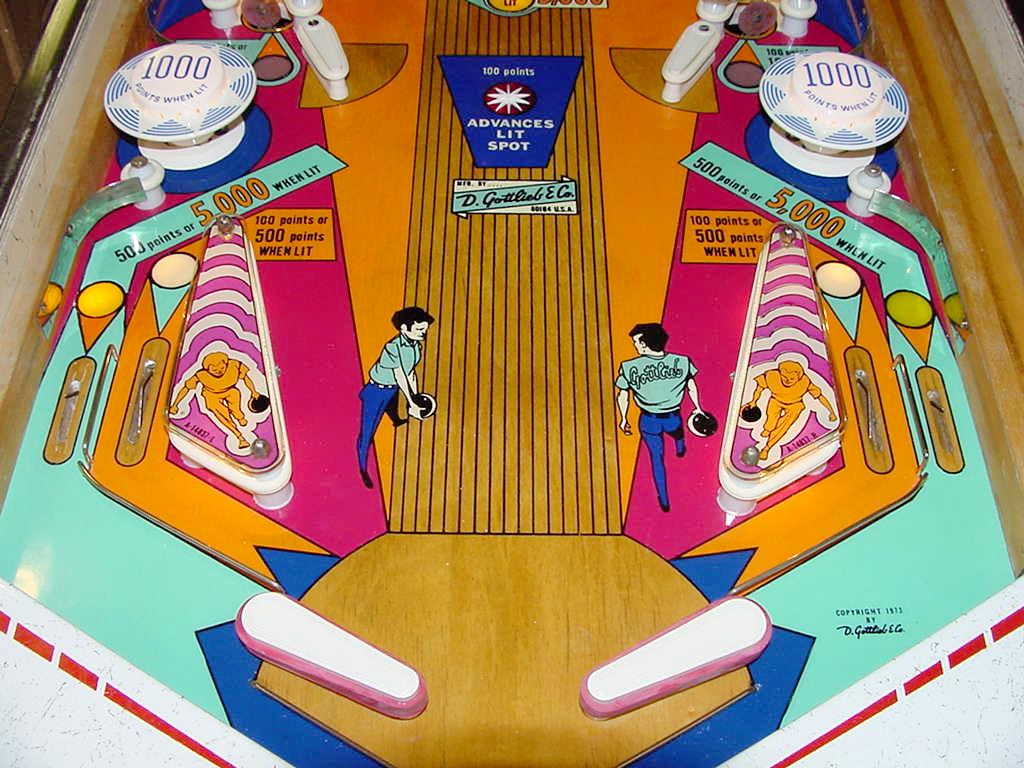
| Here's the playfield as I received it, with all the PF parts removed. I'm kind of wondering if I should go through all this effort, because really the playfield isn't that worn. It's starting to get worn (look around the light inserts), but it's not too bad really. The kickout hole wear is what's forcing me to do this work really. |
|
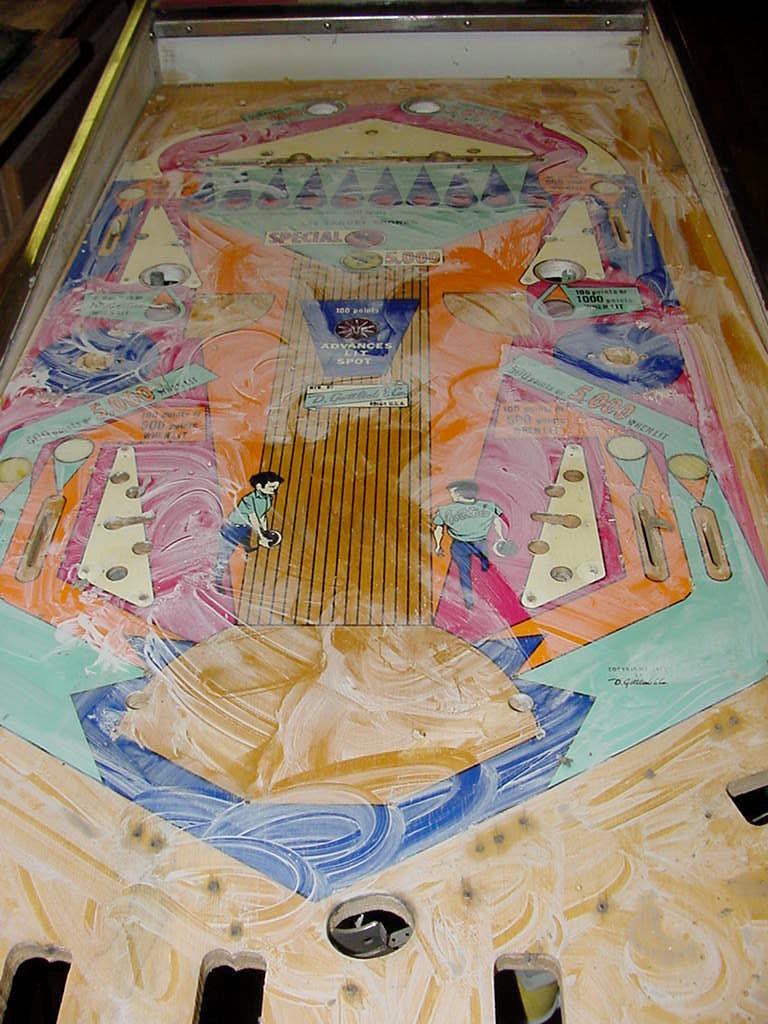
Here's the playfield after attacking it with Melamine Foam and 90% rubbing alcohol. This process gets a lot of the really ground in dirt cleaned out. After that I wipe down the playfield with Naptha to remove residue and any old wax. Finally I lightly polish with Novus2 by hand. This will give me a good feel for what work I have ahead, and if I should even bother. |
|
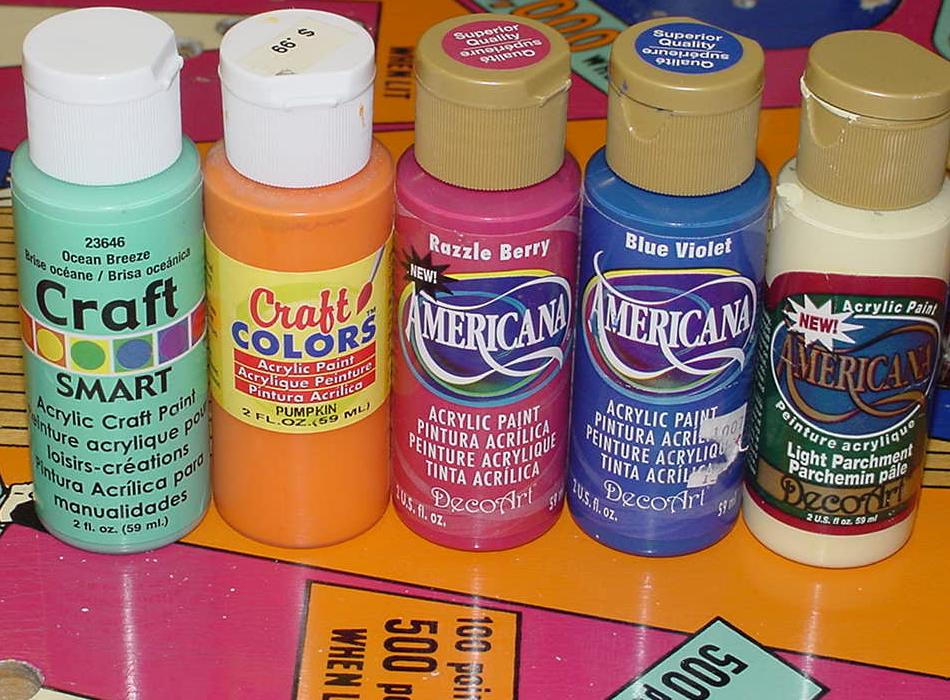
Here's the colors I will be using for this playfield restoration (in addition to black). I'm pretty happy with these, and they are readily available at Michael's. The only color that was a bear to match is the blue/green "ocean breeze". I had a hard time finding a good color match. I used my Pantone color guide on the playfield and found a similar color. Then took the Pantone guide to Michael's and bought about seven similar colors. The one below was a pretty decent. |
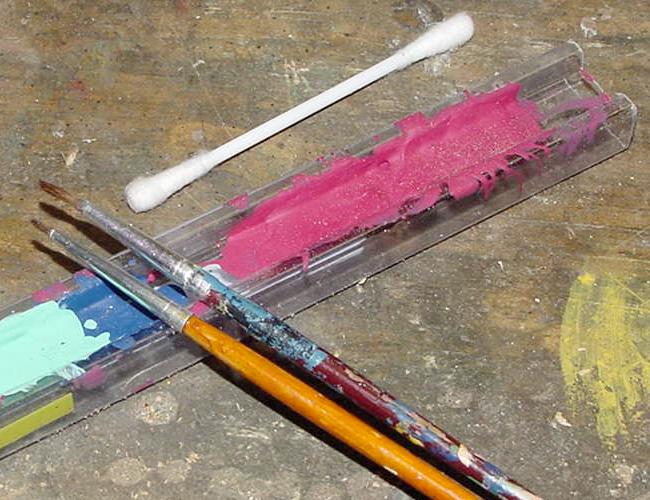
| Below is a picture of my two favorite brushes. I use these for nearly everything. They are crappy little brushes, but they work well for me. Notice I use old chip tubes to hold my paint while I work. These are disposible, and if I flip it over, the paint generally stays in the channel and doesn't get all over. |
|
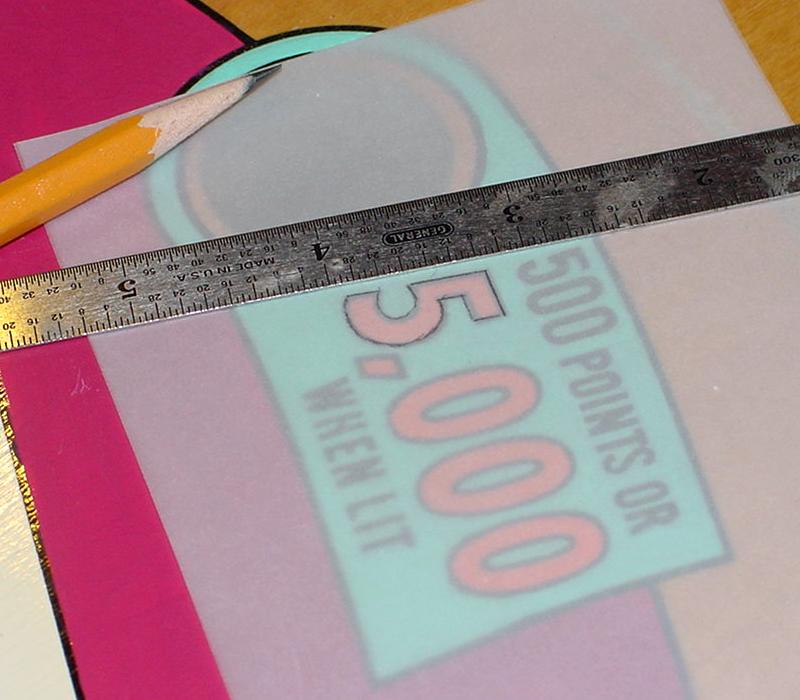
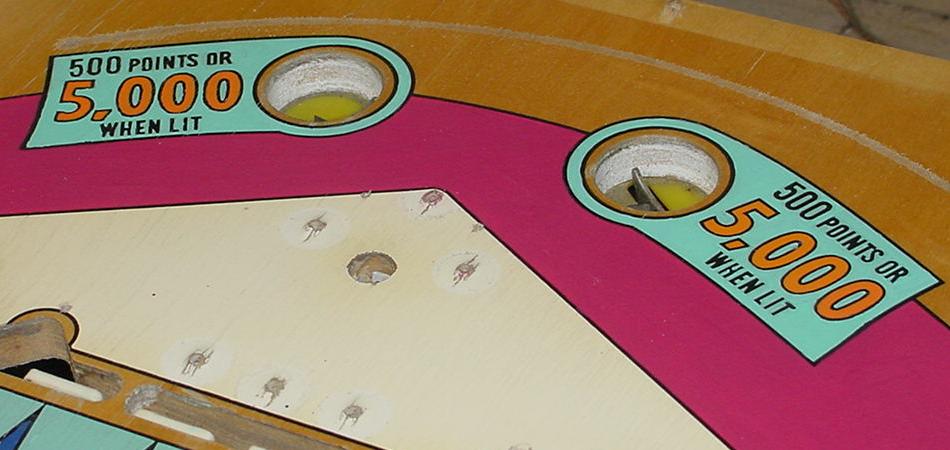
The bulk of the touchups are pretty mindless, but labor intensive. Almost the entire playfield will be repainted by hand. But the one area that is not so easy to touchup is the missing text across the top of the playfield - the left side text is worn away from the kickout hole. The good news is the right side text is identical, so we can use the existing text as a guide to recreate the missing text. I have filled in the background green/blue color where the missing text resides. Now I need to find a way to transfer the missing text to the worn area. |
| I use some tracing paper to trace the original text. I will then transfer this to the worn area. Below I'm using a pencil and a straight-en to draw the text. |

| Using a scribe and a straightedge, I scratch right through the tracing paper and into the paint. I will then use the scratched areas as a guide to paint the black keyline. Next I'll fill in the center orange test areas. |
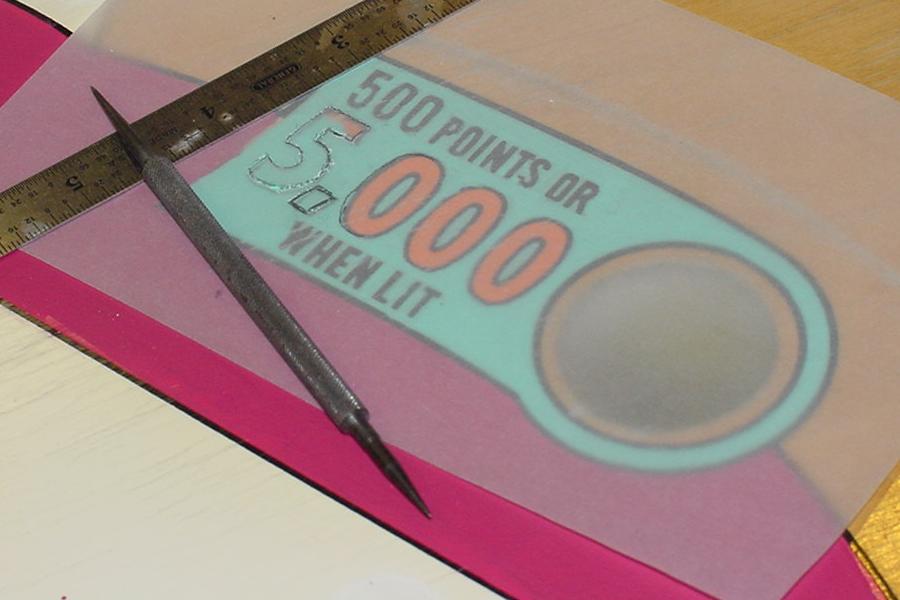
| After the area is scratched with the text, I use a pencil to draw (trace) the scratches. This is easy to do because the pencil wants to 'find' its way into the scratch lines. |
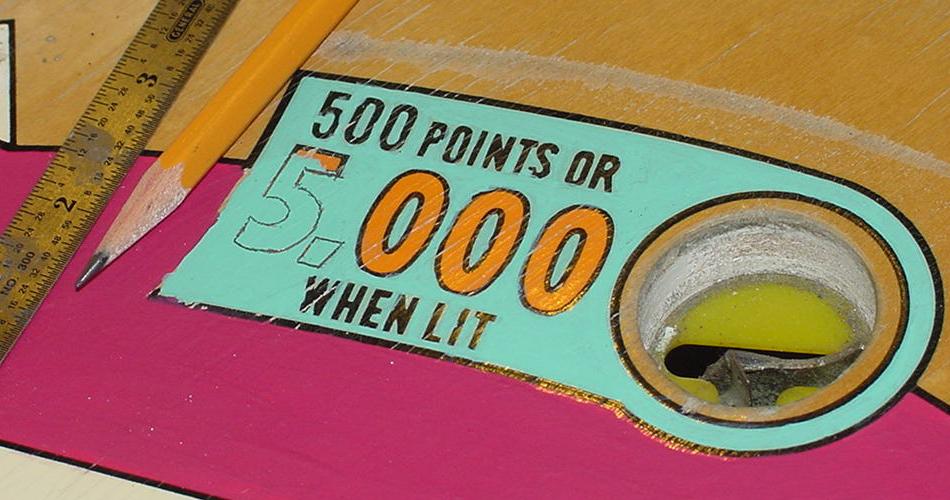
| Now I rough paint the black key lines. Don't worry if it's not perfect, that will all get cleaned up. Too much black on the inside will get fixed with the orange fill color. Too much black on the outside can be fixed with an Exacto or by adding some blue/green. |
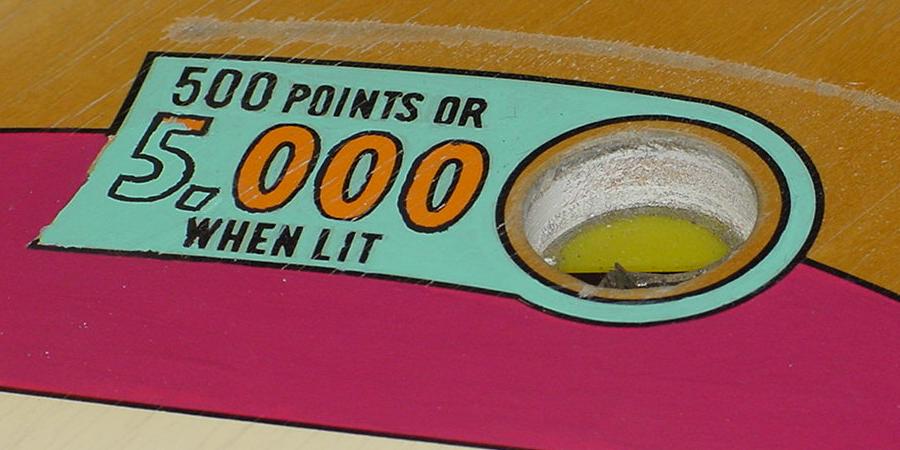
| Here's the final outcome. The text on the left is recolored, the text on the right is largely original. Comparing the two shows, though not perfect, the text on the left came out pretty well. The problem is matching the "crispness" of the orignal silkscreened lettering. Might need some more tweaking. Another way to do this would be to scan the original area on the right, clean up the text in Photoshop, then print it on water-slide decal paper. Next "green out" the area on the left, and apply the decal over the green/blue background. This works well with white or black text, but not so well with red or orange text (which is unfortunately is rather transparent). But it would have given very nice black keylines. Next I will try this method for another problem seen below... |
|
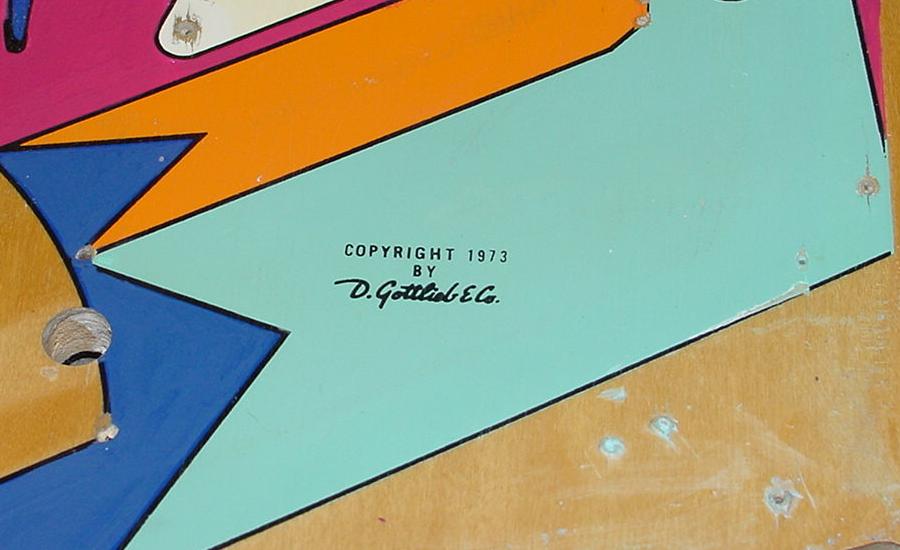
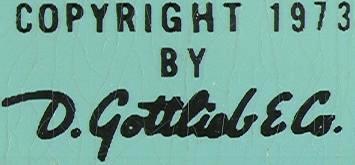
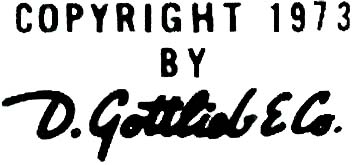
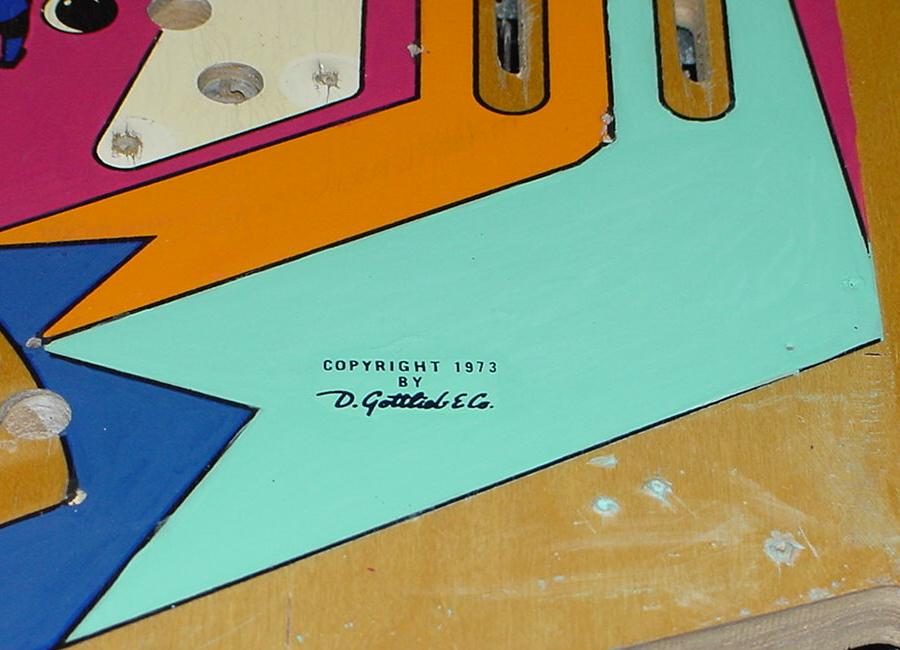
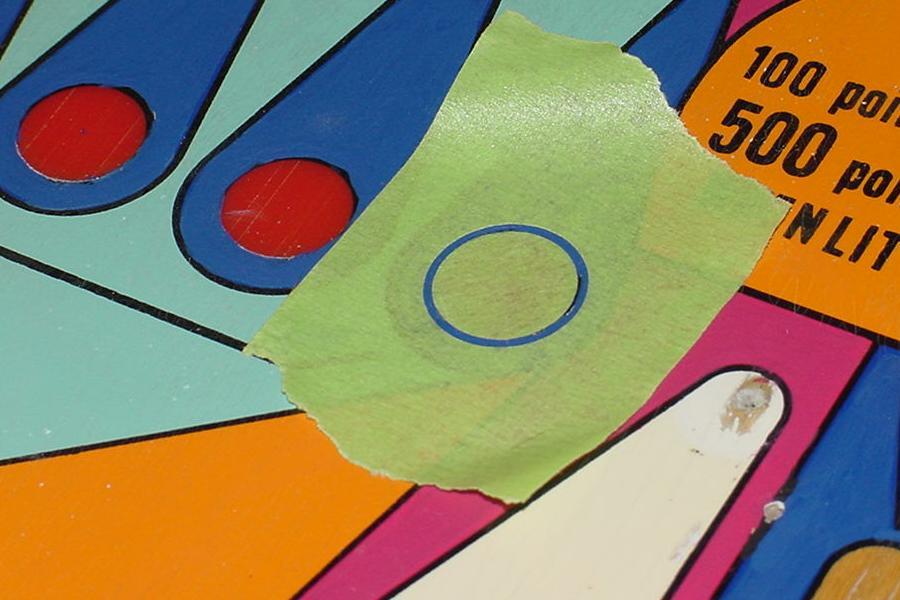
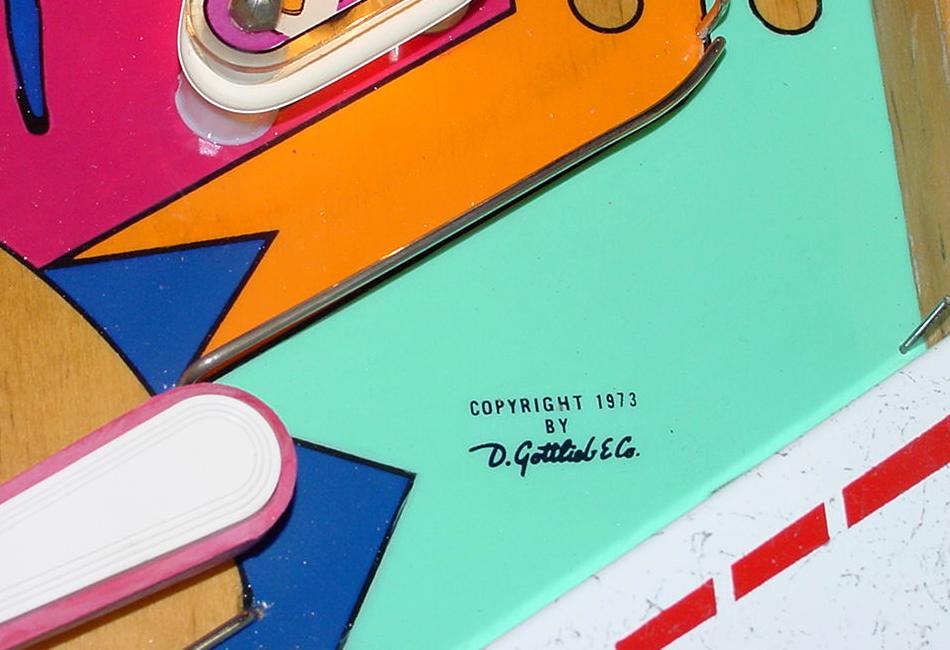
On the left side of the playfield I repainted all the blue/green areas. I would like to do this to the right side of the PF too, but I have a problem. There is a small "Copyright 1973 by Gottlieb" text inside the blue/green area. I could just paint right over this, losing it forever. But I would really like to keep this. But how to do it? It's so small it would be hard to paint around. |
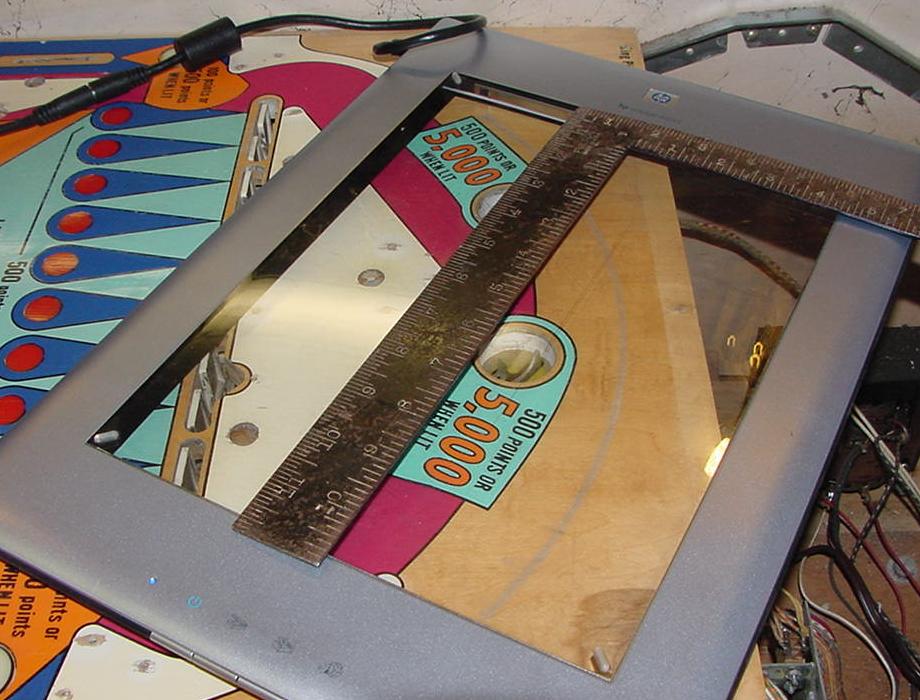
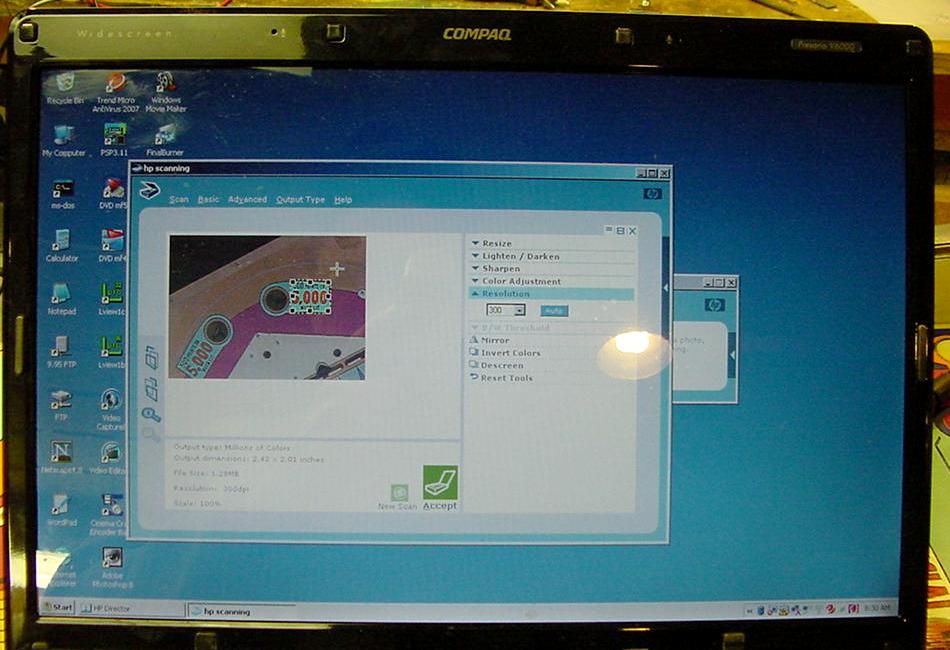
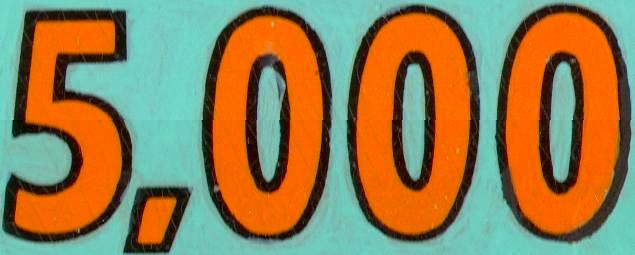
| First step is to break out the HP4600 "window pane" scanner. This is a really handy tool for scanning playfield art. I will also scan the "5000" point text touched up above, just because I already have the scanner all fired up. I will be scanning at 300 dpi. |
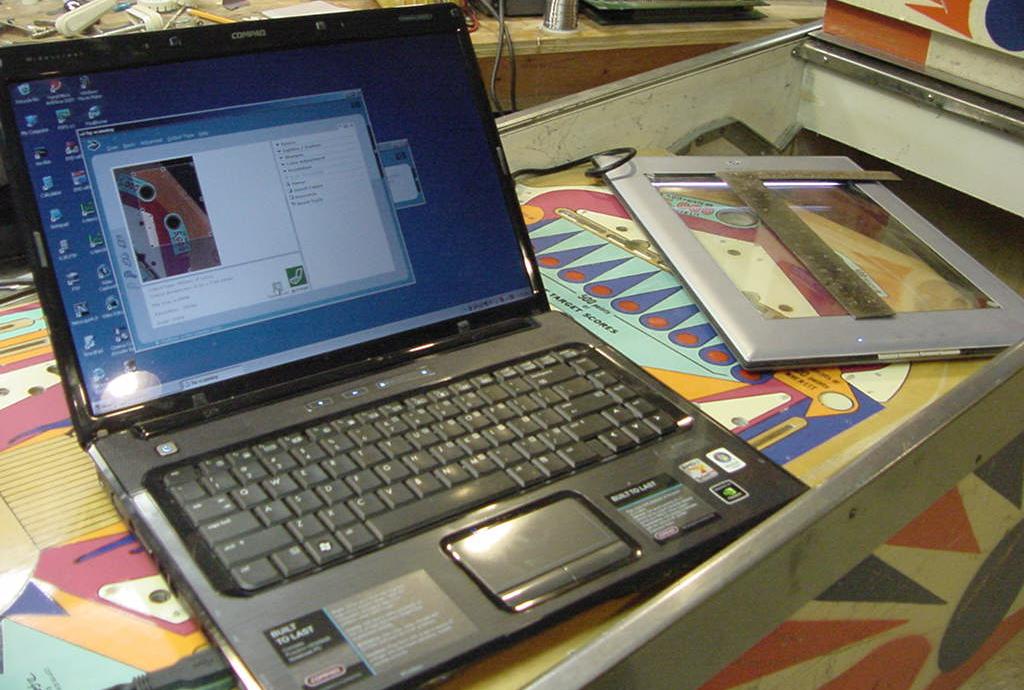
| Using a right angle, I can align the text area straight on the scanner bed. This is important for easier editing. |
|
Once I have the areas scanned, I measure them with a ruler.
The I load them into Photoshop, and set the "Image Size" to
my measured sizes and 300 dpi. (If I did everything right, the
size should not change on the Photoshop screen as I accept
the new size specs.) Next I edit out the backgrounds and
clean up the text.
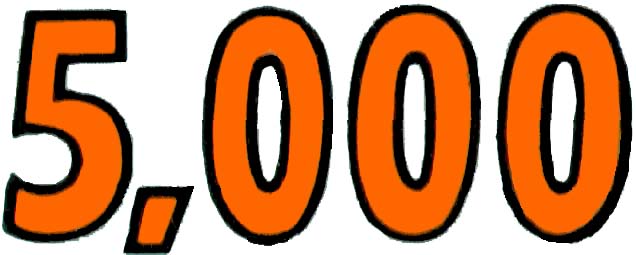
I also change the colors, making all the solid colors consistent and one shade for any particular area. If you have a Pantone inkjet compatible printer (and some inkjets are sold as Pantone compatible), you can use a Pantone color guide and figure out the closest Pantone color number to the desired shade. Then in Photoshop specify this Pantone color number in the color selection area. Now use the "Fill" tool, making a specific area that exact Pantone color (in this example, the orange color). If you're inkjet is any good, it will accurately print that exact Pantone color shade. In my case since I was really only doing black, none of this matters. "Black is black", as my paint shop buddy says. Finally I print this on waterslide clear decal inkjet paper (there are different papers for inkjet and laser jet printers). Below is what I started with, and what I ended up with after editing. This is what I will print on the waterslide decal paper. |
| Now I have the Photshop'ed graphics printed out on transparent water slide decal paper (see decalpaper.com). Since I used an inkjet printer, the paper page needs to be clearcoated with Krylon Cyrstal Clear (sprayed right on the decal paper over the graphic). I spray two medium coats, and let the decal paper dry for 12 hours. This will prevent the ink from bleeding when it gets wet (during the water slide). I also paint the entire playfield area where the decal will go, covering up the original graphic. (I marked the playfield with crosshairs to help align the new decal.) |
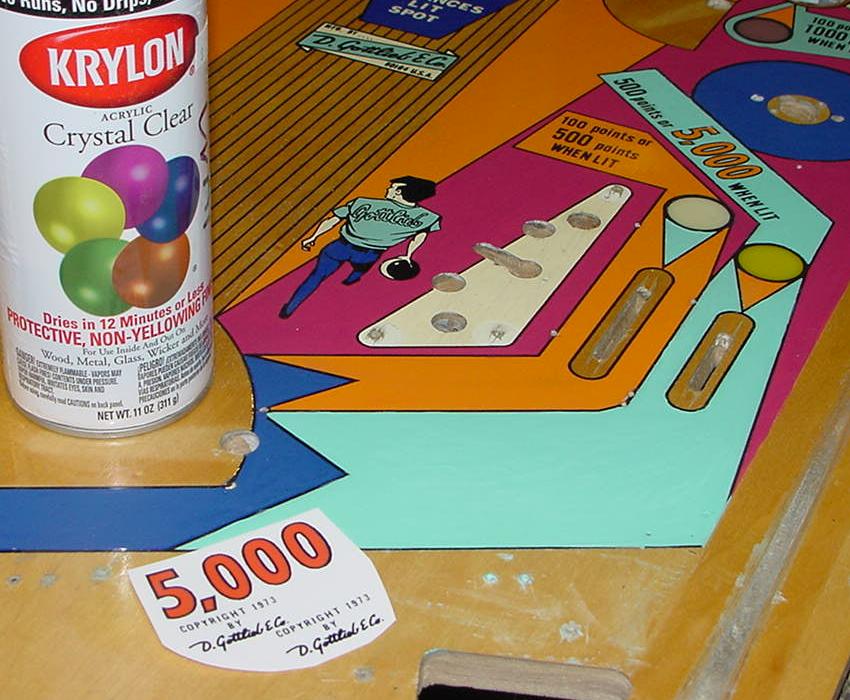
| Here's the decal cut out, and ready to soak in water for 20 seconds or so. Then I slide it off the decal paper and onto the playfield. (Sometimes a little water on the playfield helps this process. But make sure the acrylic paint under the decal has dried for 12 hours before getting it wet.) Note I printed the 5000 point decal, but I won't be using it as the above touchup came out pretty good. |

| The clear water slide decal blends perfectly with the blue-green colored background. I used a little blue-green acrylic paint and touched up the edges of the waterslide decal to make them less noticable. Now all I need to do is clearcoat the playfield to project the new decal. |
|
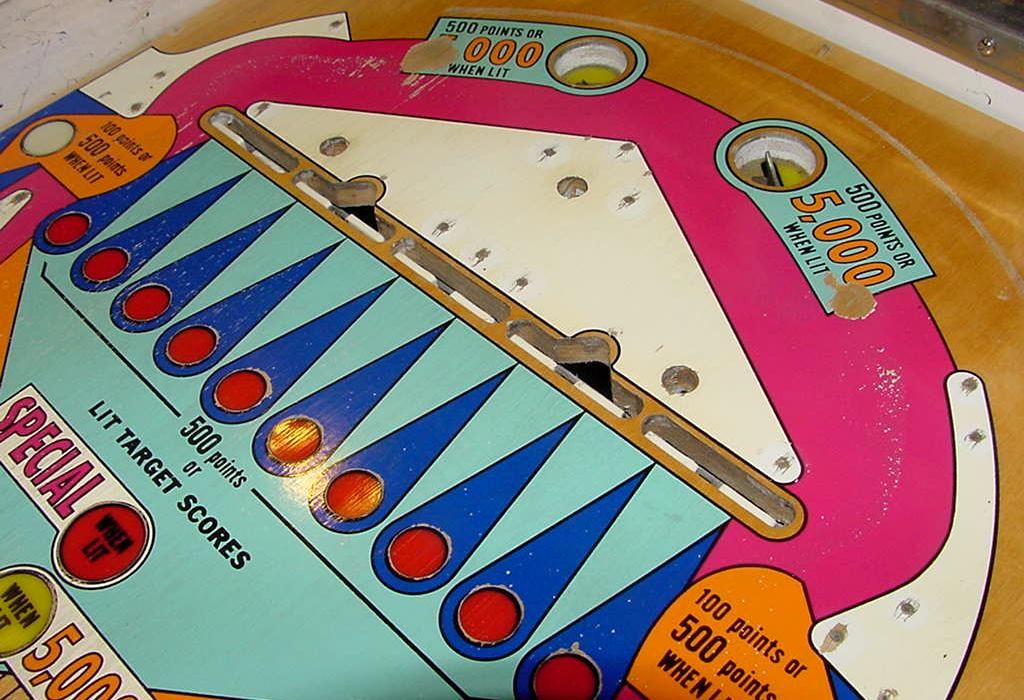
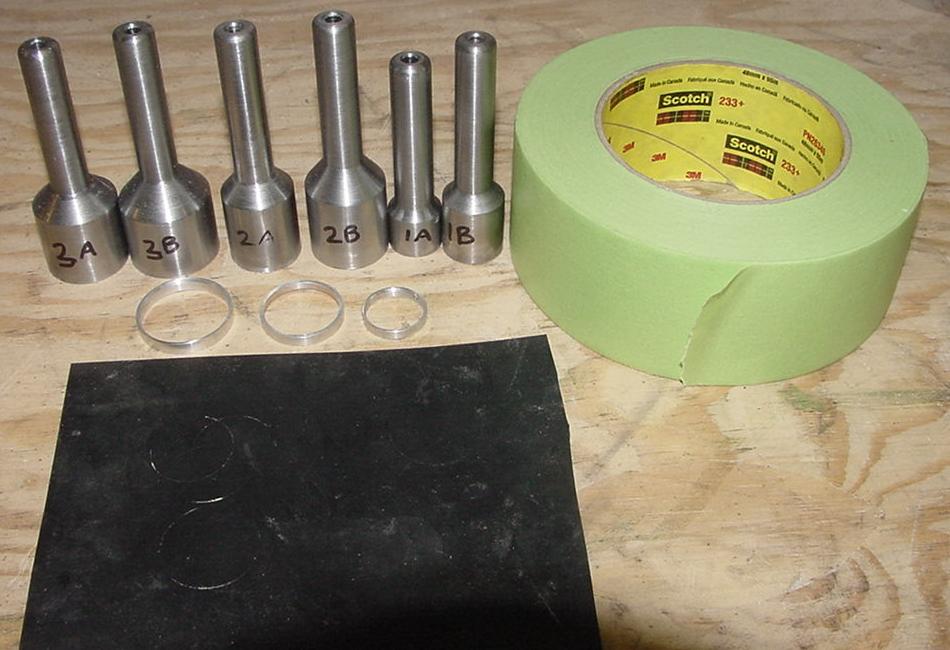
Here I am using my tape die cutters from Vince C. to paint the black keylines around each of the lamp inserts. The "key lines" are the black lines around the edges of the playfield lamp inserts. They are basically color separators. Though I can paint them pretty good by hand, it's nice to have a tool that makes the job easier. You will need GREEN 3m #233 "skunk tape" two inch wide tape ($8 a roll), available from any decent automotive paint store. Don't cheap out and try to use blue painters tape. The blue tape is too thick, and does not give good results. The green 3m #233 tape is very thin and is designed for this type of work. |
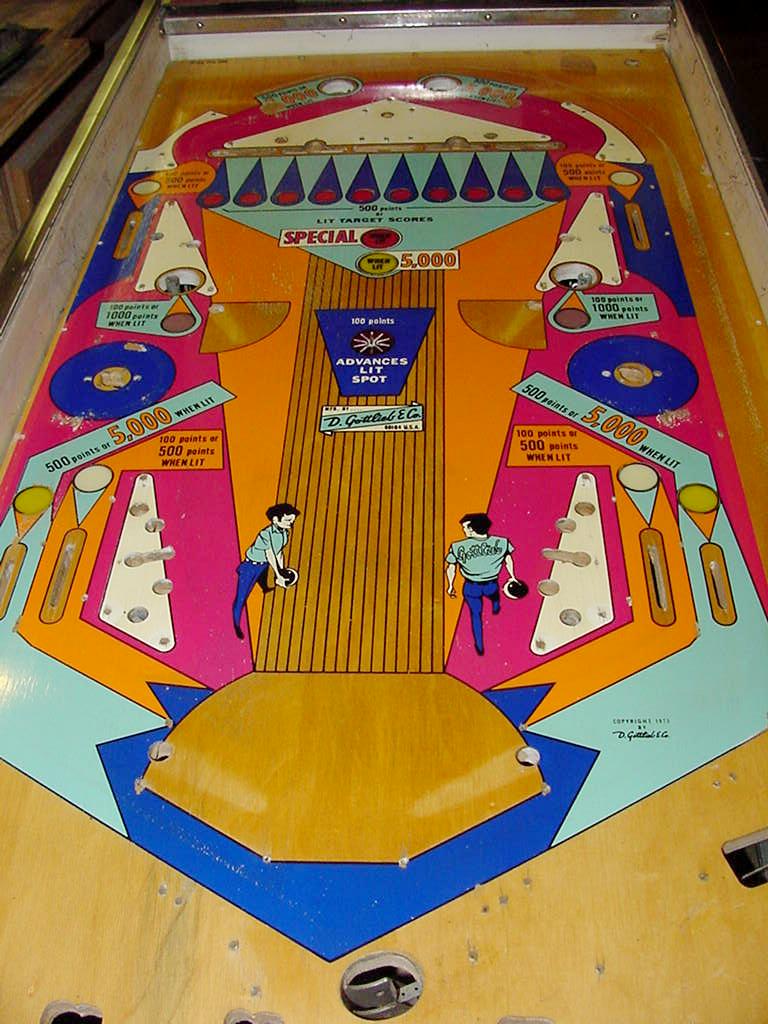
| The final product, ready to clear coat. All the touchups were done with acrylic paints and waterslide decal. |

|
Here's the Gottlieb King Pin after clearcoat with automotive clear urethane and being assembled. Came out pretty good, and plays very nice. Notice the last picture of the "Copyright 1973 by Gottlieb" where that was done (seen above) using the waterslide decal. There's absolutely no hint that the text is not original. |
|
More information on clearcoating can be seen in the "This Old Pinball" videos TOP #1,3,4,7. This shows the whole procedure of touching up and clearcoating a pinball playfields. Also see Pinball Restoration Guide, part two and the Gottlieb 2001 playfield restoration and Gottlieb Quick Draw playfield restoration web pages for more info.
* Go to Pin Fix-It Index |