(Example used: 1975 Gottlieb Fast Draw) by cfh@provide.net, 02/18/09. Copyright 2009 all rights reserved. For hardcore pinball restorers only. This document is part of the Pinball Restoration document. Update of this document are available at http://pinrepair.com.
When I got there (7 mile and Woodward in Detroit), I was pretty apalled by the Gottlieb Fastdraw's condition. It had been sitting for at least 10 years in an empty basement, and was covered in dust. The backbox rear door was off, so there was tons of dust and dirt on the score reels, player unit, and relays. The backglass was decent, as was the cabinet. But the playfield was trashed! This game was well played. And the game was DOA. The primary reason was the 25 volt solenoid fuse was blown. After replacing the fuse there was still no life. The culprit was an open slam switch on the front door. All the steppers were frozen too, and every switch stack was loose. This game was going to be a challenge to fix in a short period of time. Just under 2 hours later I had the game working. I found out why the game's playfield was trashed, this game had great "feel", with good ball kinetics. This is a hard thing to explain but every game has different ball kinetics, some bad some good. Well this game had good kinetics and the ball really felt and played great. It was fun to play, even in it's worn condition and dead playfield rubber. The guy watched me repair the game the entire time, and when I got done, he asked if I would check the lights. Some of the bulbs weren't working, but not because they were dead; the sockets were loose. I fiddled with them and they were all working (probably not for long, but at this point I just wanted to get out of Dodge and go home.) Then the guy looked at me and said, "Am I going to have problems with this game? Will I have to fiddle with things like you are doing?" I had to tell the guy the answer was, "yes". The game was just too dirty and too neglected. It needed a lot more attention than the nearly two hours I spent on it. I could see getting calls until the game was played enough error-free to hold its own. At this point the guy just wanted to sell the Gottlieb Fast Draw game. After arguing about price for at least 20 minutes (he had come down to $300, but I wanted to pay $100), we agreed on $150. I hauled the game out of the basement and drove away, knowing damn well I had probably just made a big mistake. (I mean this game was dirty and worn!)
Scope.
|
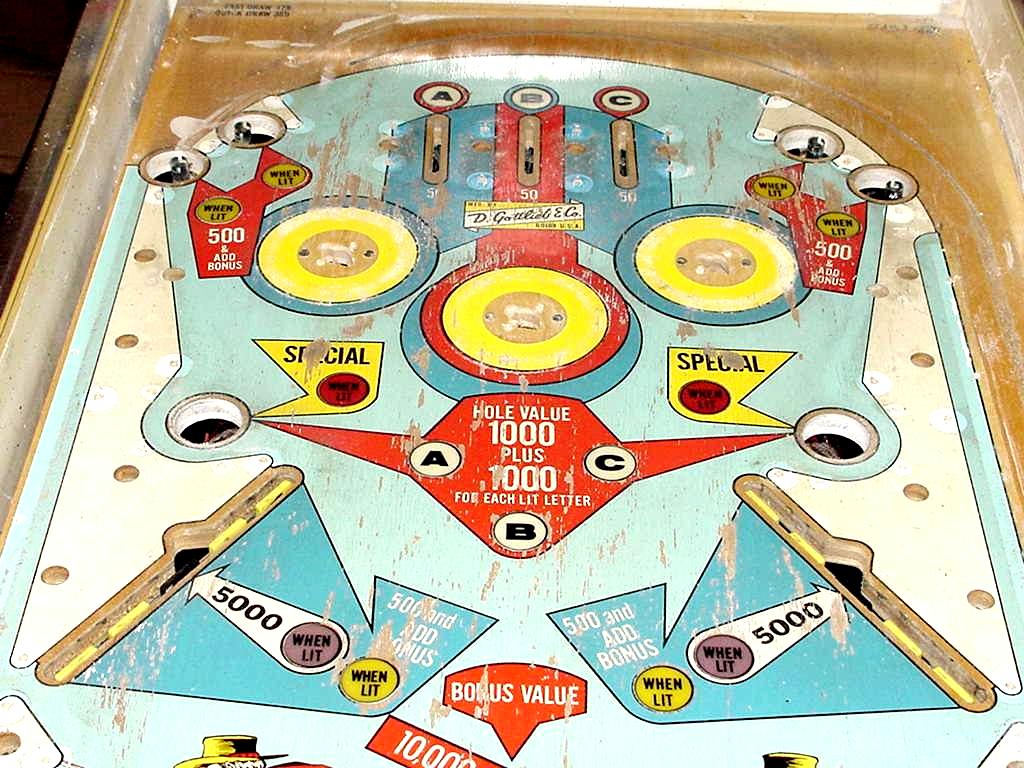
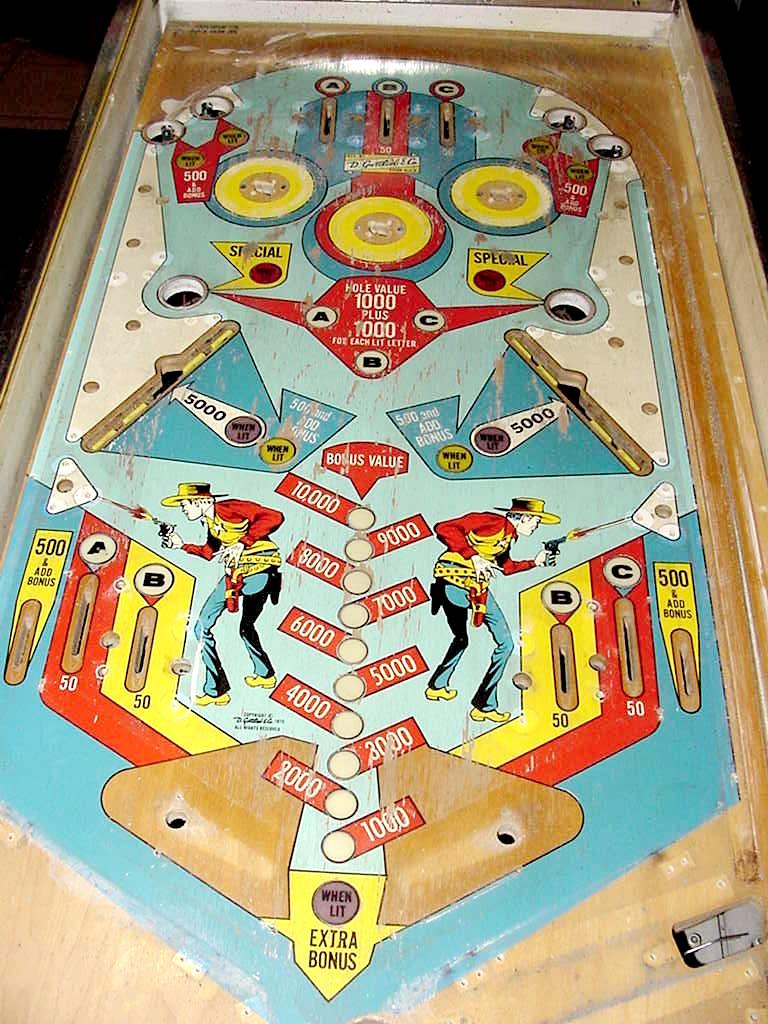
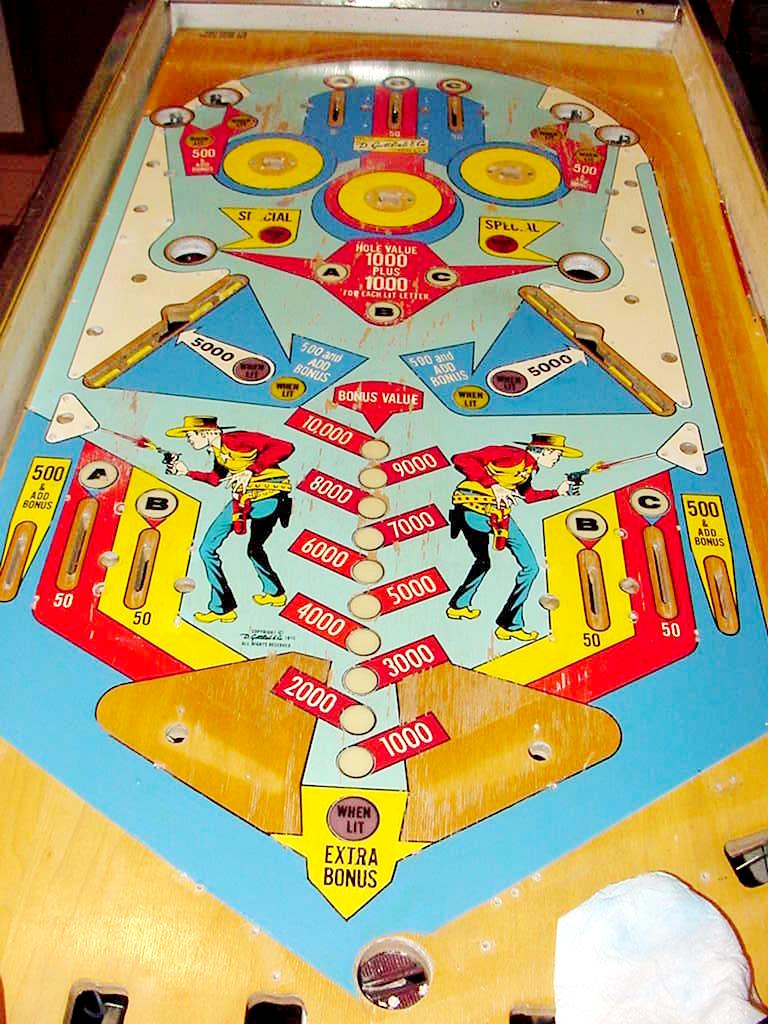
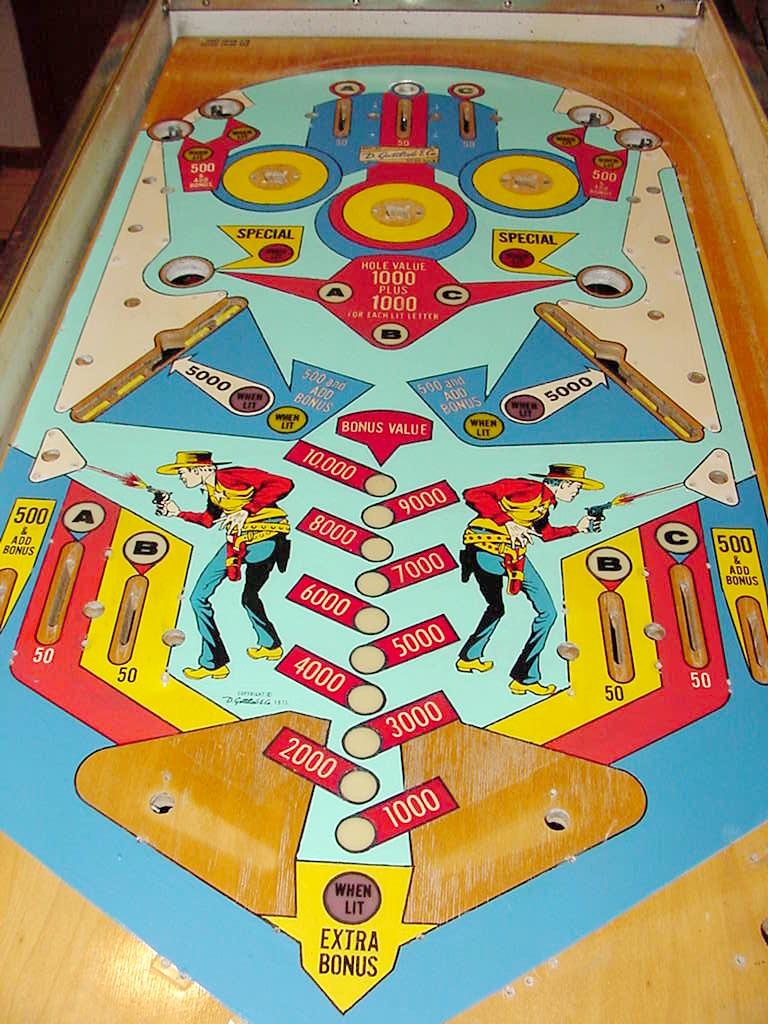
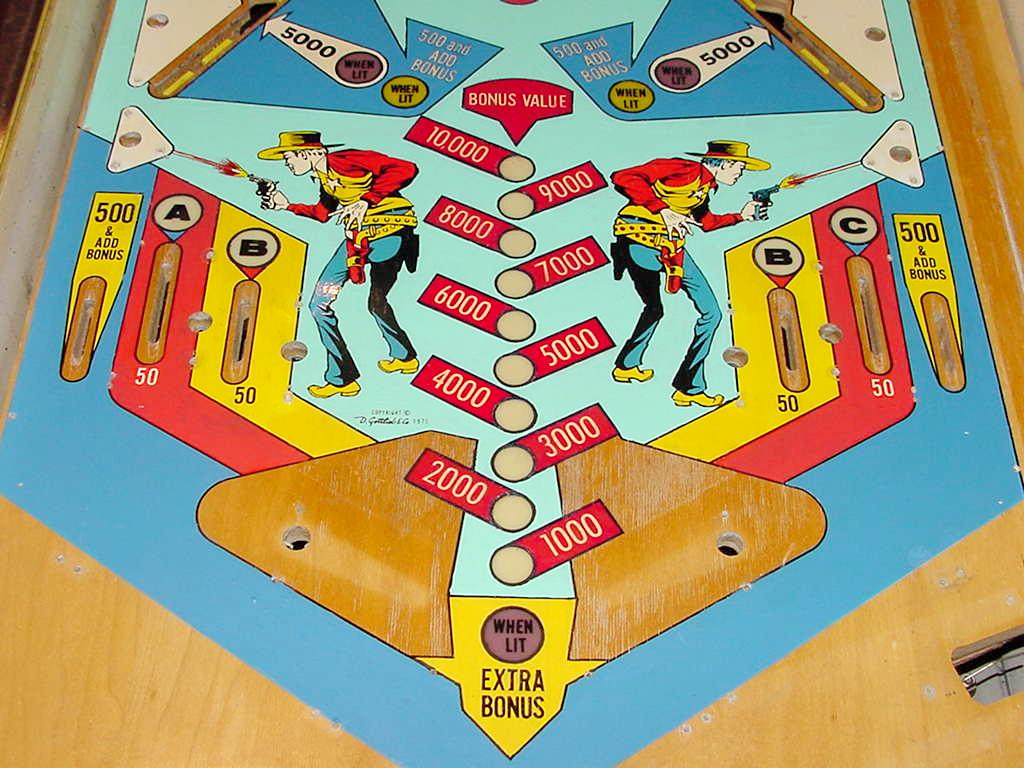
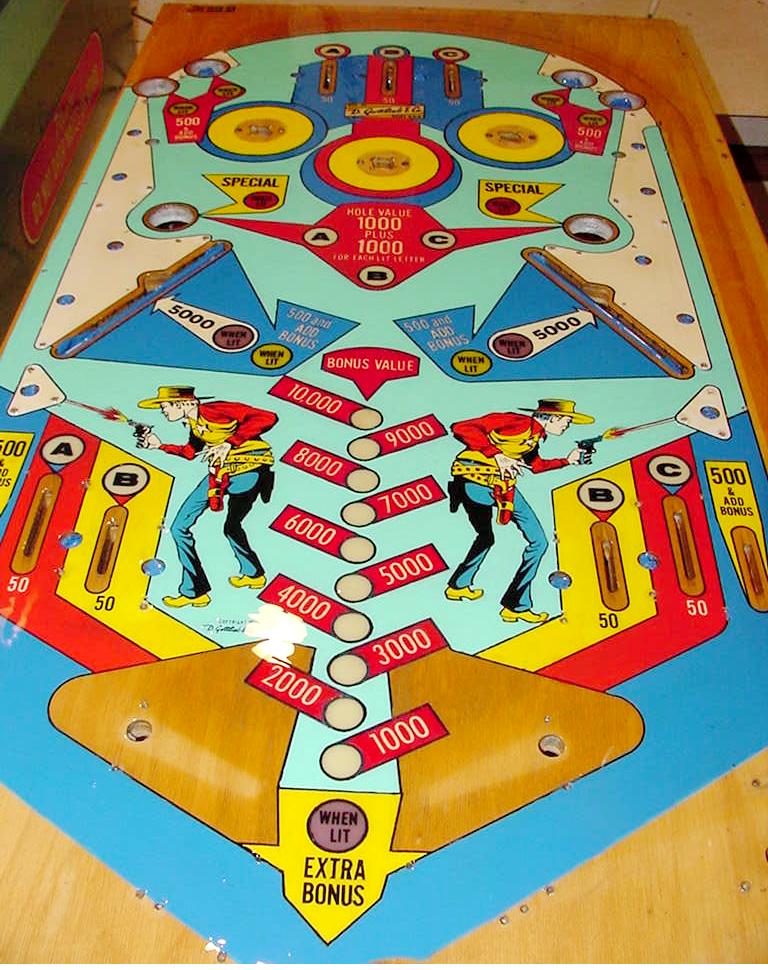
| Here's the playfield as I received it, minus the playfield parts. I removed all the plastics, posts, metal guides, flippers, pop bumpers, side rails, and other parts. The playfield needs to be completely free of all this, as it will only get in the way during the touchup and clearcoat process. The idea is to clean what's left of the playfield, and evaluate what needs to be done to make it more "presentable". |
|
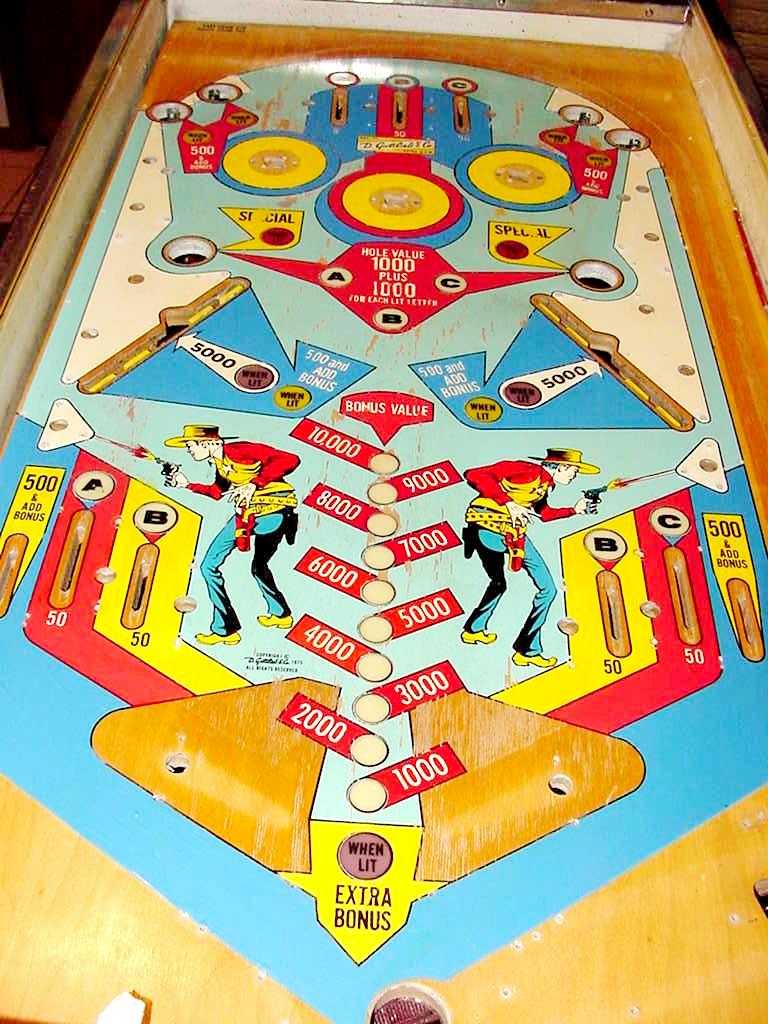
Here after I used Melamine Foam (Magic Eraser) and 92% rubbing alcohol to clean the playfield. This will also remove a lot of the contaminants from prior playfield waxing and cleaning. It also will get out the deep dirt. Just note though that it's very easy to remove what little playfield paint is left with the Melamine foam. (Go easy and slow.) After this is done I wipe the playfield down with Naptha to remove the white haze. Then I polish it with Novus2. Below is what the playfield looks like if I decided to skip the touchup process. But it's just too ugly for me, so I can't stop. It's almost presentable, but not enough for me to live with. |
|
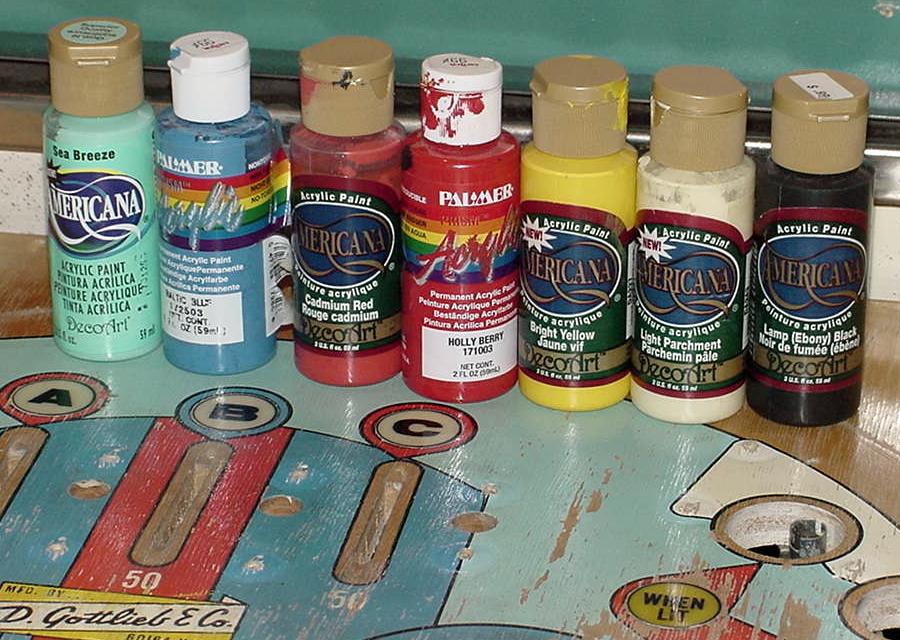
Here's the touchup paints I will be using. They are acrylic water-based at paints, available at Meijer or Frank's or Micheal's. |
|
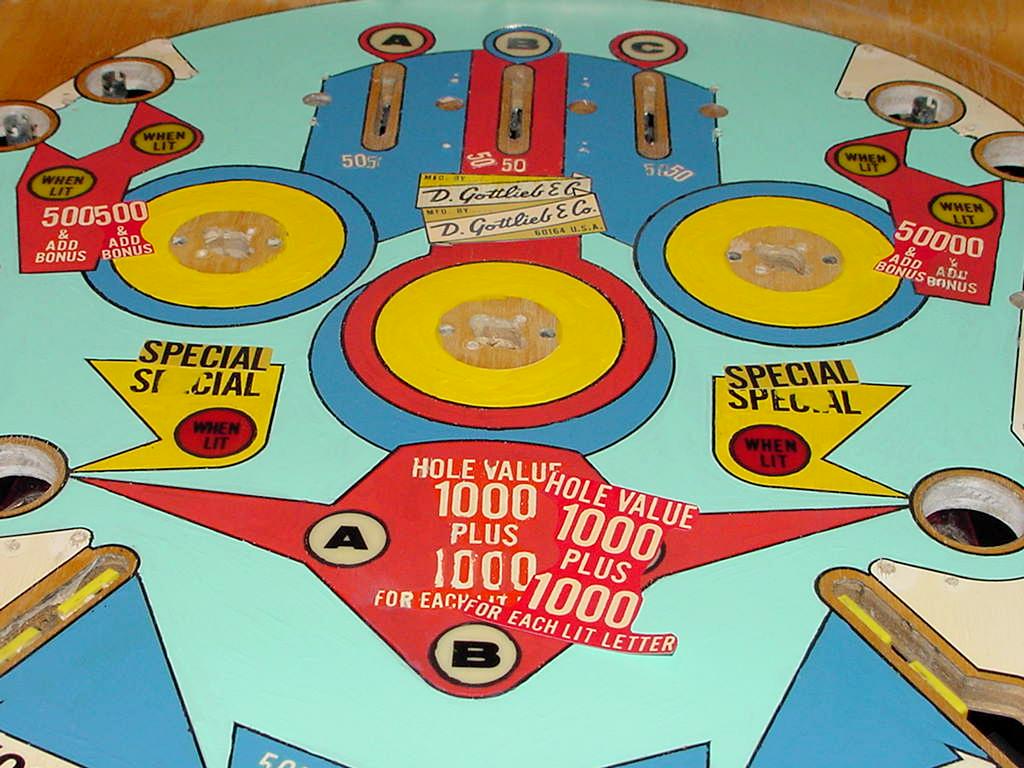
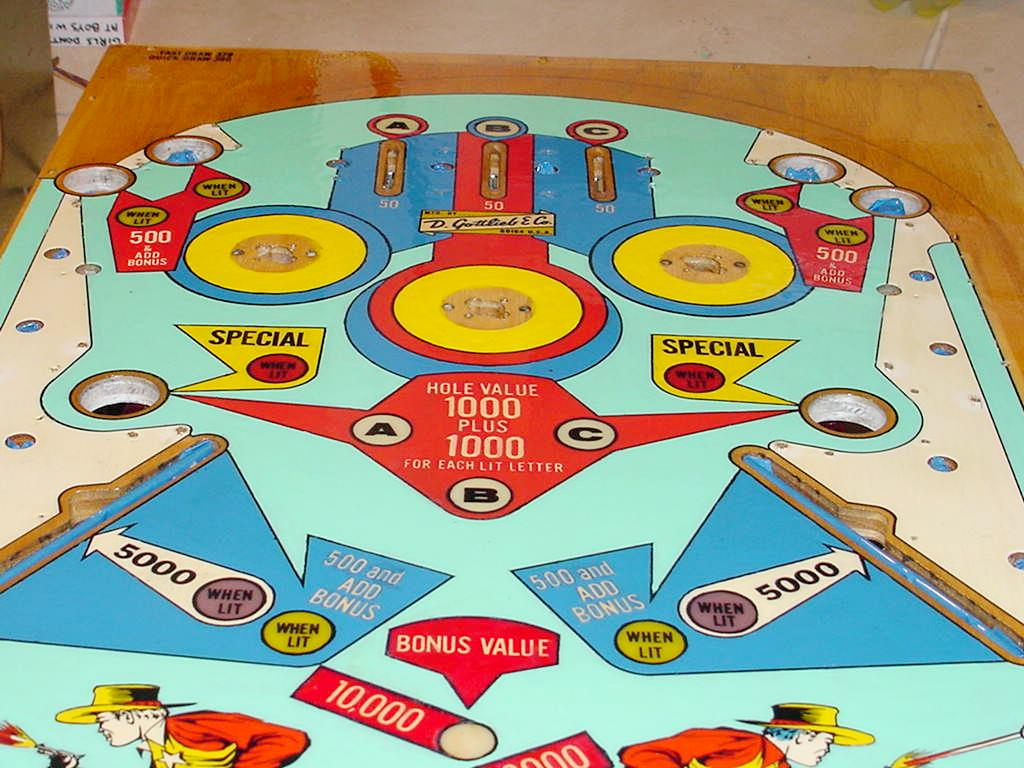
Yellow Touchup. Here I've applied the yellow to the pop bumper and "special" areas. I like to start in the center and work out. That's a good plan when doing bulk touchups. Notice I'm not being too careful, and I'm just trying to get this thing to look better! Note I painted over the wear marks in the "special" area. Don't worry about the missing text, we'll take care of that later. There are a couple ways to do this touch up. I just repainted the entire area with a (close) matching color. Otherwise it's too hard to match to color and texture. This method is used by most "wholesale" playfield touchup services, as it provides a good outcome without spending a lot of time doing color matches. It makes the whole area consistent too. But the downside is now a lot of (if not the entire) playfield will be repainted, and is really not original. I'm using mostly Americana craft acrylic water-based color paints with a paint brush to apply the color. If possible paint with the grain of the wood. This way brush marks and other inconsistencies are minimized and less noticable. Though frankly if you do this right that doesn't seem to be much of an issue. |
|
White Touchup. Now it's time to do the white. This is one of the most difficult touchups, because all the white is the missing (worn) text. I will try my best to make it look "right". But again, it's diffucult. It always looks touched up, as it's very difficult to free-hand paint fonts and text in the same style. |
|
Dark Blue Touchup. Now it's time to do the dark blue. This color was easy to do, as it had excellent coverages. |
|
Red Touchup. Now it's time to do the red. This color generally isn't as opaque as one would like, so sometimes it needs a white primer to get better coverage. I didn't do that, but it did require a couple coats in some areas. I used two different reds here. The Americana Cadmium Red was used on the "raw" playfield reds. The Palmer Holly Berry red was used to touchup the decals (read more about those below). |
|
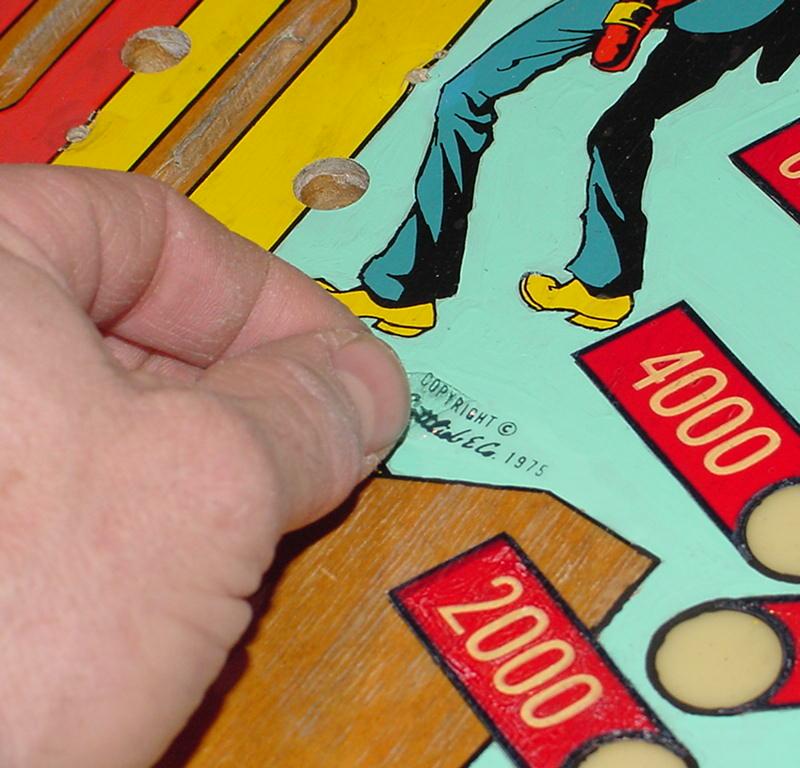
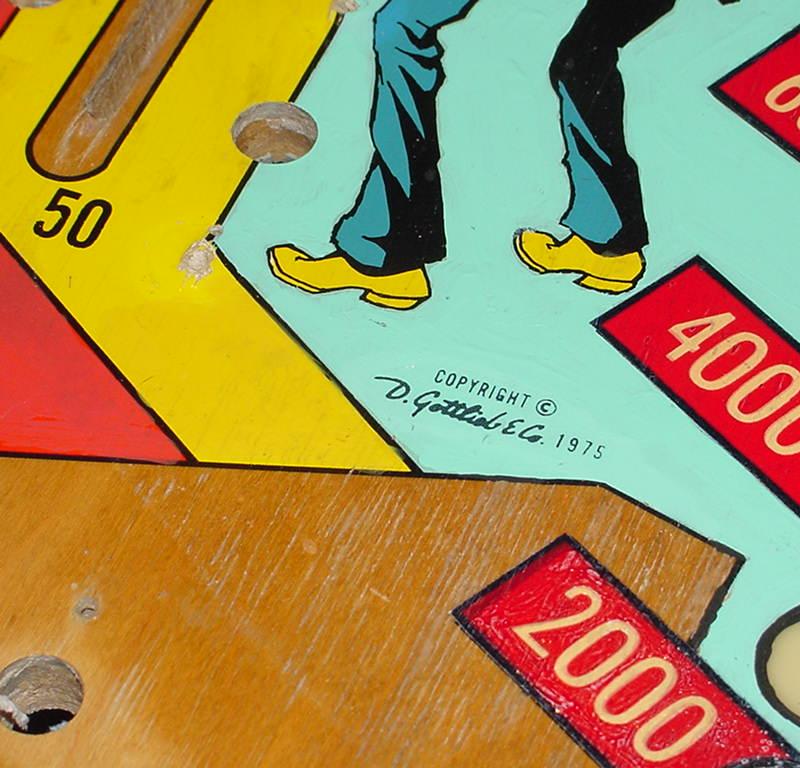
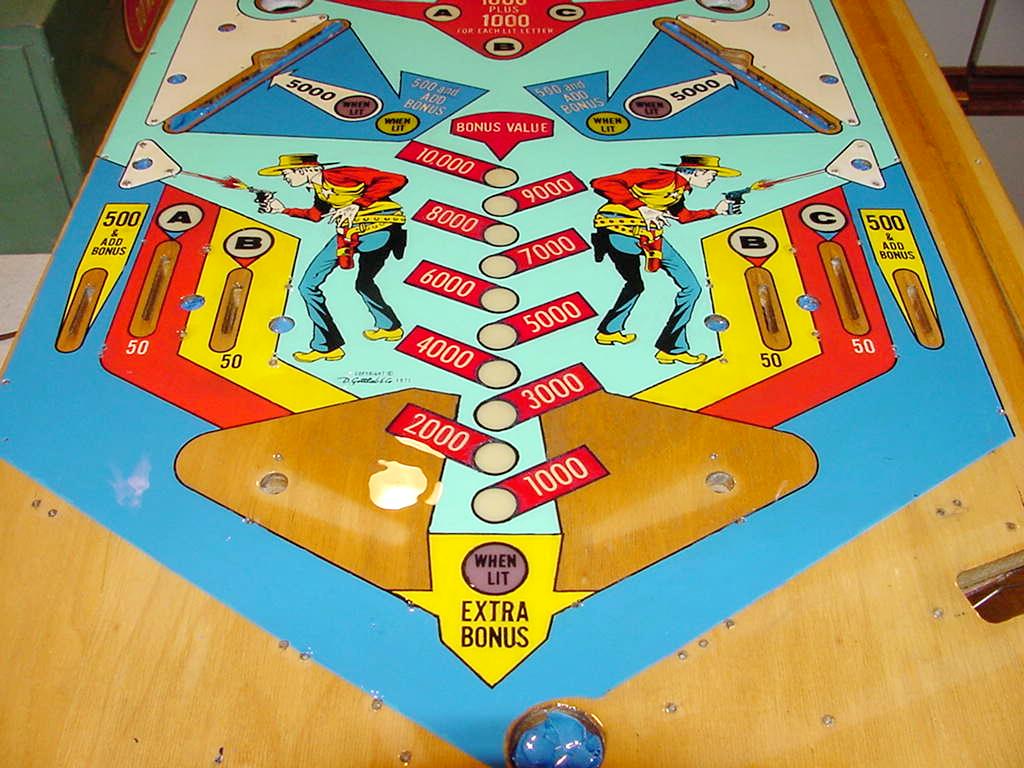
Light Blue Touchup. Now it's time to do the light blue. Man there's a lot of it! Takes some time, but the color covers well. Did require a second coat in some areas, but generally went on well. Note the "copyright" notice below the left cowboy's foot is painted over. I will reproduce this later... |
|
Black Key Lines Touchup. Now it's time to do the black "key lines". These are all the black outlines that separate the colors. They are also the lines that go around the lamp inserts. I painted these all by hand, not using anything more than a small brush. I only touchup the lines that have missing areas. But I do go around *all* the lamp inserts. You don't have to be that accurate in this regard. Because you can touch up with color around the inserts or lines later. Also on the inside edge of the lamp inserts I'll use an Exacto knife to straighten up those edges (after the paint dries.) |
|
Scanning the Gottlieb Fastdraw Playfield and Making Decals. Things get tricky here. Overall the playfield is a big improvement over the worn original. But the thing that bothered me was the re-painted text. I just could not match the fonts by hand, and they looked SO touched up. So I kind of gave up trying, and decided to take a different approach. Note I still *tried* to touch up the text, and you'll see why in a minute. But I knew there was a better way to get this done. What I did was to break out my HP 4600 scanner, and lay it on the playfield. This is a neat scanner in that it does not have a "bed". It's a "window" scanner, so you can put it on any surface for a good scan. I scanned in all the text I had touched up (or needed to touch up). At 300 dpi the TIF files were pretty sizable, but easy to edit in Photoshop. In Photoshop I cleaned up the text and made all the colors consistent. Here's what I ended up with. Once this was done, I cut and pasted all the graphics into two files. (You'll see why in a second.) The idea is to print this stuff on water-slide decals. These are extremely thin, and work well for playfield touchups. The decals come in two types - white and clear. The reason there is white is that your printer can not print white! Yea I know, this sucks, because printing white on a clear decal would be ideal for playfield areas that have white text. But it just can not be done. Even printing off-white really does not work. So the next best thing is to have white decal paper. And the reason I separated the graphics into two different files is that the stuff that has black text (not much on a Gottlieb Fast Draw playfield) can be printed on clear decal paper. Print the decals on your white and clear decal paper. This is available from www.decalpaper.com. I used a standard HP inkjet printer for this duty. The upside to this is the printer was cheap. The downside is the colors are water-based ink. So to lock the color to the paper (so the colors don't run when put in water), I sprayed the decal paper with Krylon Acrylic Crystal Clear after they were printed. Let them dry a few hours, and they are ready to use. I also printed an extra sheet of decals because I knew I may make a mistake. Below is a picture of the decals I did on white decal paper. Note a couple of the decals I also moved to my clear decal file, but since I had the room, I printed them on the white decal paper too. |
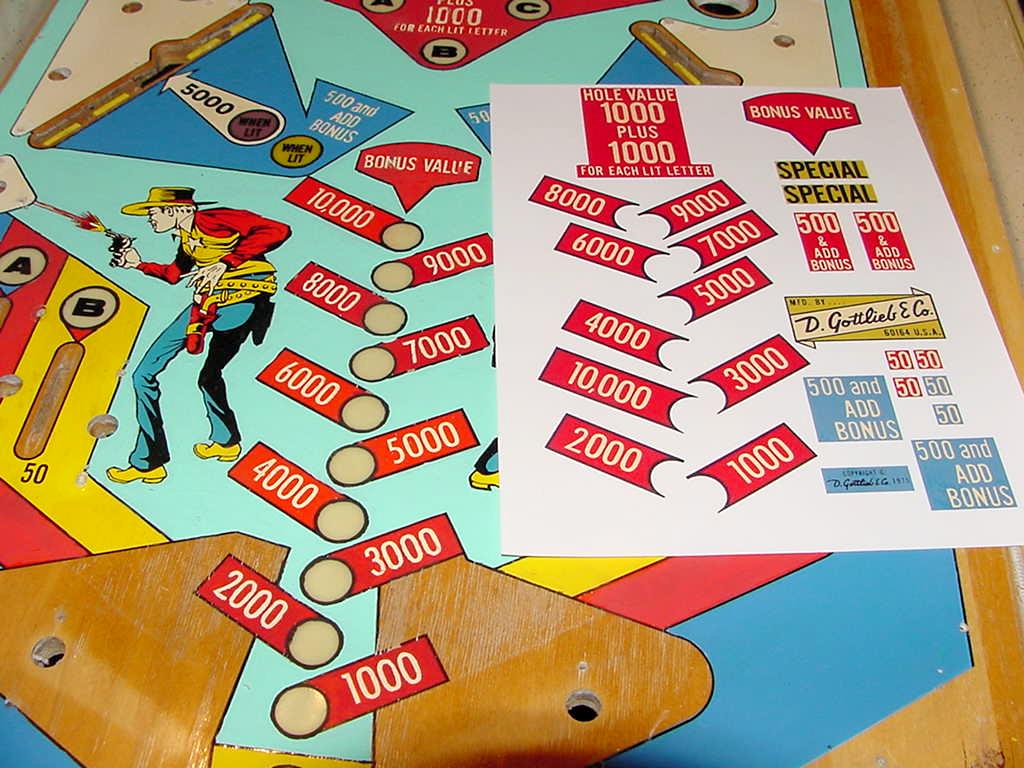
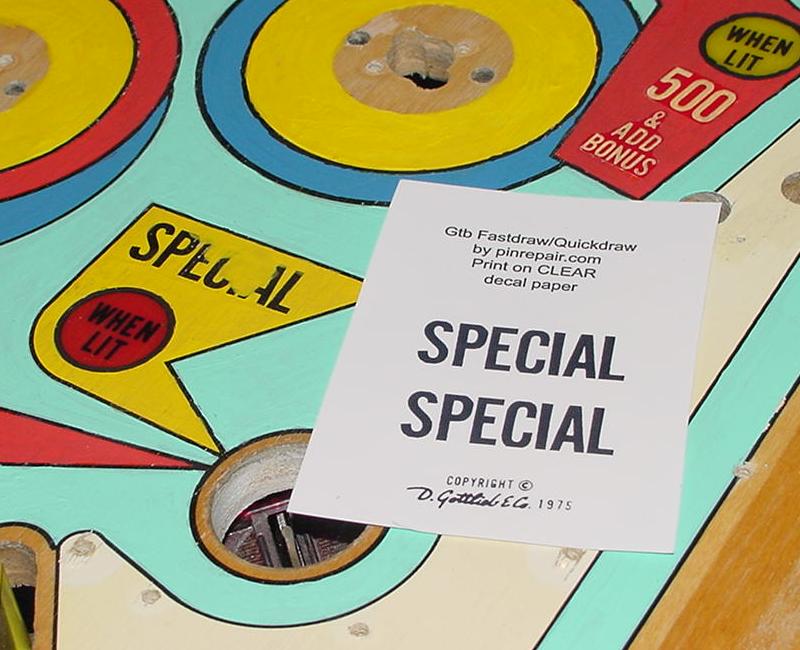
| Here the decals are cut out and ready to apply. Note I make sure I have the decals printed in the *exact* size as the original graphics. This is very important! You'll see why in a second. Also when they are cut out, try and cut out as much background color as possible. Again you'll see why in a second. |

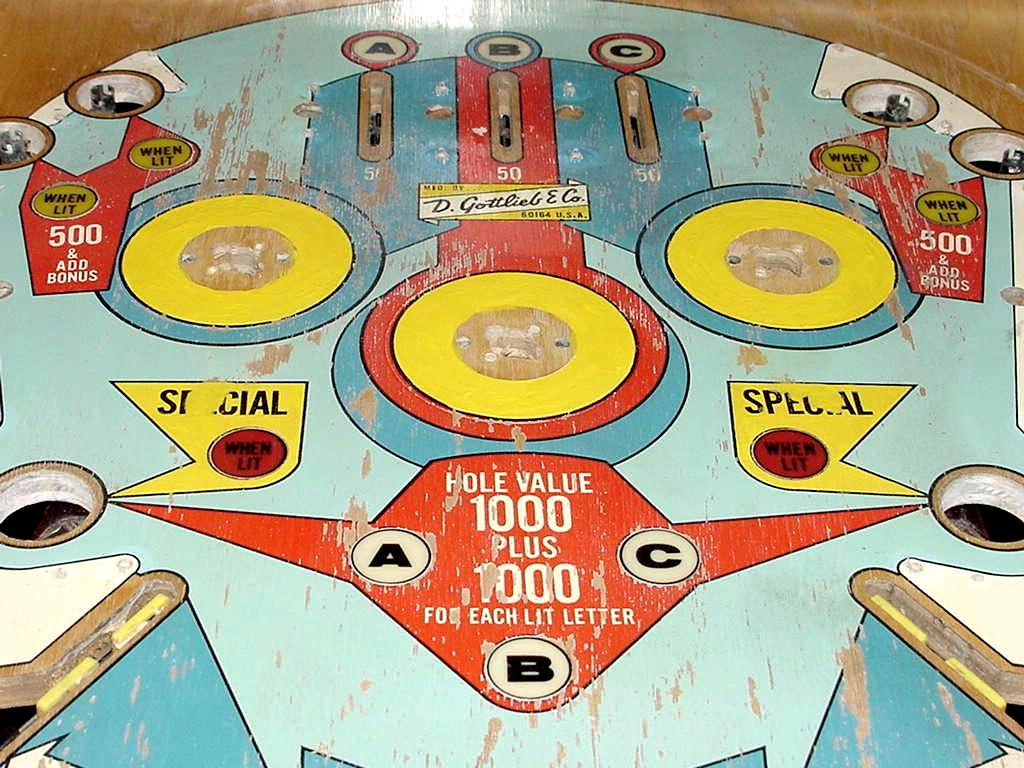
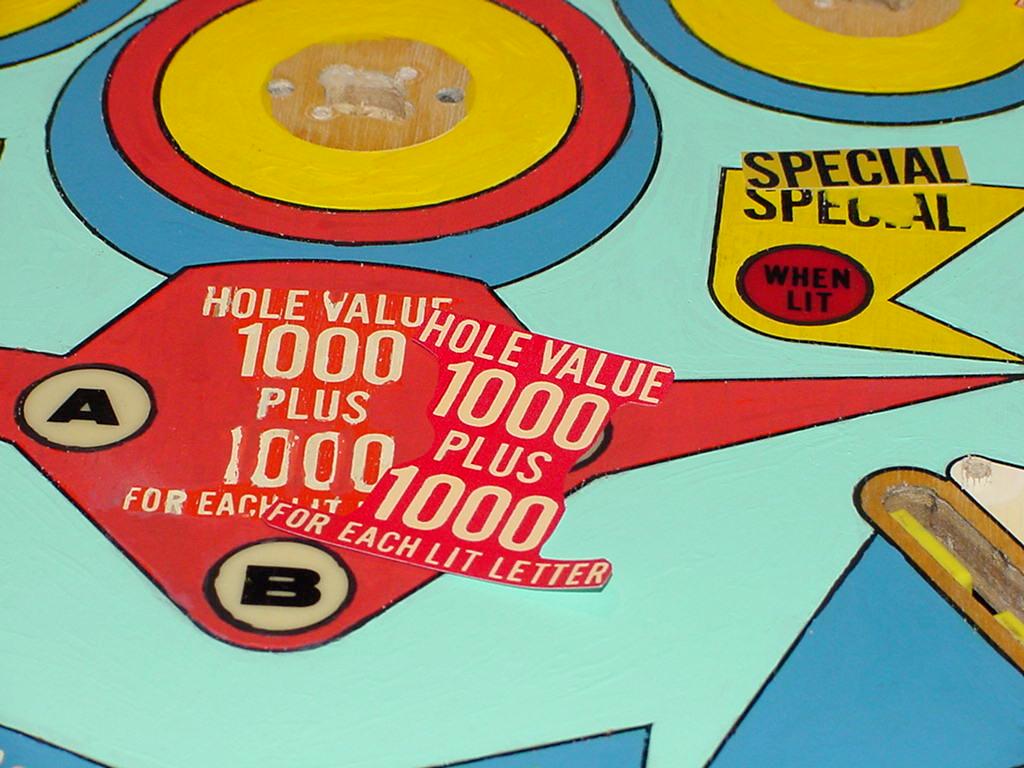
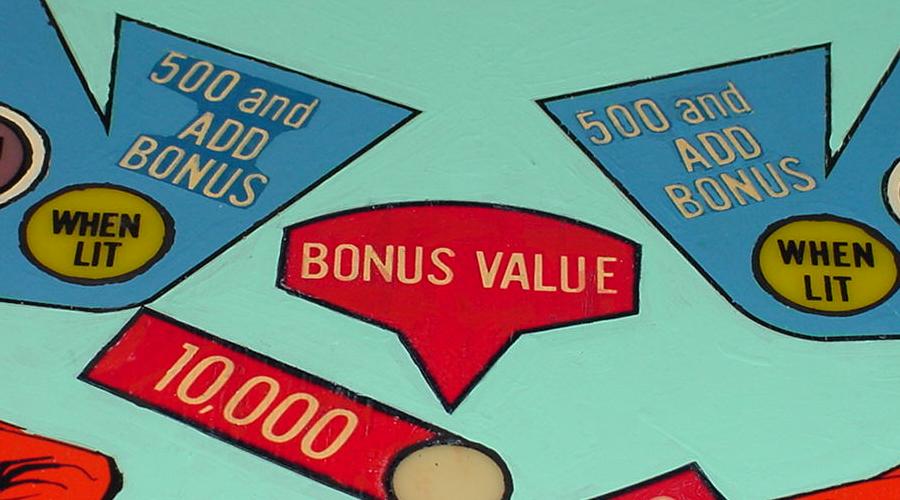
| This picture shows why I am doing applying decals... I was not that careful in the white text touchups. And where I was careful it still looked like crap! (Notice the "R" in "FOR EACH".) This had to fixed. |
|
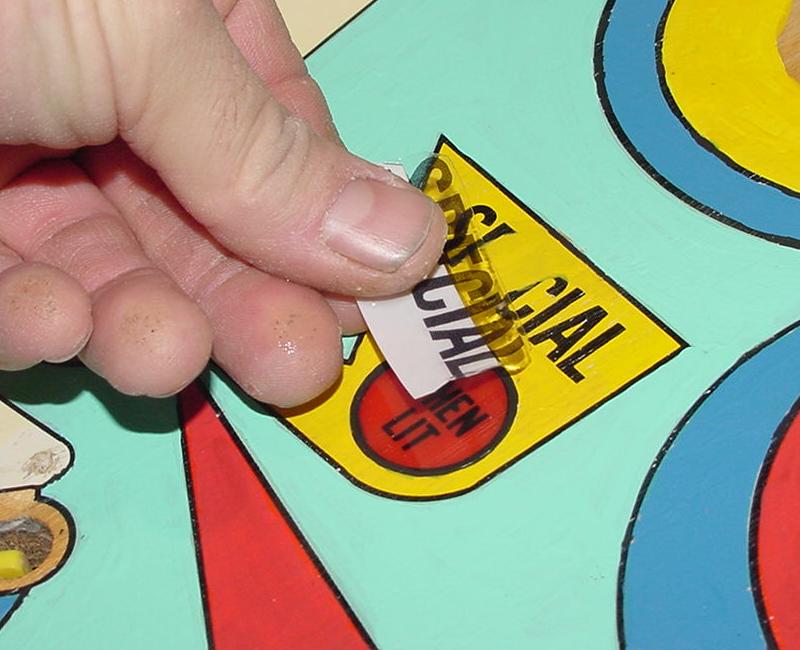
To apply the decals, get a bowl of warm water. Add a few drops of white
glue to the water (this helps the decals stick to the substrate). Put the
decal in the water (one at a time). The white paper decals took about 45 seconds
before they would separate from the paper. After this time, remove the decal
from the water and slide them onto the playfield. It is helpful to have
a little water on the area you are appling the decal. This allows decal
repositioning easier.
The reason the original text is important to have is that even the white decals have some translucency. And the original text is helpful when positioning the new decal. I used a toothpick to help position the decal. Once you have the decal where you want it, gently pat the decal with a paper towel to absorb any excess water. |
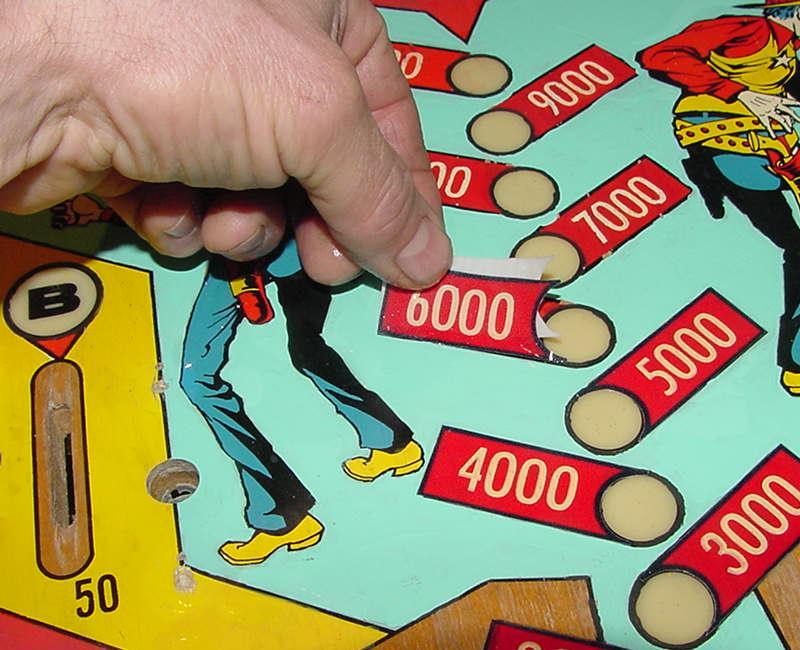

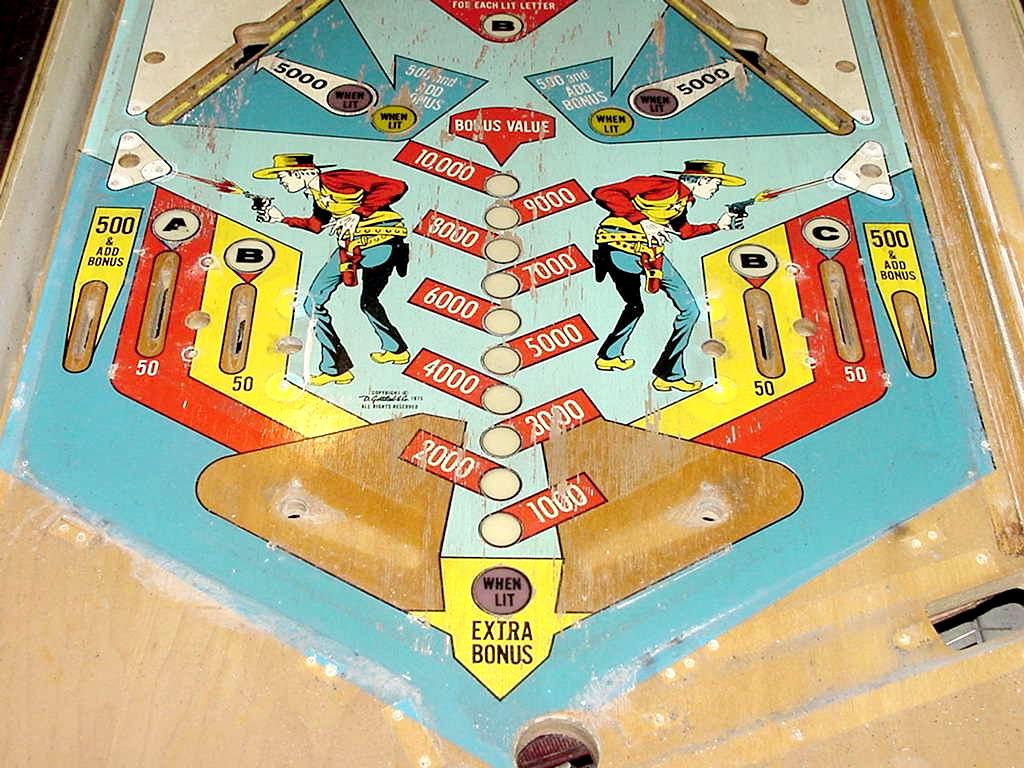
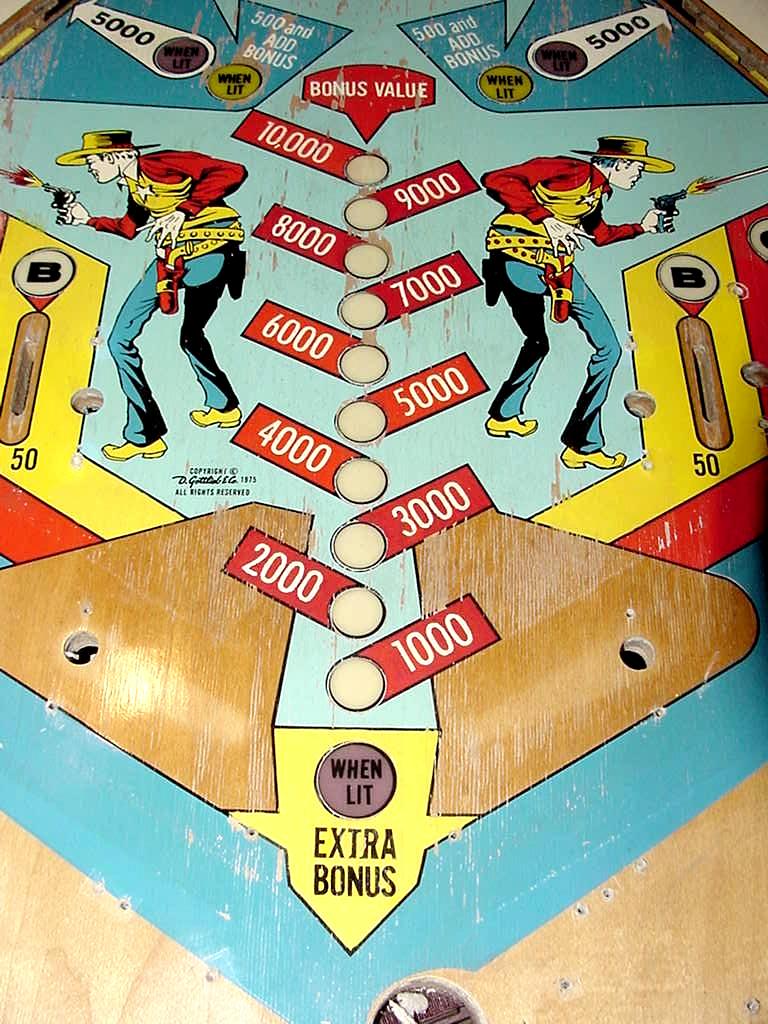
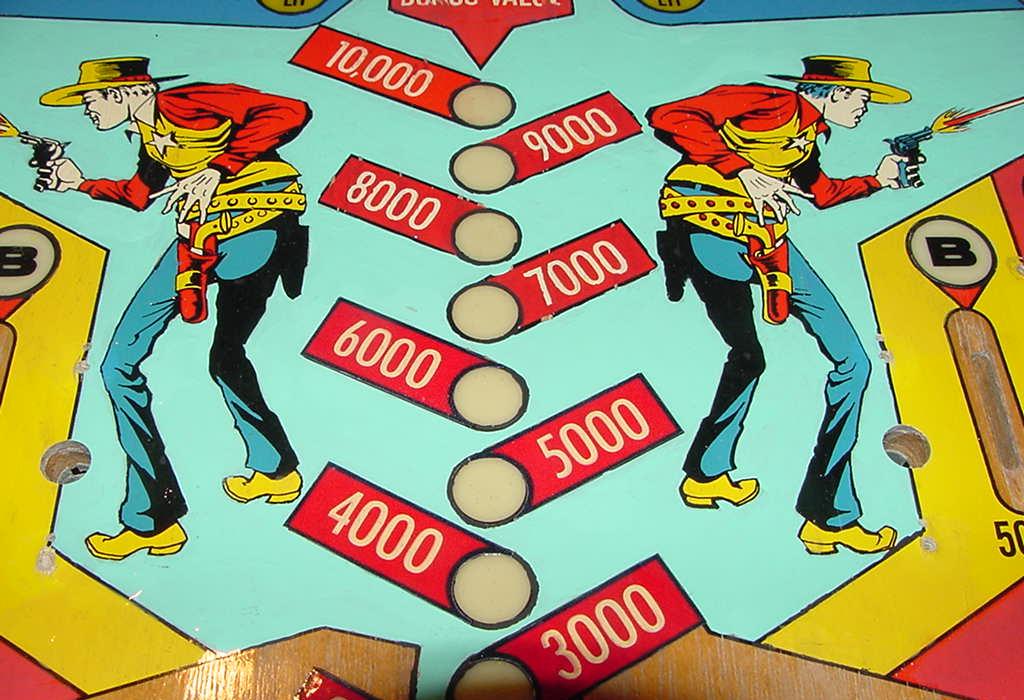
| Here 1000 to 6000 has been decaled, and 7000 to 10k have not. Notice how crisp the text is where the decals have been applied. |
| After doing the white waterslide decals, I did the clear decals. These only need about 10 seconds in the water to release them from the paper. The clear decals give better results, but again, you can't print white, so clear decals are not always going to work. |
|
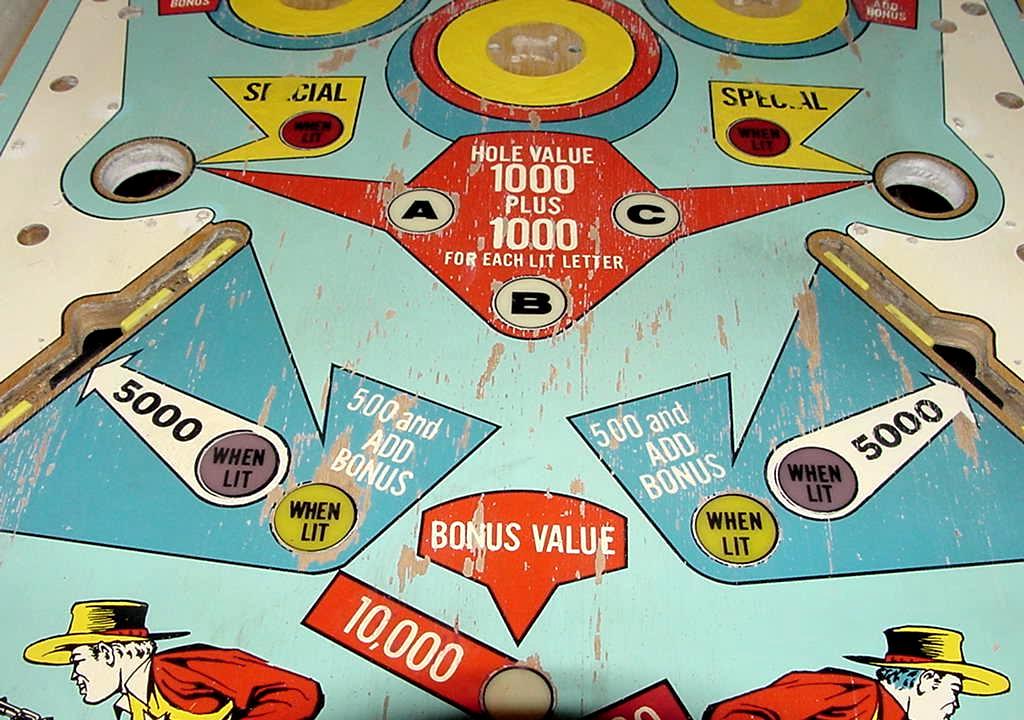
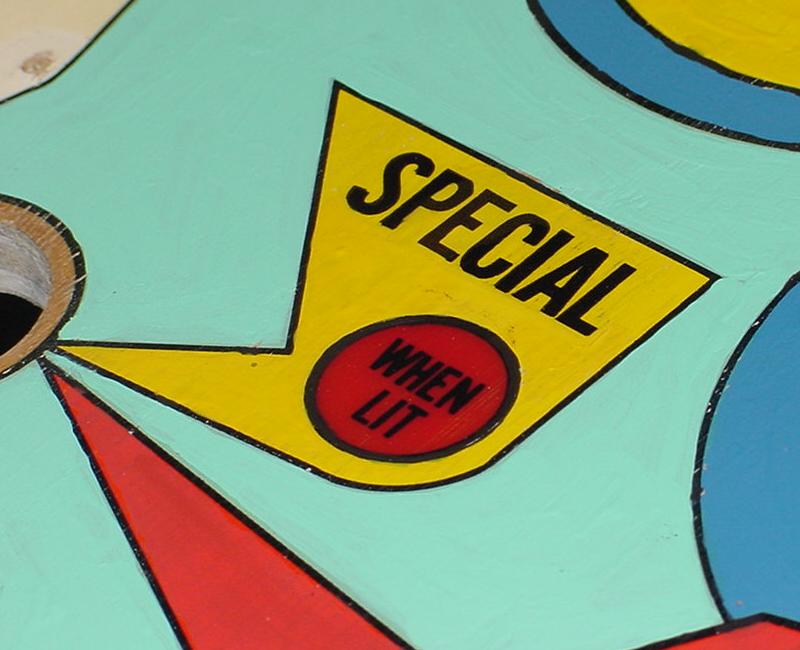
Decal Clean-up/Touch-up. One of the draw backs to the white decal paper is the background color. It surely will *not* match whatever color you have put down as the background playfield color! This is unfortunate, but there really is no way around it. Again if we could use clear decal paper and print white, this problem would be solved. But that's not an option. So what do you do? What I did was take a small brush and painted the background color on top of the applied decal. This hides the decal's background color. I didn't spend a lot of time doing this, because frankly, you have to be right on top of the decal to really see this. But it does make the decal blend into the playfield. Here a picture of the right side that has been touched up over the decal, and the left side that is "virgin" applied decal. Notice I did not have to do this on the red "Bonus Value" or "10,000" decals, because in this case, since there was no lamp insert to deal with, I made the decals the entire size of the red graphic. This was not possible in the dark blue area because of the "When Lit" insert, and the shear size of the blue area. (The bigger the decal, the more difficult it is to apply. If the decal gets too big, it is easy to stretch or crease the decal, removing color from the stretch or crease.) |
|
If the decal does get damaged, that is easy to fix too. Again a little
touchup paint right over the decal can fix nearly any problem. If you have
an alignment issue, a little touchup paint can fix that too. I did some
adjustments to the decals with touchup paint to make the colors more
consistent. And also along the edges of some decals to hide them better.
The only thing left to do is to use an Exacto knife to remove any extra black on the lamp inserts to to smooth out circles. |
|
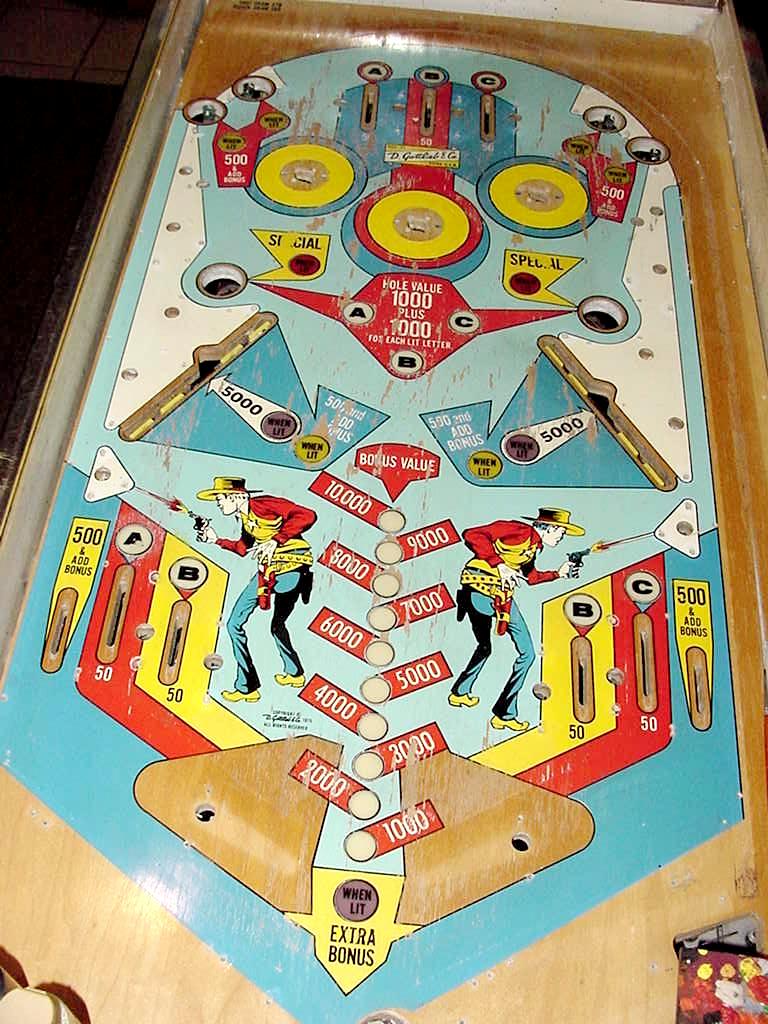
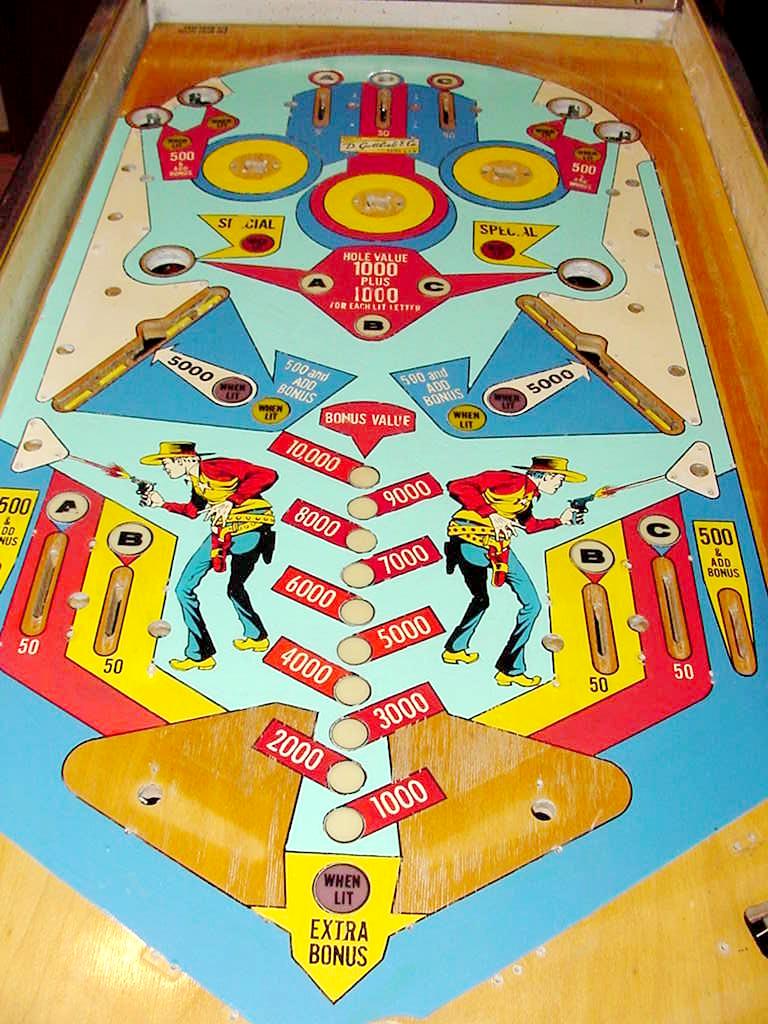
Ready for Clearcoat. Now the playfield is ready for clearcoat. I use two-part automotive urethane clear for best results. This stuff dries fast (8 hours), and is extremely durable (much more durable than the original acrylic lacquer clearcoat). Below are pictures of the Gottlieb Fastdraw playfield *before* clearcoat. It's ready to go into the garage for the painting. |

|
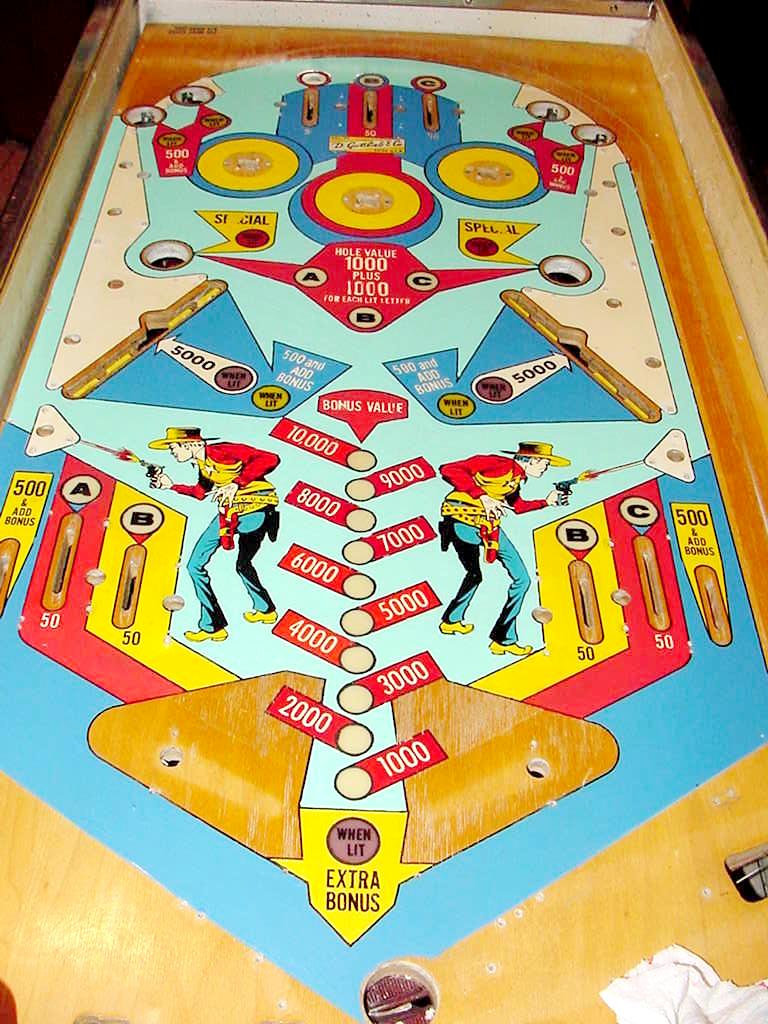
After Clearcoating. I sprayed about four or five coats of automotive urethane, and let the playfiel dry overnight. Then I used a Dual Action sander with 600 grit (dry) to sand the playfield level. I didn't go nuts with this, as I'm not trying to make a piece of glass. I just want to do some general leveling of the playfield. Then I hand sand with 1200 and then 2000 grit, followed by two different polishing compounds, and finally a swirl remover. Below is the Gottlieb Fast Draw playfield after the automotive urethane clear coat has been applied. |
|
Conclusion. Overall I was pretty happy with the outcome of the Gottlieb Fastdraw pinball playfield. Though not a perfect job, it was satisfying, and certainly a better looking playfield than when I started. Also far more durable (which is important because I plan on putting the game out on location for everyone to play!) One question I am often asked about this is, "how long did this procedure take?" In this case, I spent about 4 to hours scanning in the graphics and cleaning them up on the computer. Then a full day doing the raw acrylic touchups. Let the touchups dry overnight, and apply the waterslide decals. Followed by doing some more touchups to the decals, wait an couple hours, and clearcoat. In this case the whole thing was done over a friday-to-sunday (a weekend project). More information on clearcoating can be seen in the "This Old Pinball" videos TOP #1,3,4,7. This shows the whole procedure of touching up and clearcoating a pinball playfields. Also see Pinball Restoration Guide, part two and the Gottlieb Quickdraw playfield restoration and Gottlieb 2001 playfield restoration web pages for more info.
* Go to Pin Fix-It Index |