(Example used: 1973 Gottlieb Jumpin Jack) by cfh@provide.net, 03/05/09. Copyright 2009 all rights reserved. This document is part of the Pinball Restoration document. Update of this document are available at http://pinrepair.com. Gottlieb Drop Target replacement method here.
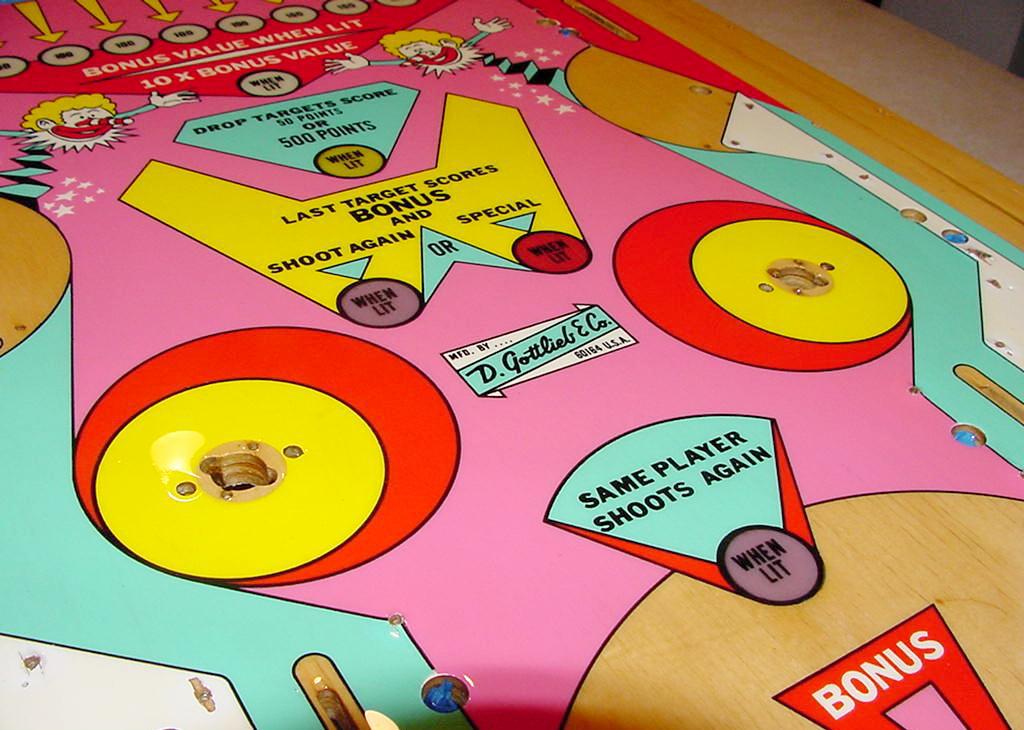
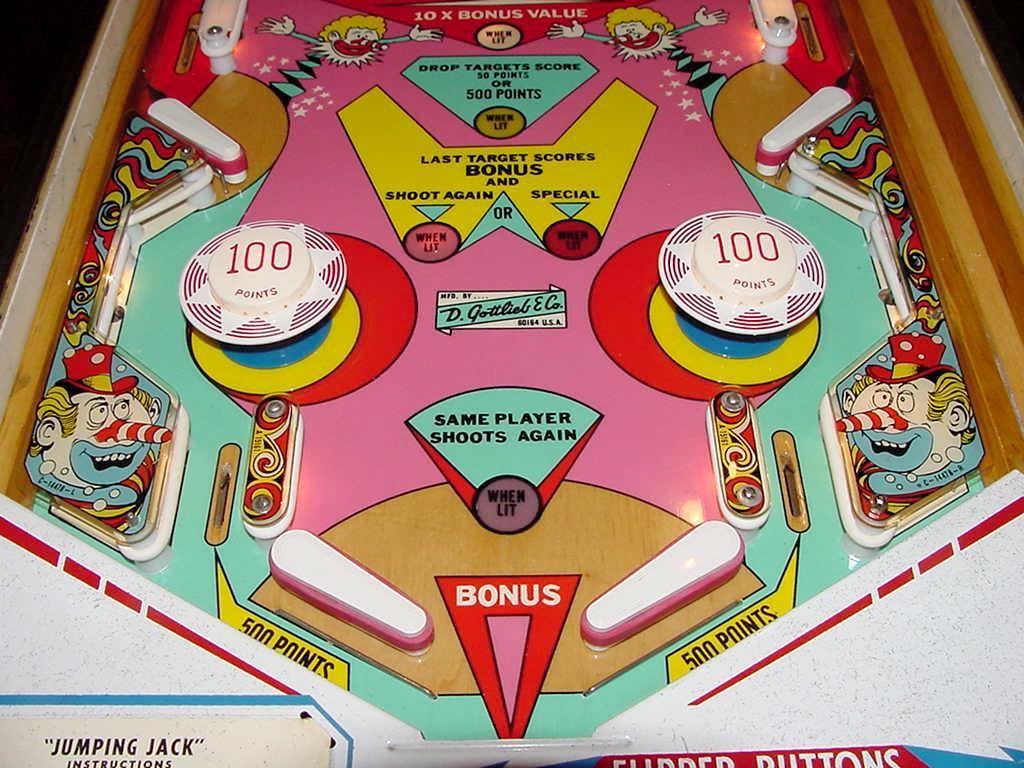
The reason this game is hard to find in decent condition is due to its popularity. It's a great playing game with a bank of 10 drop targets and the ability to earn an extra ball ("same player shoots again") and/or a free game ("special"). Not a lot of EM Gottlieb multiplayers from the 1970s have the extra ball feature. Also the backglass artwork is considered one of the best from the 1970s. So in the day this game got played a lot, making finding one today more difficult. I'm really not a big fan of multiplayer EM games, but the Gottlieb Jumping Jack (2 player) and Jack in the Box (4 player) are exceptions. There are a handful of 1970s Gottlieb multiplayer games that are good, and these fall into that category. I also have a single player Gottlieb King Pin, which is very similar is playfield layout to Jumpin Jack, but not exactly the same. I like King Pin better in many regards, but the backglass artwork on Jumpin Jack/Jack in the Box is hard to resist.
Scope.
|
|
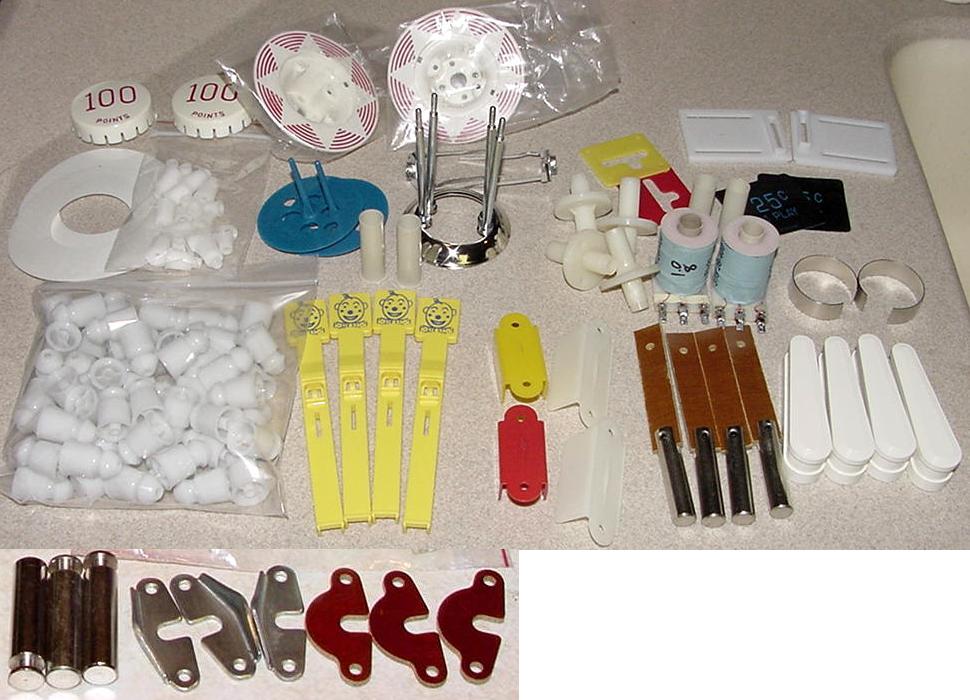
Preliminary. First thing I did was remove all the top parts from the playfield. Then I flipped it over and worked on some of the mechanical assemblies on the bottom. Of course before I did all that, I placed an order with Pinball Resource for the parts I thought I would need:
Unfortunately all this stuff will cost in excess of $100. But if you want your game to look nice and play 'as new', it's stuff you probably need. |
|
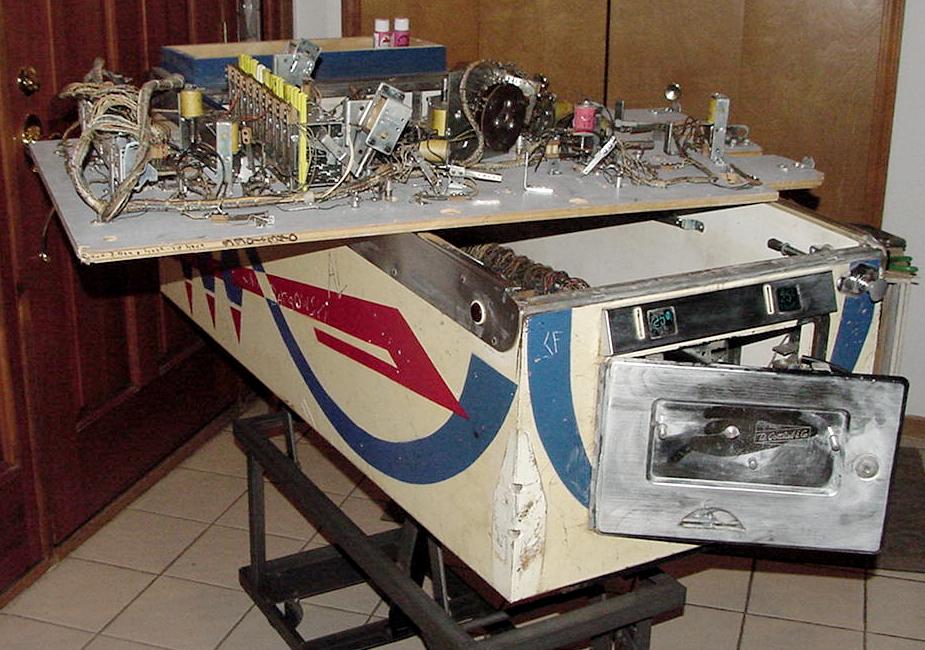
Here's the playfield unplugged from the cabinet and flipped upside down. It easier to work on some things this way. I have also removed all the parts from the top of the playfield, getting ready for touchup and clearcoat. |
|
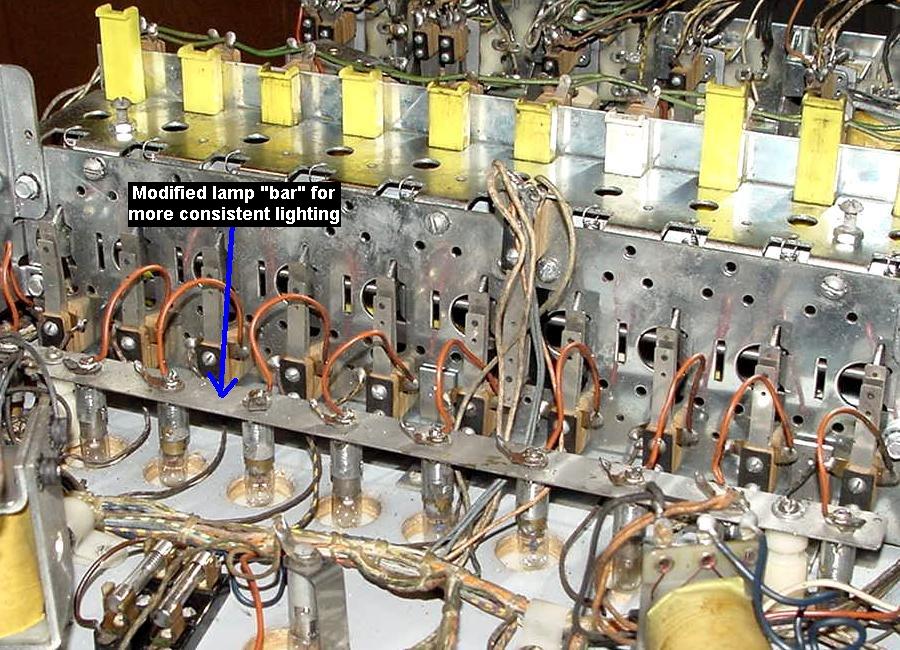
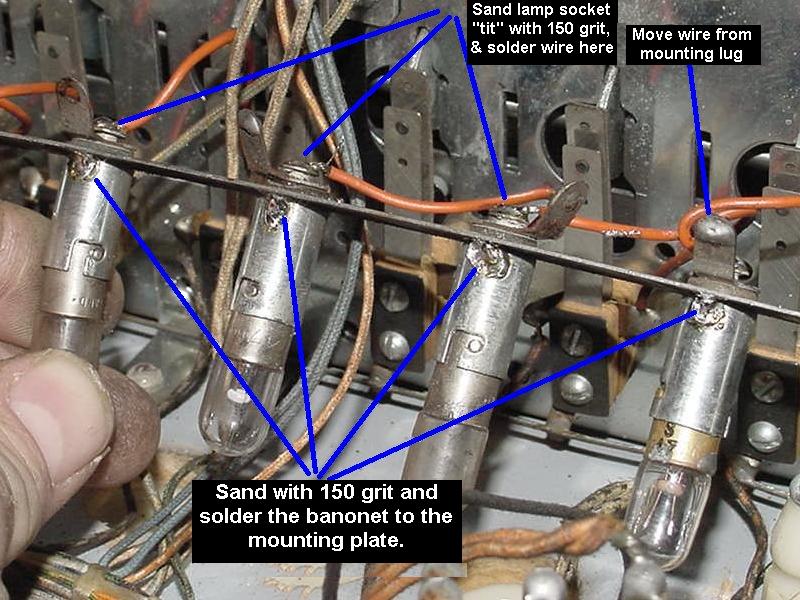
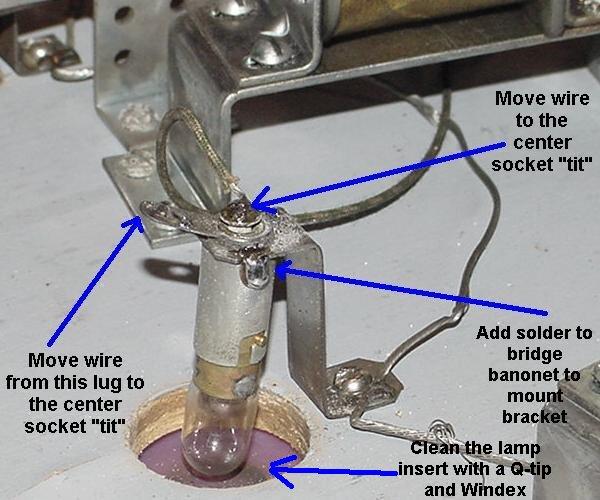
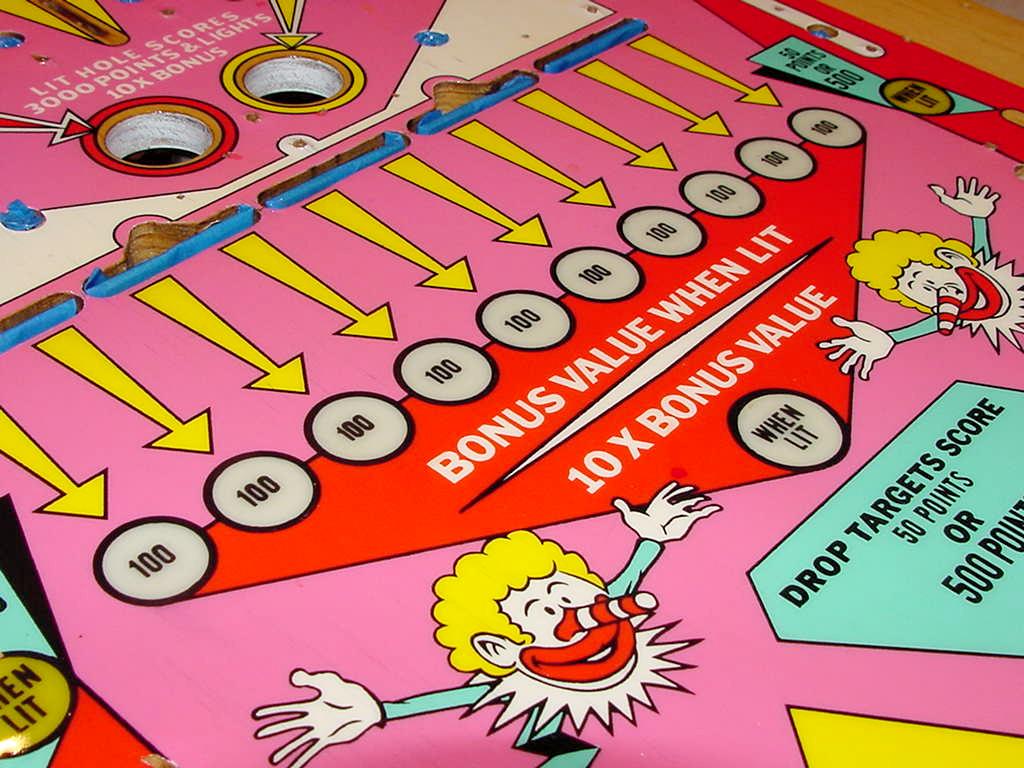
First thing I do is to address all the logic-controlled lamp sockets. The one thing I really hate about older games are flickering or non-working logic lamps. I'm not talking about GI (General Illumination), but the lamps that light to show features and objectives. If these don't work, the game is just less fun and the player does not know what to shoot for (or what has been accomplished). The problem with these lamps can be largely related to the lamp sockets themselves. These are pressed together with a fiber insulator in the middle. With time this fiber shrinks, and the whole socket assembly loosens. Add humidity and electricity, and the metal corrodes, making the socket intermittent. To fix this problem you can of course replace the socket. But this is time consuming and expensive. Instead I sand the sides and "tit" of the sockets with 150 grit sandpaper, and do a little soldering. This makes a hard contact between the power lines and the bulb. Below is a picture of a typical lamp bar that has been modified using this approach. |
| Here's a stand-alone socket that has had the similar modification for more lighting dependability. While you're doing this stuff, it's not a bad idea to use a Q-tip and some Windex to clean the underside of the lamp inserts. |
|
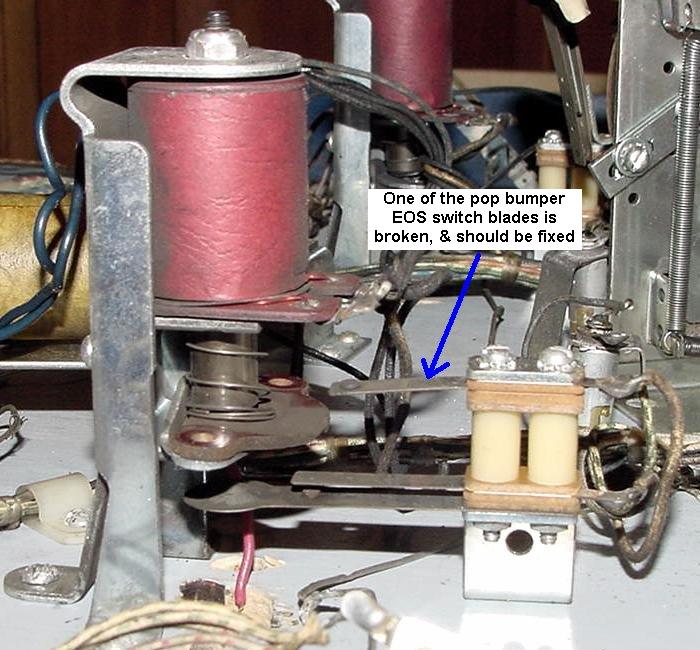
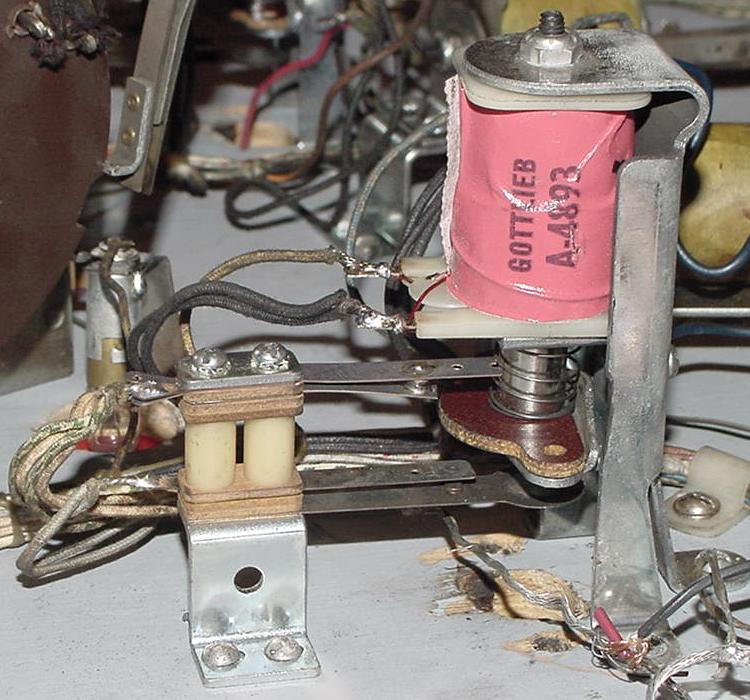
Next up is the check the pop bumpers' EOS switch. These switches are important because the controlling pop bumper relay stays "on" until the pop bumper fully engages. Then the EOS switch on the pop bumper opens, and releases the pop bumper relay. If the pop bumper EOS switches are broken ("open") as shown below, the pop bumpers will still work. Just they won't be as powerful as they could be. So the EOS switches are important to make the pop bumpers powerful. Otherwise the pop bumper only stays energized for the length of time the ball is touching the playfield pop bumper skirt. So instead of the pop bumper "popping" the full stroke of the coil, the game may only give half-stroke. Because of this the pop bumper EOS switches are important for good game play. |
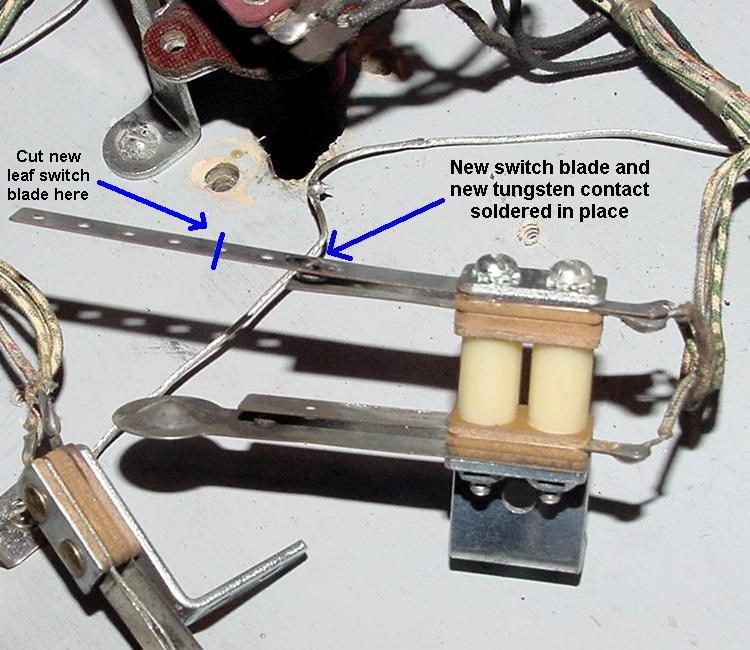
| The best way to fix this is to buy generic "medium" switch blades from Pinball Resource. Mount the new blade, then solder in a new Tungston contact where needed. Cut the new switch blade to the proper length. I also like to clean and polish the switch "cup" where the pop bumper skirt's stem contacts the switch cup. This gives better pop bumper response and makes the whole system work better. I use 600 grit sandpaper for this task. |
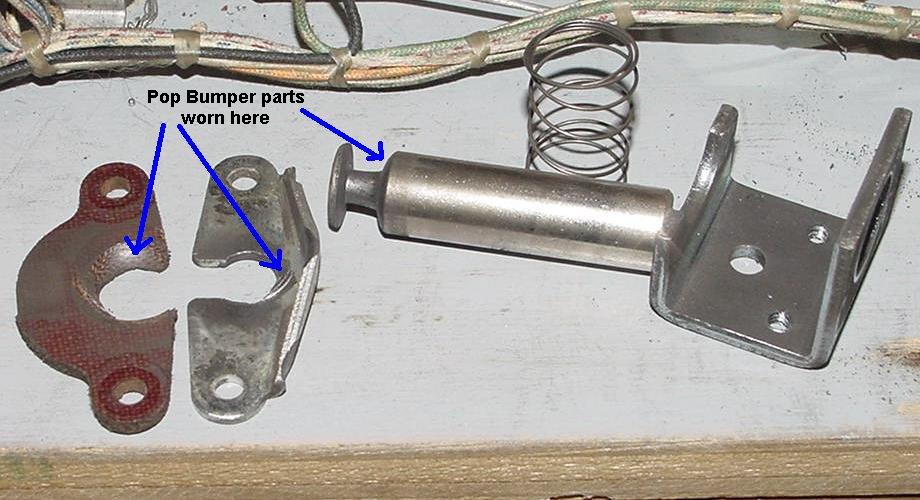
| Another thing to check while working on the pop bumper are the pop bumper's plunger and "yokes" (the fiber plate and metal plate that attach the "rod and ring" assembly to the coil). In the picture below the wear to the fiber and metal yoke can clearly be seen. Also the plunger itself is worn where it mates to the yoke. All these parts need to be replaced for the best pop bumper action. While you're at it, put a new coil sleeve in the pop bumper coil. The cost for these parts is minimal, around $2 per pop bumper. |
| Here's the re-worked pop bumper with the new switch blades, plunger, yokes, and coil sleeve. |
|
The Playfield Touchup and Clearcoating. Here's the playfield as I received it, minus the playfield parts. I removed all the plastics, posts, metal guides, flippers, pop bumpers, side rails, and other parts. The playfield needs to be completely free of all this, as it will only get in the way during the touchup and clearcoat process. The idea is to clean what's left of the playfield, and evaluate what needs to be done. |

| I used Melamine Foam (Magic Eraser) and 92% rubbing alcohol to clean the playfield. This will also remove a lot of the contaminants from prior playfield waxing and cleaning. It also will get out the deep dirt. Just note though that it's very easy to remove what little playfield paint is left with the Melamine foam. (Go easy and slow.) After this is done I wipe the playfield down with Naptha to remove the white haze. Then I polish it with Novus2. Below is what the playfield looks like if I decided to skip the touchup process. |

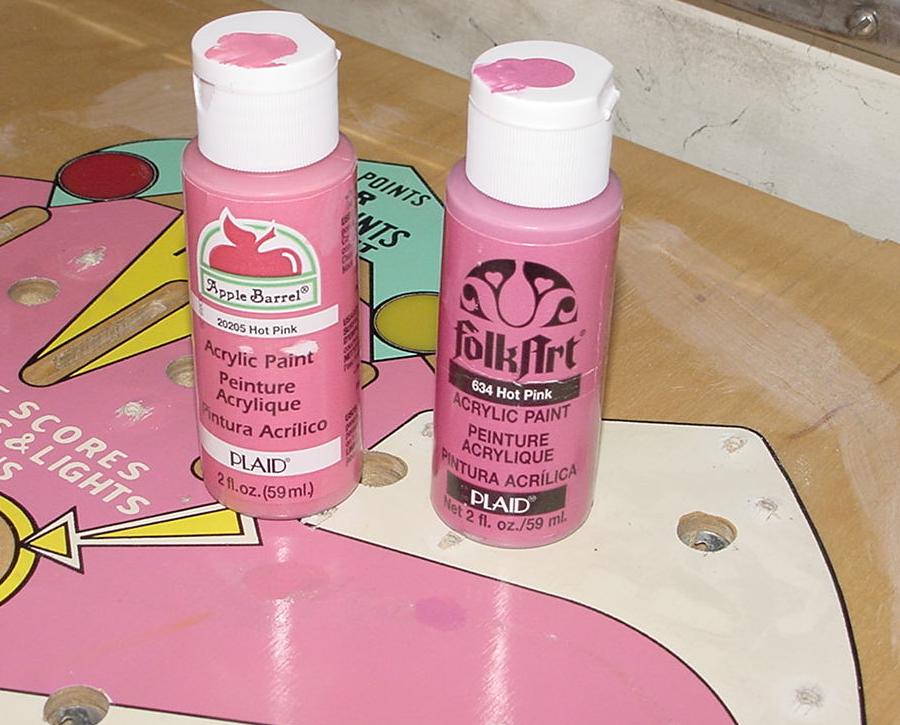
| Here's the touchup paints I will be using for the pinks. They are acrylic water-based at paints, available at Meijer or Frank's or Micheal's. My buddy Cliffy's choice for color match of the pink did not turn out to be the best on my game. Maybe his pinks were different on his Jumpin Jack, I'm not sure. Here's a sample. Cliffy's color is on the right. The one I'm using is on the left. Though I'm not a huge fan of either Folkart or Apple Barrel acrylics (they seem to have less color pigment than say Americana brand acyrlics), the Apple Barrel Hot Pink #20205 does seem to match well. So that's what I will be using in the pink areas. |
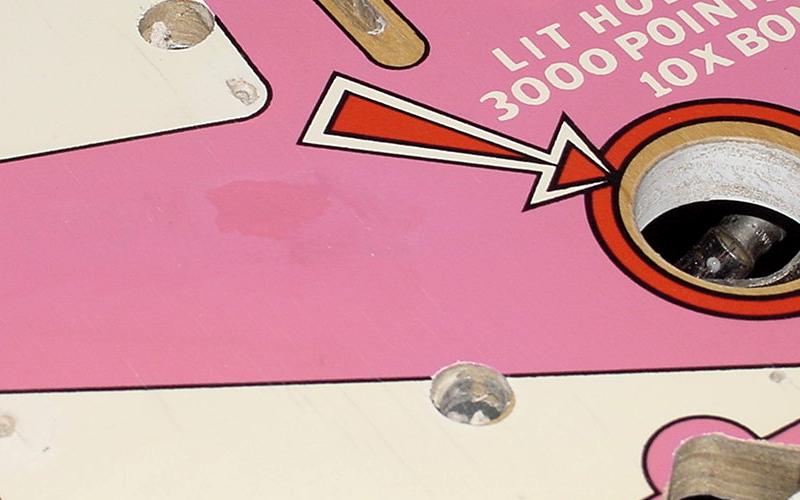
| Here's the first kickout area that needs touched up. I used Melamine foam and 92% alcohol followed by Novus2 to clean the area first. Now I can evaluate what needs to be touched up. |
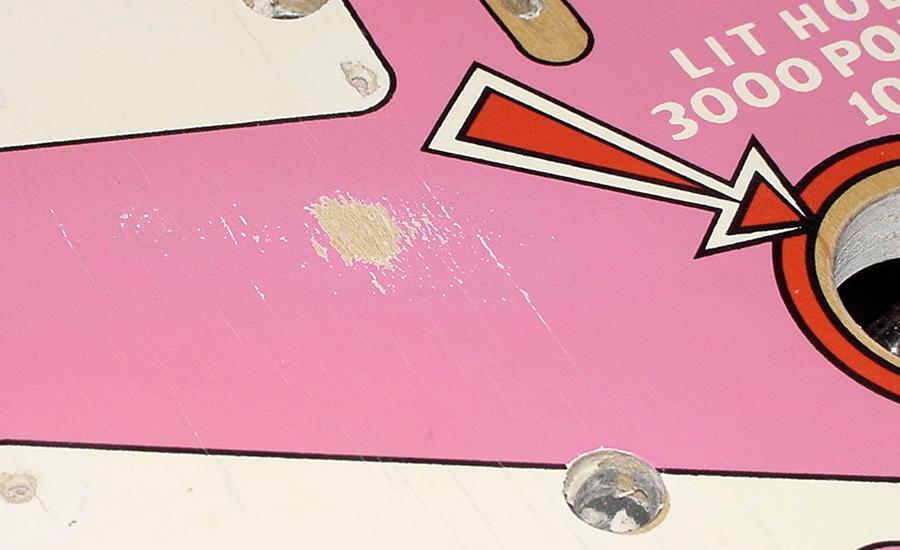
| The first thing I do is to paint the area (rather sloppy), and wipe off all the acrylic paint with a paper towel. This will leave the paint in the recessed areas. This will minimize the area that needs to be touched up. |
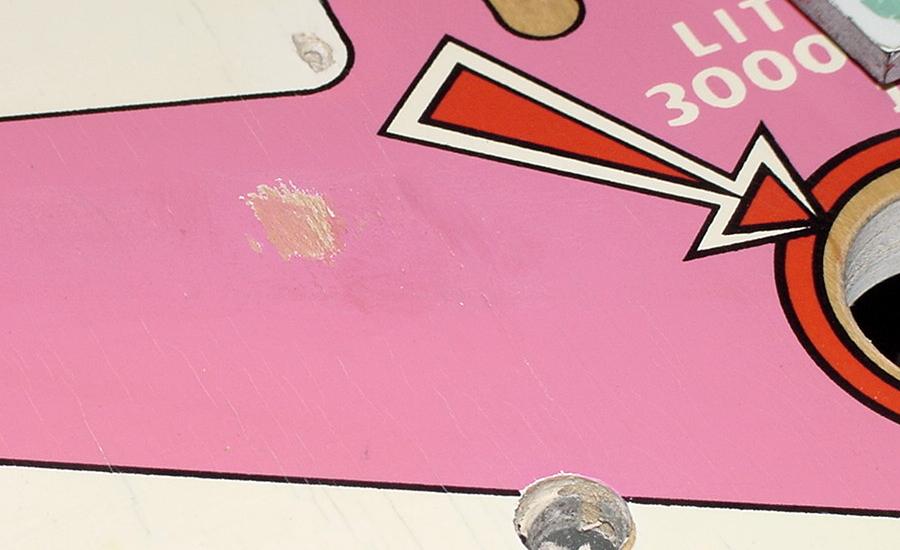
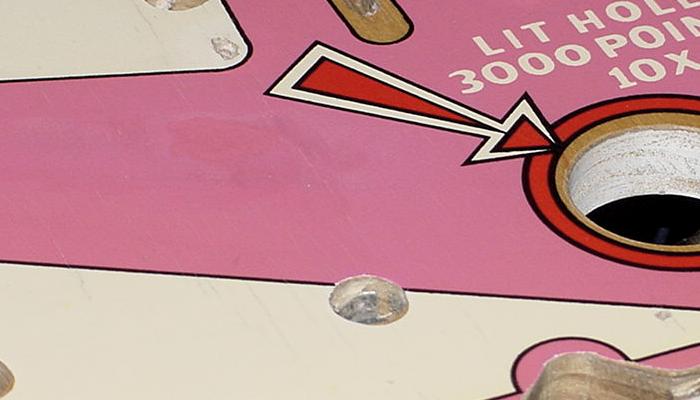
| Here I have the bulk area painted. The color match looks better in "real life", but the digital picture shows it's really not a perfect match. This is probably about as close as I can get though. |
| After the paint is fully dried, I dabbed some water over the touched up area. This will give a good idea of what the area will look like after it is clearcoated. The color does change a bit doing this. Digital pictures (which highlight color mis-match) and using this water technique really help in matching colors well. Another trick is to use a damp rag and to "feather in" the touchup area a bit. This too works well to blend the touchup area into the original finish. |
|
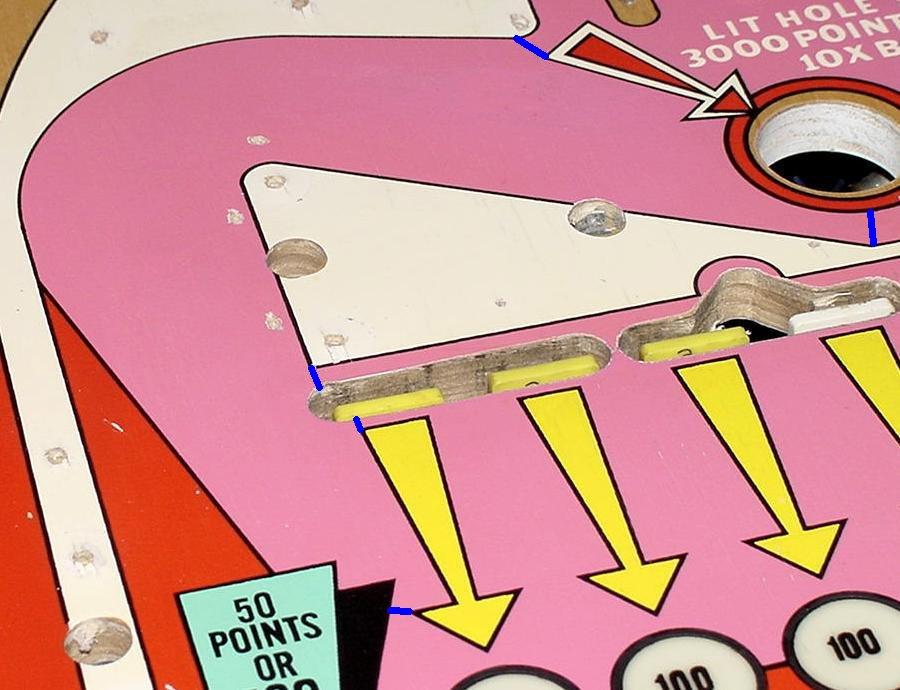
Another idea is to repaint the entire area. This makes the touchup
color far less of an issue, as the color match does not need to be
perfect. In this case I don't like the idea so much, because the area
to touchup is so small. But it is an option. To do this, I would repaint
the area shown below between the blue lines. Again I'm not taking this
approach here, but it is something to think about.
To be honest, nothing is going to match this pink paint perfectly. Believe, I tried a lot of colors. Probably bought 15 different shades of pink, and mixed them too. No matter what you do, nothing is "right". So if you want a perfect "match", you will have to repaint the entire area. Again I'm not going to do that. But really it's the professional way to do this tricky color. |
|
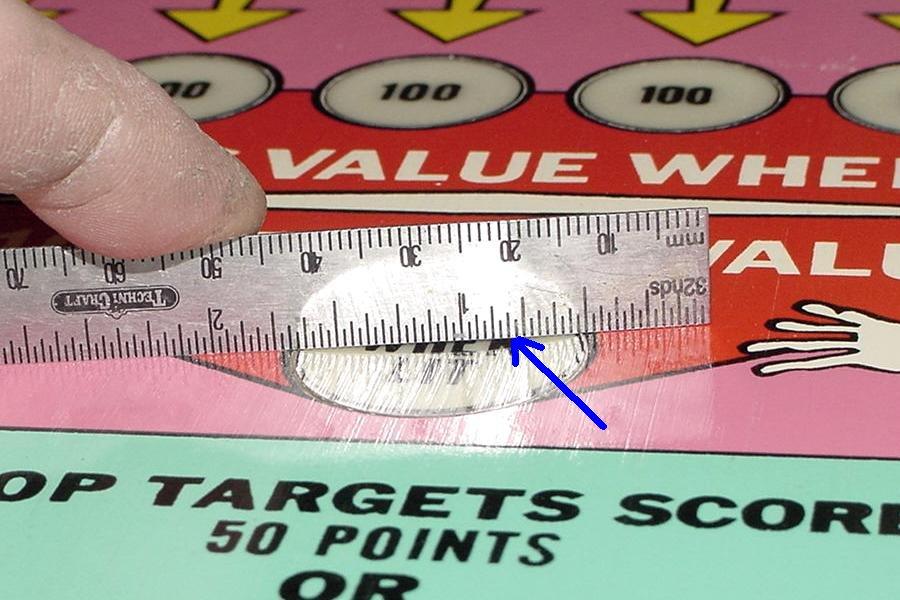
Cupped Inserts. Though this playfield is in very nice original condition, the main problem are the cupped inserts. This affects the play of the game, so it's best to have flat inserts. I've fixed this on other games by removing the insert and either filling them or sanding them flat. But in this case, that's not really an option. These inserts are not loose, which would make removing them difficult. And the chance of damage is too great. So another technique is needed to fill the concave face of the inserts. To do this I will use some clearcoat as the filler. But before I can do that, I need to make sure all the touchups are done first. The picture below shows how much this insert is cupped. |
| Before I can start filling the cupped lamp inserts, I need to touchup the playfield. This includes the black keylines around the inserts. Really can't start the cup filling until this done. Below is a picture of the left most four inserts that are touched up with black acrylic craft paint. The two inserts on the right (blue arrows) shows the wear around that is being touched up. On this playfield that whole process took less than one hour. |

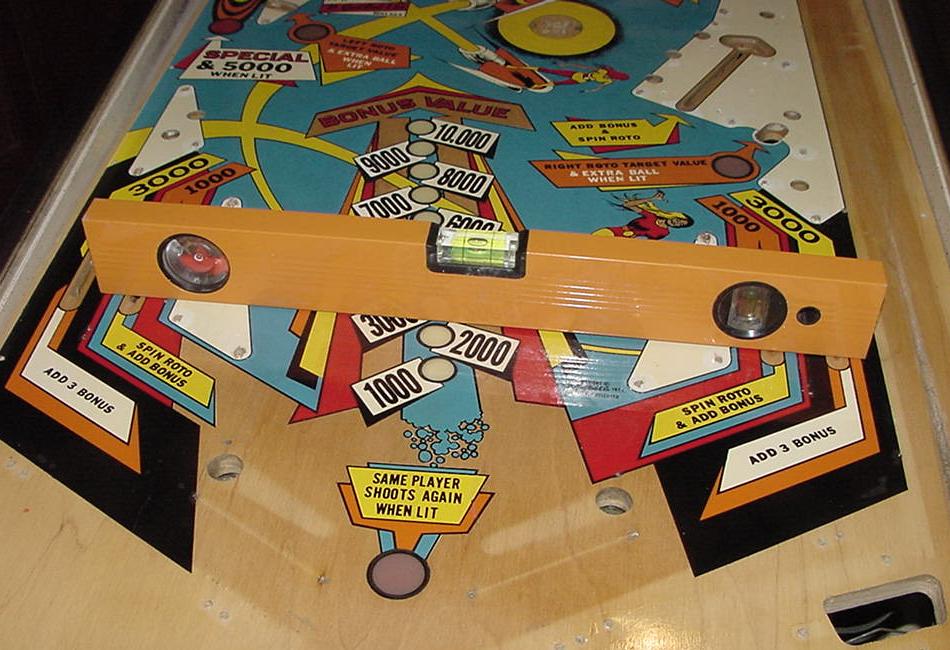
| After the keylines are painted, I can address the cupped lamp inserts. First, before doing any "fills" on the cupped inserts, the playfield must be level! Put a level on the playfield and make sure it's level left to right and front to back. This is important. Below is a picture of this with a different playfield: |
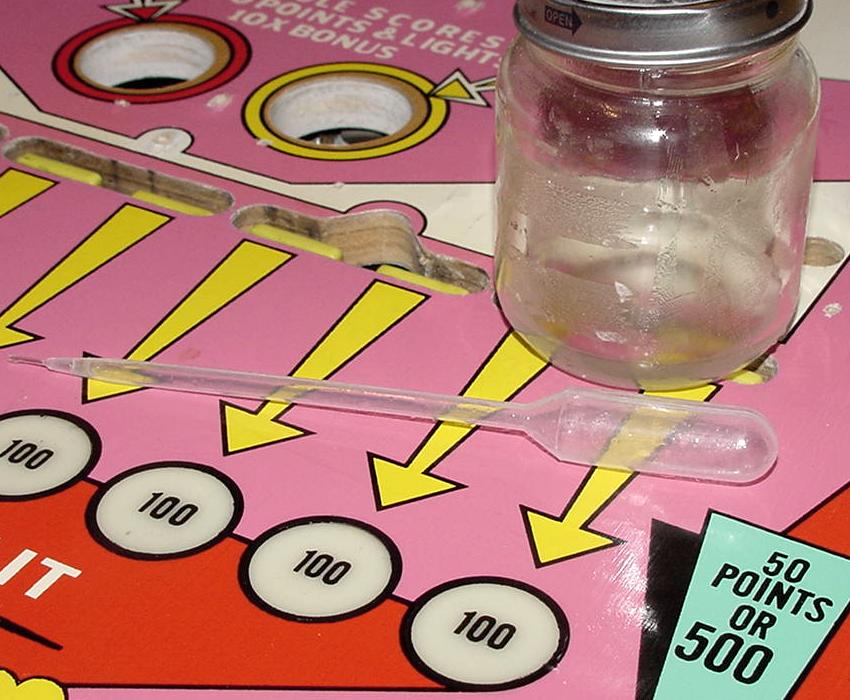
| Now I mixed up some Auto Urethane clearcoat. This is a two part catalyzed clearcoat, and is what I will use to clearcoat the whole playfield. The stuff has "high solids", which means it doesn't shrink a lot during/after drying (and it doesn't require thinning). After mixing some, I use a plastic pipette and apply the clear to the playfield inserts. This builds up the cupped portion of the playfield. Note the playfield needs to be level while doing this, so the urethane clear stays inside the cupped area of the playfield lamp insert. I fill the insert right to (and including) the black keyline around the insert, and then let it dry for about four hours. After this no sanding is required, it's all ready for clearcoat. |
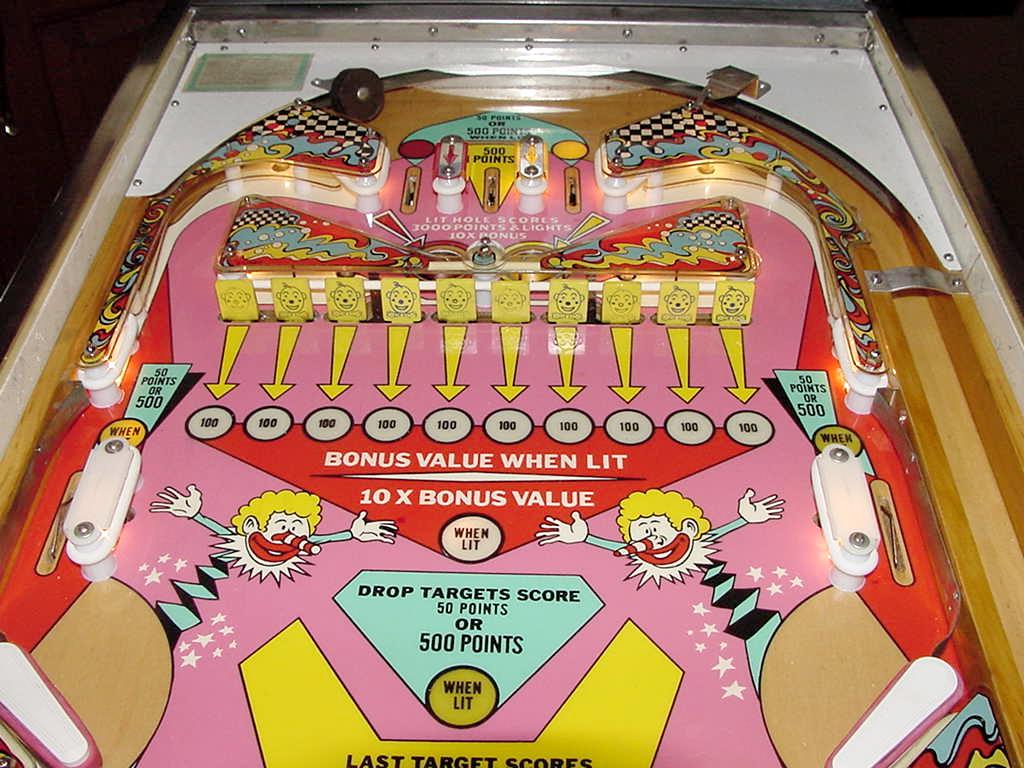
| Now the playfield is clearcoated with auto urethane clearcoat. It came out pretty well, but again this playfield did not need a lot of touchup. The major problems was the kickout wear and the lamp insert cupping (which from the pictures below you can see that they leveled out quite well). I will use a D/A (dual action) electric sander to smooth out the inserts (using dry 600 grit, 1200 grit, 2000 grit), and then machine polish. |
|
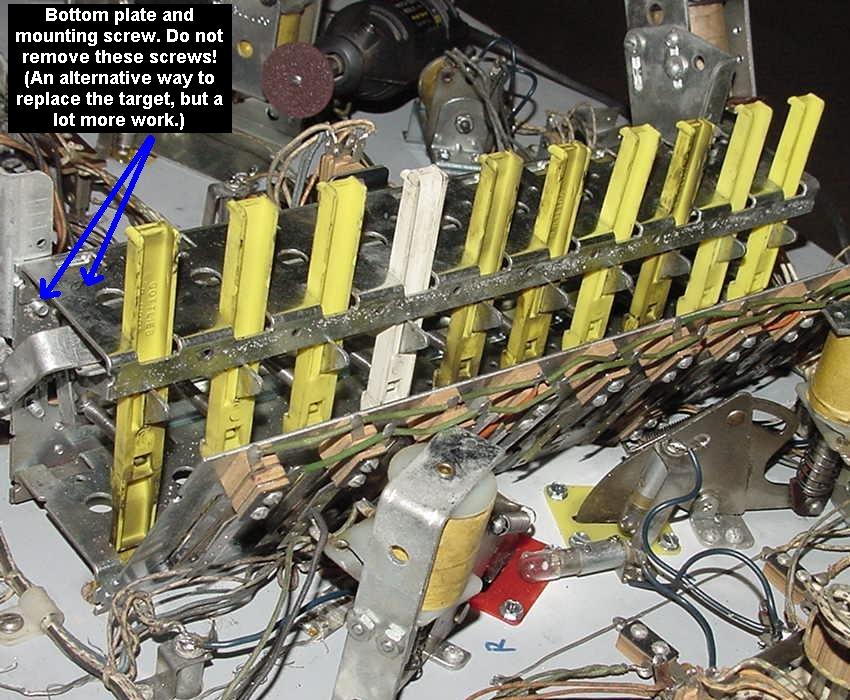
Drop Target Replacement (Playfield Reassembly). Now that the clearcoating is done, it's time to reassemble the playfield. One of the drop targets was replaced by someone else and is the wrong color (white instead of yellow). These targets are available brand new from Pinball Resource. But replacing a drop target on a Gottlieb EM is a major headache, especially on a 10-target bank. First, forget the other methods you've read on replacing Gottlieb drop targets, as they are WAY more difficult than this method. If you do the following, any future replacement takes about five minutes. The other methods I've seen are laborious at best. As we did in the disassembly process, disconnect the playfield connectors from the bottom board and the backbox connector. Then flip the playfield upside down and rest it perpendicular on the side rails of the game. This makes replacing a drop target a lot easier. Just make sure the pop bumper caps aren't touching the side rails. Typically the way this is done is to remove the back metal backing plate (six screws) on the drop target assembly, and them remove the broken target. The problem is getting the old target out (especially if it's a target in the middle of the bank - end targets are easier to replace in this regard.) To get a target out the 'skewer' has to be removed, or the bottom metal bracket loosened (hopefully not removed). The problem is, especially on a target in the middle of the bank, removing the skewer or the bottom bracket releases all the other targets (that is, the ones you don't want to remove). This makes a huge mess in re-assembly. Yes the skewer can be partially pulled out to minimize this problem, or the bottom plate loosened and angled up, but again if it's a middle target that is being replaced, this creates a lot of extra work. That's because all the other target parts and springs can come apart, making this a major headache. Also yes the bottom bracket can be loosened (not removed!) and angled out of the way, but again, the potential for problems is huge. First step is to remove the six screws that hold the backing plate to the drop target assembly. Below is a picture of the screws that need to be removed. |

| Below is a picture of the drop target assembly backing plate is unscrewed and moved away from the target assembly. |
| To help make target replacement easier, Gottlieb changed their assembly slightly around 1980. So what I decided to try, was to make this modification on this earlier EM drop target assembly. This involves using a Dremel tool with a cutoff wheel. Below is a picture showing where I will cut with the Dremel tool, and what metal will be discarded. |
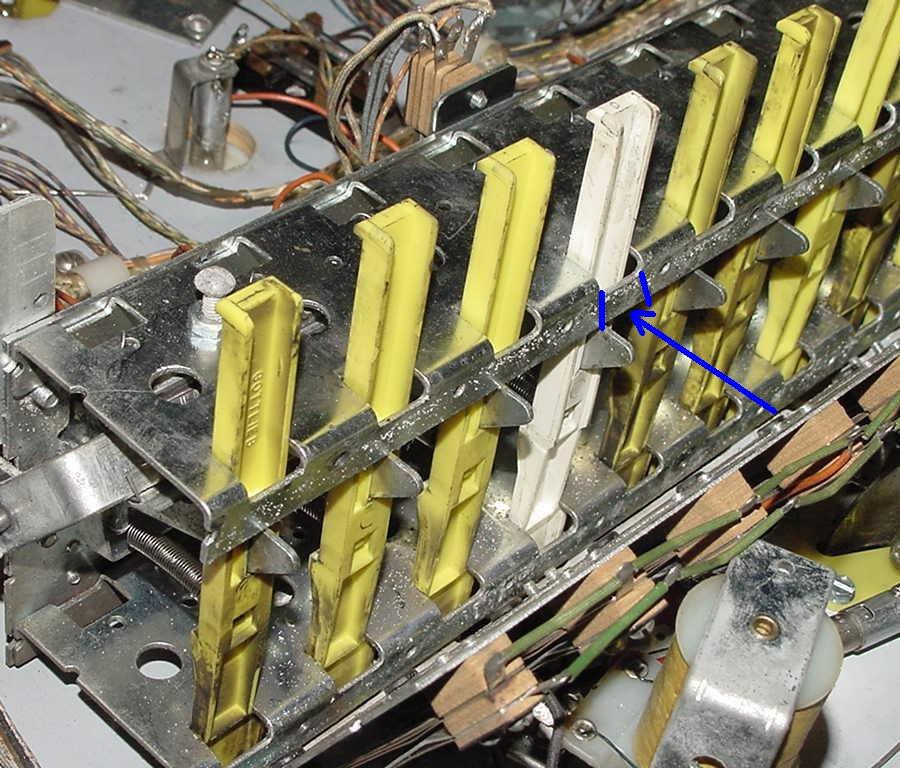
| Here's a picture with the metal cut out using the Dremel tool. Again this will make the target a lot easier to replace. The process of cutting out this piece of metal using a Dremel and a cutoff wheel took about 20 seconds. |
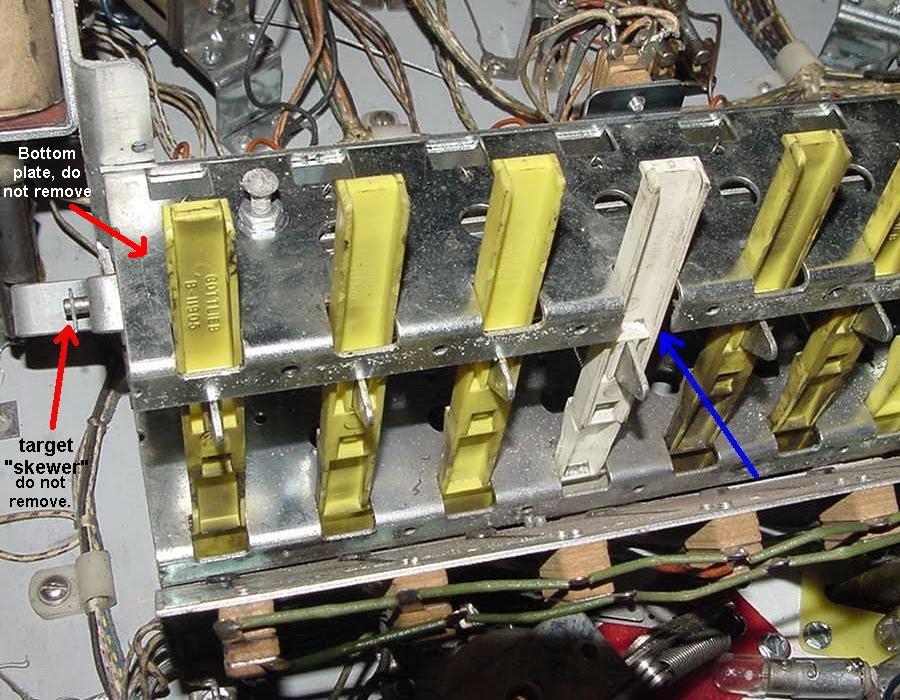
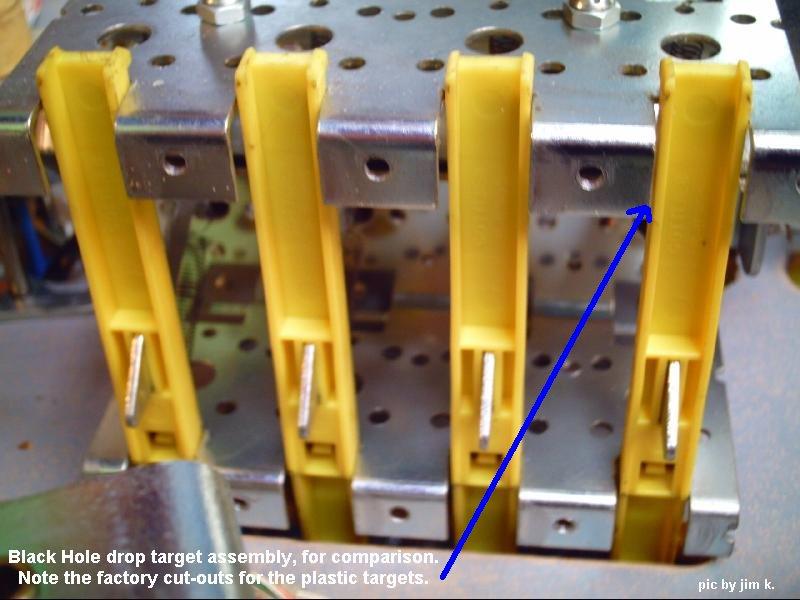
| For comparison, here's a picture of a Black Hole drop target assembly. See where it was cut by the factory to ease in target replacement. Note Gottlieb even cut the metal closest to the playfield. But frankly this is just not needed, so don't bother. This is essentially what we have done on the EM Jumpin Jack target assembly. |
| Now the target can be easily pulled back, and the attachment spring released. Then the target can be removed from the top side of the playfield. A new target is then slid into place, and the spring reattached. Using a hemostat to hold the spring works best to do this. But replacing a target in this manner is WAY easier than removing the target 'skewer' or loosening the bottom bracket. |
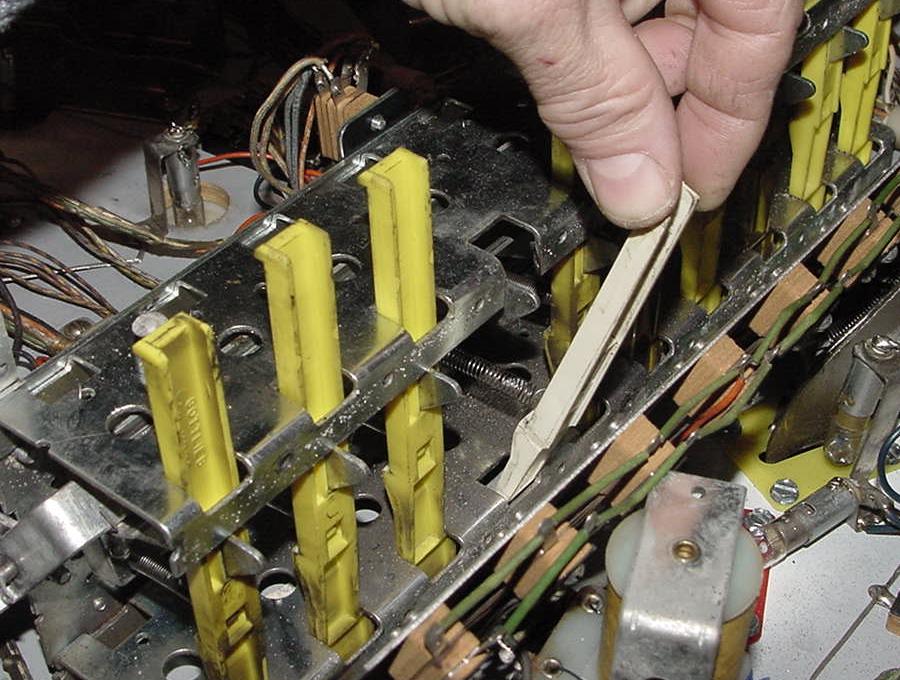
| Here's the new target installed, and an arrow showing where the metal was removed to make this easier. How does it work? Seems to be fine! But I will place the game a lot and report back with the results. |

|
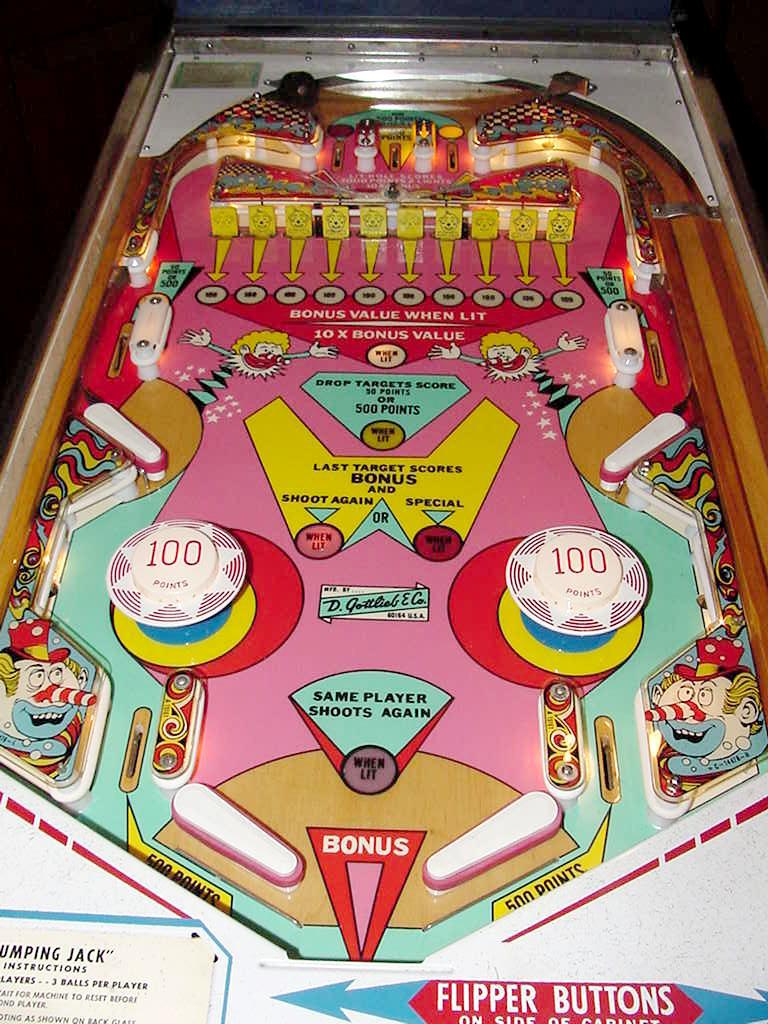
Conclusion. Overall I was pretty happy with the outcome of the Gottlieb Jumping Jack pinball playfield. Though not hugely labor intensive (just a couple hours overall in the touchup and insert cupping leveling), the playfield looks just great. It sure is nice to start with a playfield that isn't worn to hell for a chance! One question I am often asked about this is, "how long did this procedure take?" In this case, I spent about 2 hours total in the touchup and clearcoating. The time to remove all the parts and reassemble seemed to consume the most energy and time! I spent way more time with the playfield re-assembly than I did with the touchup and clearcoat. |
|
More information on clearcoating can be seen in the "This Old Pinball" videos TOP #1,3,4,7. This shows the whole procedure of touching up and clearcoating a pinball playfields. Also see Pinball Restoration Guide, part two and the Gottlieb Quickdraw playfield restoration and Gottlieb 2001 playfield restoration web pages for more info.
* Go to Pin Fix-It Index |